New User Automation
Environments
Selected:
Selected:
Selected:
Selected:
Process Steps
Retrieve required information
Pia will connect to azure and retrieve some details to assist during the user creation process, such as:
- A list of all groups
- A list of common values such as job titles, office locations, departments etc.
- A list of users
Pia will also check the availability of Microsoft 365 licenses configured for this client. If a license is not available, the package will be stopped until a license is manually provisioned.
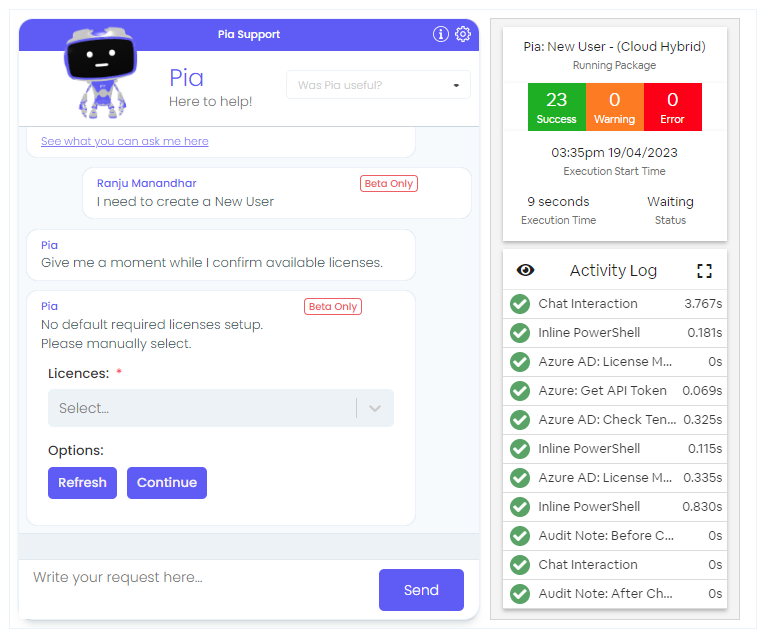
Select Licenses
Pia will then present a drop-down form with a list of available licenses. You can select the license(s) that need to be assigned to the user.
📸 View Example Form
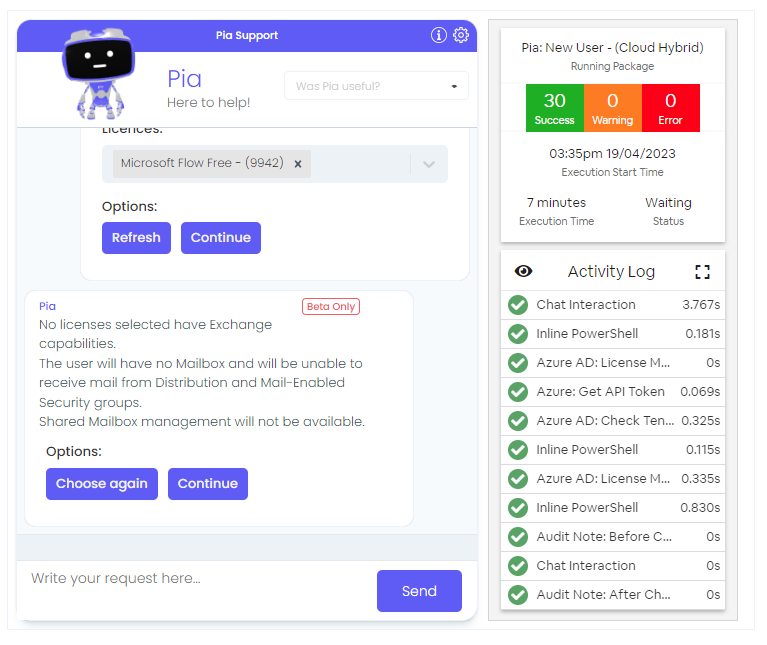
Pia will check if a license with Exchange capability has been selected. If not, Pia will prompt the chat user that the account being created will not have a mailbox and cannot be granted any mailbox related permissions such as calendars or shared mailbox. You can either choose to continue or retry selecting a license with Exchange capability.
📸 View Example Form
Pia will get the company record from the ticketing system for this client.
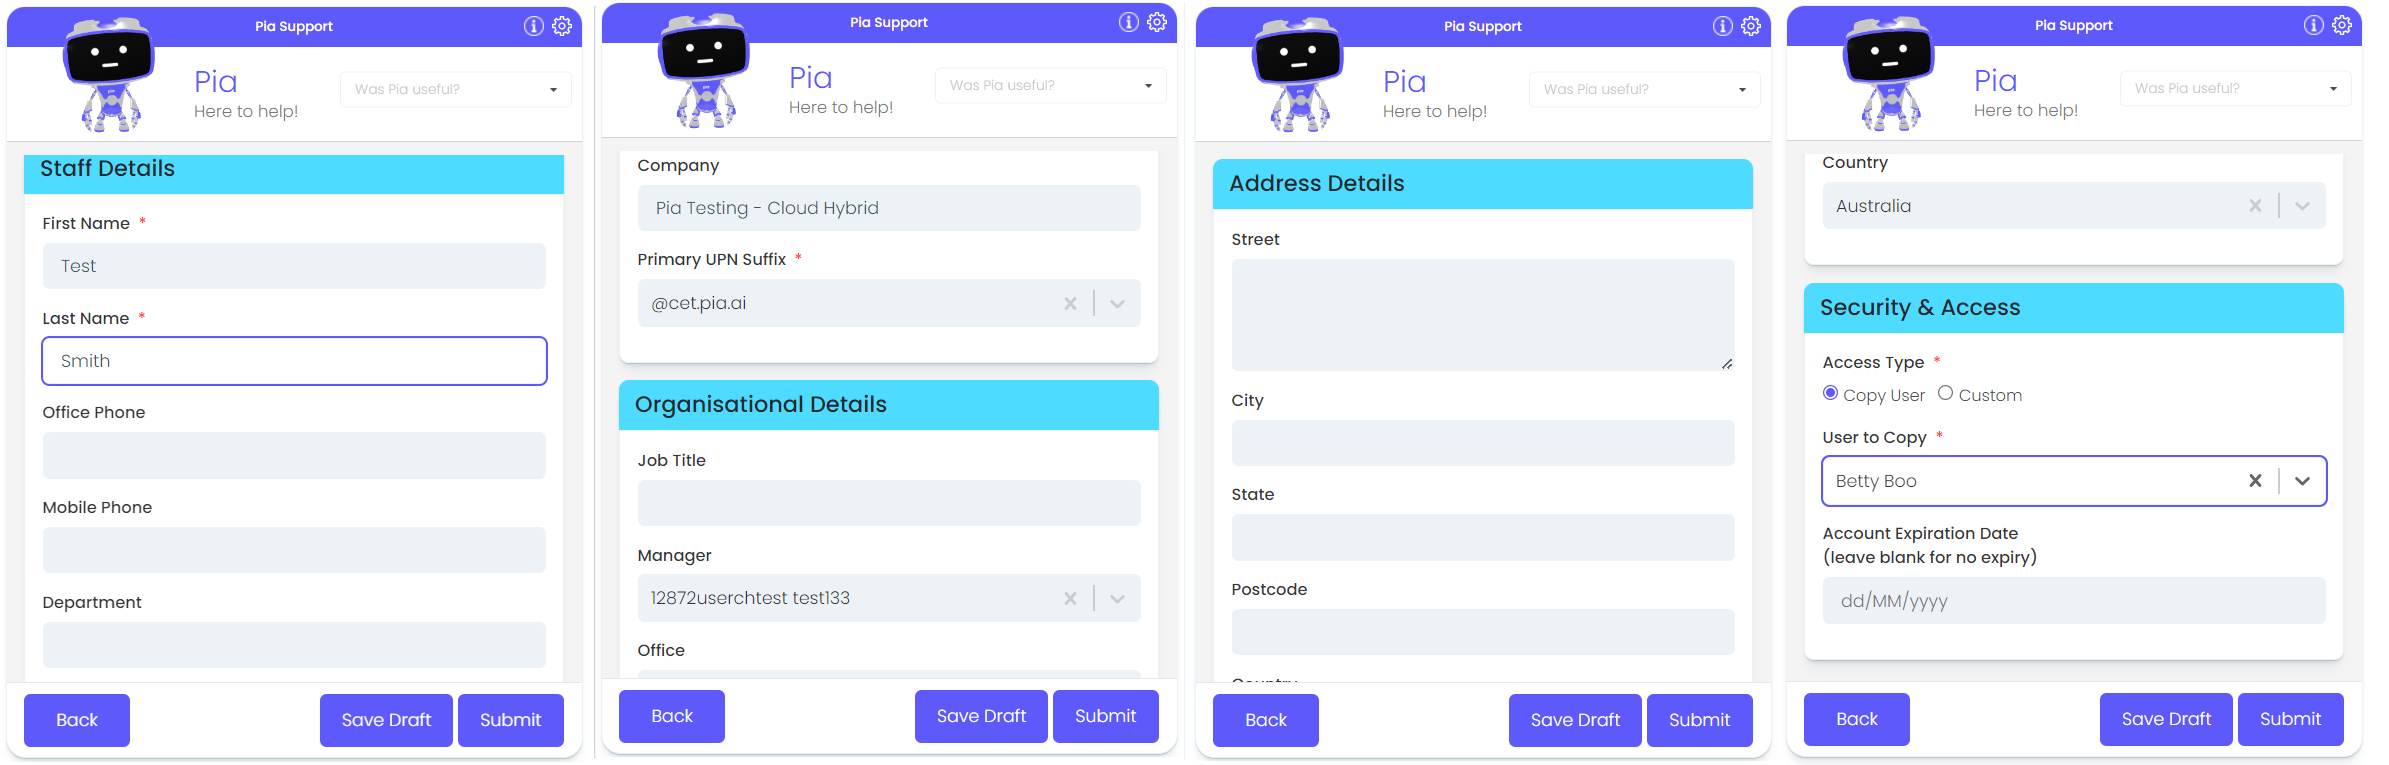
Collect new user details
A form will be displayed in the chatbot for the chat user to fill in details of the new user. You can fill out the following details about the user:
Staff Details
- First Name
- Last Name
- Office Phone
- Mobile Phone
- Department
- Company
- Primary Email Suffix
Organizational Details
- Job Title
- Manager
- Office
Address Details
- Street
- City
- State
- Postcode
- Country
Security & Access
- Access Type (Access Level or Custom)
- Copy User: You can select a user's groups to copy
- Custom: You can add custom access for the user
- Account Expiration Date
Regardless of which Access Type you choose, Pia will still give you the option to change the groups you would like to add the new user to.
📸 View Example Form
_nu_form-9b047c42477d058d444833b642b38fb1.png)
Verify entered data
Pia will generate a new samAccountName and UPN based on the username format in the package configuration. Pia will make sure the samAccountName does not exceed 20 characters and that it is unique.
- If the UPN or samAccountName is not unique, will be prompted to answer if you wish to continue or not.
- If you continue, the UPN will be amended with a number at the end (such as John.Smith1@company.com)
📸 View Example Form
-_matching_upn-5ca7d0c9b43ad23cb0d36f934aa90a06.png)
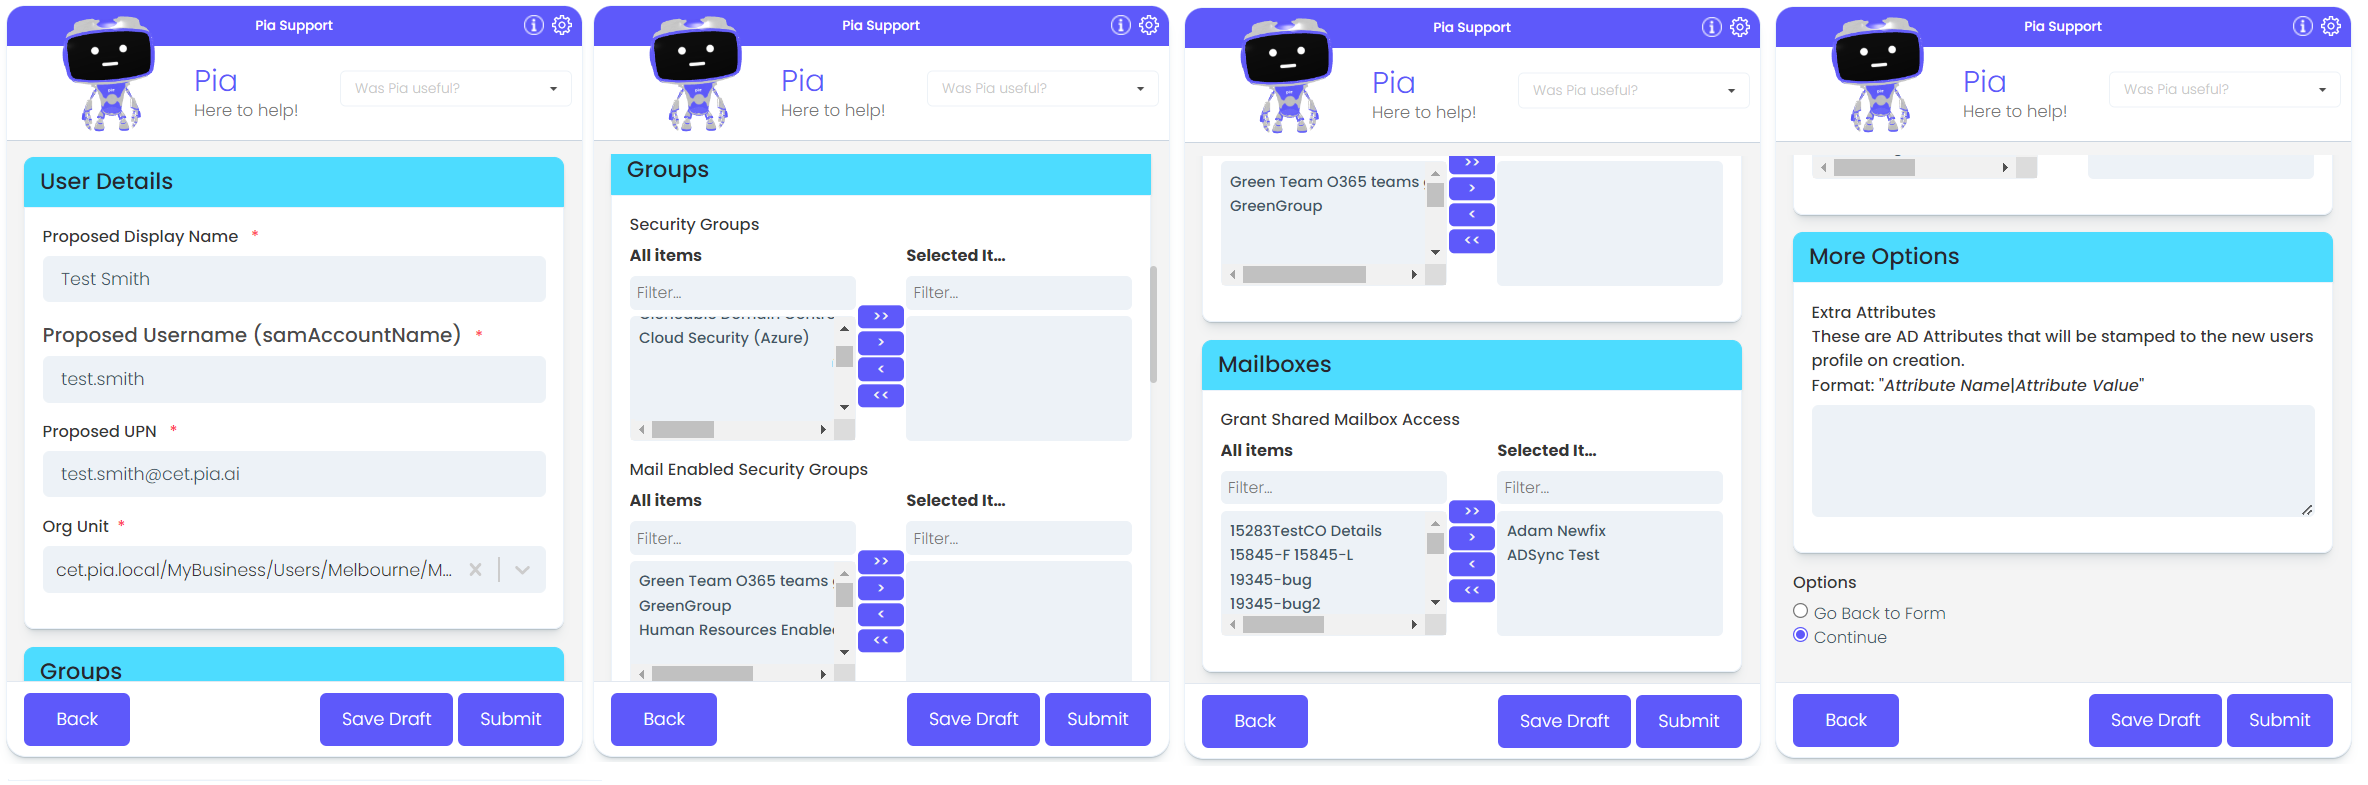
Collect additional details
Pia will then prompt a confirmation form for the chat user to update the following details:
User Details
- Proposed Display Name
- Proposed Username (samAccountName)
- Proposed UPN
- Org Unit
Groups
- Security Groups
- Mail Enabled Security Groups (This is only available if the new user has been assigned an Exchange License)
- Distribution Lists (This is only available if the new user has been assigned an Exchange License)
- Microsoft 365/Unified Groups
- Extra Attributes: These are AD Attributes that will be stamped to the new users profile on creation
At this stage, you can choose to Go back to the New User form or Continue.
📸 View Example Form
Mailbox Permission level
If any mailboxes have been selected in the New User Confirmation Form, Pia will prompt another form to select permission level for each mailbox selected. This includes:
- Permissions (Full, Send As, Send)
- Automapping : if this is checked, the mailbox will be added automatically to the user's outlook.
📸 View Example Form
__mailbox_permissions-9d10fa4d1bc44fdc00137ca2c201327f.png)
Password selection and notification options
Once the mailbox permissions have been submitted, Pia will:
- Generate a new password for the new user. This will confirm to Active Directory security rules

Create the user
Continuing, Pia will:
- Create the new user in Active Directory(AD) based on the information gathered in the previous steps, ensuring that the ConnonicalName(CN) is unique by appending a truncated GUID to the name of a matching CN found in the target OrgUnit(OU).
- Perform a local AD replication
- Perform an AD sync on the Azure AD Connect server
At this point, Pia will wait until the ADSync with Microsoft 365 is complete before continuing.
Pia will then:
- Assign the configured Microsoft 365 license(s) to the new user account
At this point, Pia will wait until Office 365 has finished provisioning the mailbox until continuing.
Pia will then:
- Assign the user to the configured Microsoft 365 groups
- Sets calendar permissions for the newly created user so all staff have access to read limited details
This completes the user account creation. Finally, Pia will:
- Create a note on the ticket with the details of the newly created user and licenses that have been assigned (depending on your audit conditions)
Post Creation Steps
Azure AD Sync
- Check if the Azure AD Sync configuration is set up using a Group Filter, and add the user to the group so the new user will sync to Microsoft 365.
- Pia will then create manual tasks against the ticket and advise the chat user if there are manual tasks to be performed
- Pia will advise you if there was an issue in assigning any of the groups during the new user creation.
- Finally, Pia will inform you the account creation was completed and report the username and password of the new user
_final-b441cc01064b10207f195de145399504.png)
Welcome Email
Pia will ask to confirm the contents of the Welcome email to be sent to the new user or any other recipients. This will be based on the configuration for Welcome email in the package config form.
📸 View Example Form
_-_welcome_email-84ce700364159a40e14ae27701efa3eb.png)
-_email_form-7c6b0910ddaf40dcda8373844e33dcc2.png)
Cloud
Semi-hybrid
Integrations
Demonstration
