Customize Pia's SmartForms using Extension Automations!
To get the most out of this guide, you should be familiar with custom automations and Extension Automations. If not, our reference guide here can help you get up to speed.
In this example, leveraging Extension Automations, we are going to customize the Staff Onboarding Pia SmartForm by allowing your clients to select from a list of programs to be installed along with their newly created new email address. The form is then presented to your engineers in the Pia chatbot within your PSA.
Step 1: Create a Custom Form
📦 Open your Sandbox
🔎 Navigate to the Form Editor:
- From the left sidebar, select Automation > Form Editor.
📝 Create a New Form:
- Click on New Form and enter the form properties.
For the purposes of this example, we've used the following: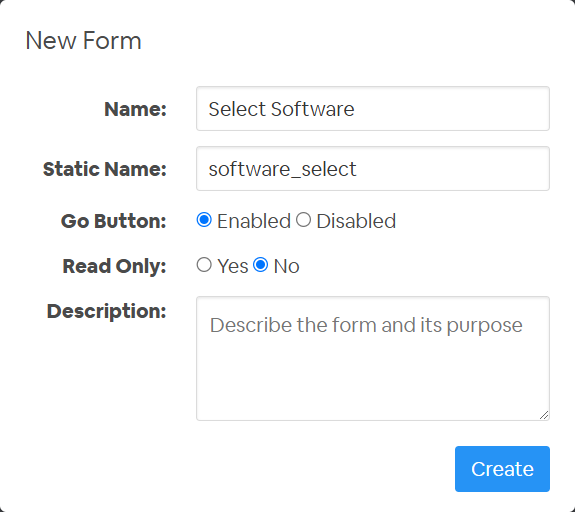
- Click on New Form and enter the form properties.
➕ Add Form Elements:
- From the Toolbox, drag and drop the following elements into the form:
- Form Section
- Checkboxes
- Text Input
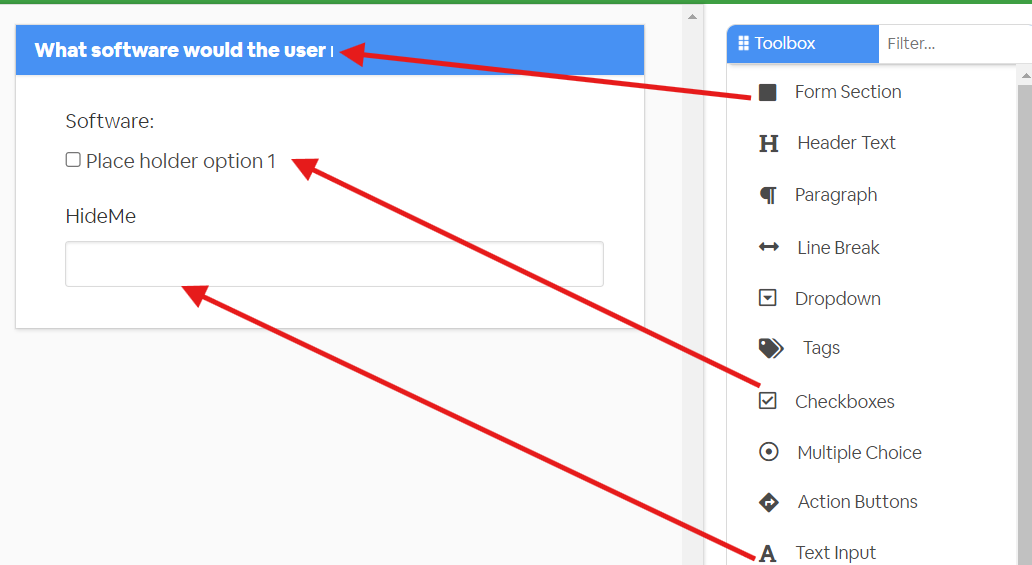
- From the Toolbox, drag and drop the following elements into the form:
⚙️ Assign the Reference Names by hovering your house over each element and clicking the pencil icon.
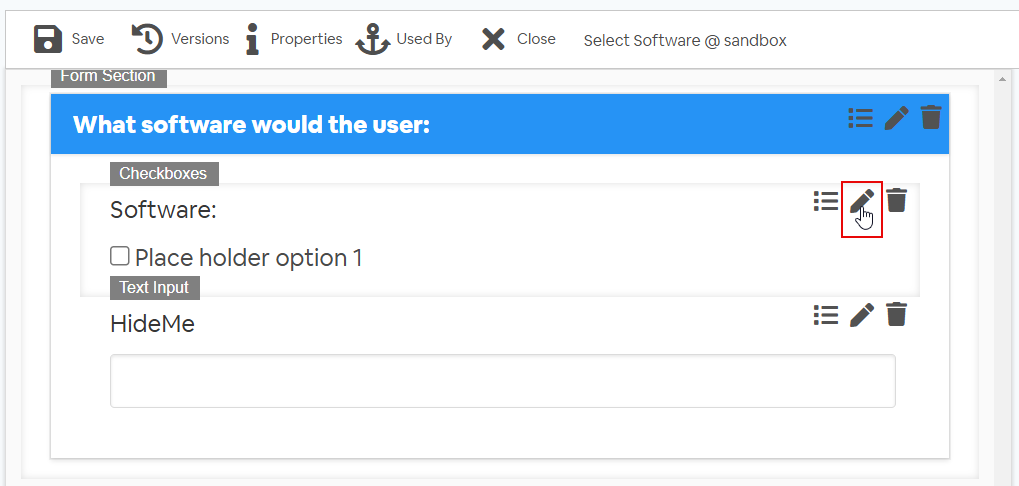
For the Checkboxes, assign the Reference Name as
software-7b570b1f38f1283e534499d849226408.png)
For the Text Input, assign the Reference Name as
hideMe-0fabb7e3b99c562ca3cb738a263ecb1d.png)
💾 Close the Edit window, and then Save the form to see the changes.
Need more info? For detailed instructions on how to build forms, check out the Form Editor documentation.
Step 2: Create your first child extension
- 🔎 Navigate to the Package Editor:
- From the left sidebar, select Automation > Package Editor.
- Click on New Package to start creating a new package.
- 🛠️ Define Package Details:
- Name your package appropriately, in this example, "Child Extension 1 - Append Form".
- ⚙️ Set Up Package Conditions:
- Define conditions for when the package should be executed.
conditions:
  - name: 'client_filter'
    optMode: 'OptOut'
    category: 'Hello World'
- 🎯 Add Tasks to the Package:
- Add a PowerShell script to dynamically create form definitions.
steps:
  - task: inline_powershell
    inputs:
      script: |
        $software = @(
          [PSCustomObject]@{text = "Adobe Acrobat"; value = "Adobe Acrobat"},
          [PSCustomObject]@{text = "VPN Access"; value = "VPN Access"},
          [PSCustomObject]@{text = "Google Chrome"; value = "Google Chrome"}
        )
        $formDefProps = @{
          software = @($software)
        }
        return @{
          formDef = (ConvertTo-Json $formDefProps -Compress)
        }
- Use the append_smartform_interaction activity to append additional fields to the specified SmartForm.
- task: append_smartform_interaction
  inputs:
    form_name: 'software_select'
    form_def: =inline_powershell.formDef
- Your final code should look like this:
# Pia Automation Package
conditions:
- name: 'client_filter'
  optMode: 'OptOut'
  category: 'Hello World'

- name: 'extension_automation'

# Define list of programs
steps:
- task: inline_powershell
  inputs:
    script: |
        $software = @(
            [PSCustomObject]@{ text = "Adobe Acrobat"; value = "Adobe Acrobat"}
            [PSCustomObject]@{ text = "VPN Access"; value = "VPN Access"}
            [PSCustomObject]@{ text = "Google Chrome"; value = "Google Chrome"}
        )

        $formDefProps = @{
            software = @($software)
        }

        return @{ formDef = (ConvertTo-Json $formDefProps -Compress)}

# Append my extra fields to the smartform
- task: append_smartform_interaction
  inputs:
    form_name: 'software_select'
    form_def: =inline_powershell.formDef
Step 3: Create your second child extension
🔎 Navigate to the Package Editor:
- From the left sidebar, select Automation > Package Editor.
- Click on New Package to start creating a new package.
🛠️ Define Package Details:
- Name your package appropriately, for example, Child Extension 2 - Read Form.
⚙️ Set Up Package Conditions:
- Define conditions for when the package should be executed.
conditions:
  - name: 'client_filter'
    optMode: 'OptOut'
    category: 'Hello World'
  - name: 'extension_automation'
- Define conditions for when the package should be executed.
🎯 Add Tasks to the Package:
Add tasks to retrieve and display the form data.
steps:
  - task: get_form_data
    alias: sf_app_1
    inputs:
      form_name: 'software_select'  # Retrieve form data from the 'software_select' form

  - task: inline_powershell
    alias: 'hide_skips'
    inputs:
      sf_variable_1: =sf_app_1.form_data.software  # Get the software data from the form
      script: |
        $softwareList = @()
        foreach($software in $sf_variable_1 -split ",") {
            $softwareList += [PSCustomObject]@{ text = "$software"; value = "$software"; selected = $true}
        }

        $formDefProps = @{
            software = @($softwareList)
            hideMe = "submittedForm"
        }
        return @{ formDef = (ConvertTo-Json $formDefProps -compress) }  # Return the form definition JSON

  - task: chat_interaction
    inputs:
      text: |
          The client has selected the following additional programmes:
      form_name: 'software_select'
      form_def: =hide_skips.formDef  # Use the form definition created in the PowerShell script
      form_display_mode: 'Embed'  # Embed the form in the chat interaction
Your final code should look like this:
# Pia Automation Package
conditions:
- name: 'client_filter'
   optMode: 'OptOut'
   category: 'Hello World'
- name: 'extension_automation'

# Define list of programs
steps:
- task: get_form_data
   alias: sf_app_1
   inputs:
      form_name: 'software_select'  # Retrieve form data from the 'software_select' form

# Process form data using PowerShell script
- task: inline_powershell
   alias: 'hide_skips'
   inputs:
      sf_variable_1: =sf_app_1.form_data.software  # Get the software data from the form
      script: |
            $softwareList = @()
            foreach($software in $sf_variable_1 -split ",") {
                  $softwareList += [PSCustomObject]@{ text = "$software"; value = "$software"; selected = $true}
            }

            $formDefProps = @{
                  software = @($softwareList)
                  hideMe = "submittedForm"
            }
            return @{ formDef = (ConvertTo-Json $formDefProps -compress) }  # Return the form definition JSON

# Display form data in chat interaction
- task: chat_interaction
   inputs:
      text: |
         The client has selected the following additional programmes:
      form_name: 'software_select'
      form_def: =hide_skips.formDef  # Use the form definition created in the PowerShell script
      form_display_mode: 'Embed'  # Embed the form in the chat interaction
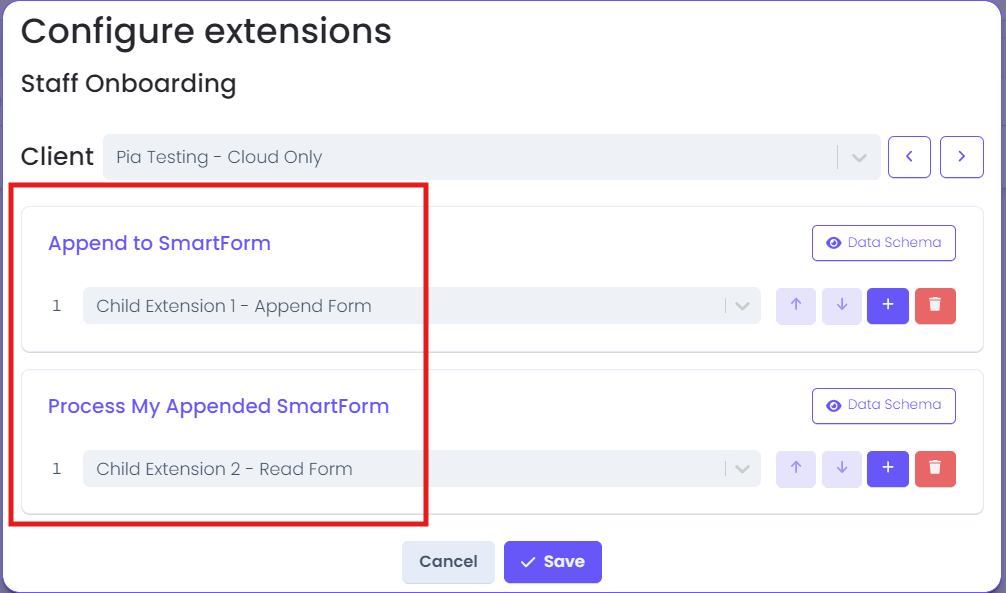
Step 4: Assign Extensions to the SmartForms Package
🔎 Navigate to SmartForms:
- From the left sidebar, select SmartForms > Forms.

- From the left sidebar, select SmartForms > Forms.
🧩 Configure Extensions:
- Find the relevant form (e.g., Staff Onboarding) and click Configure under the Configure Extensions section.
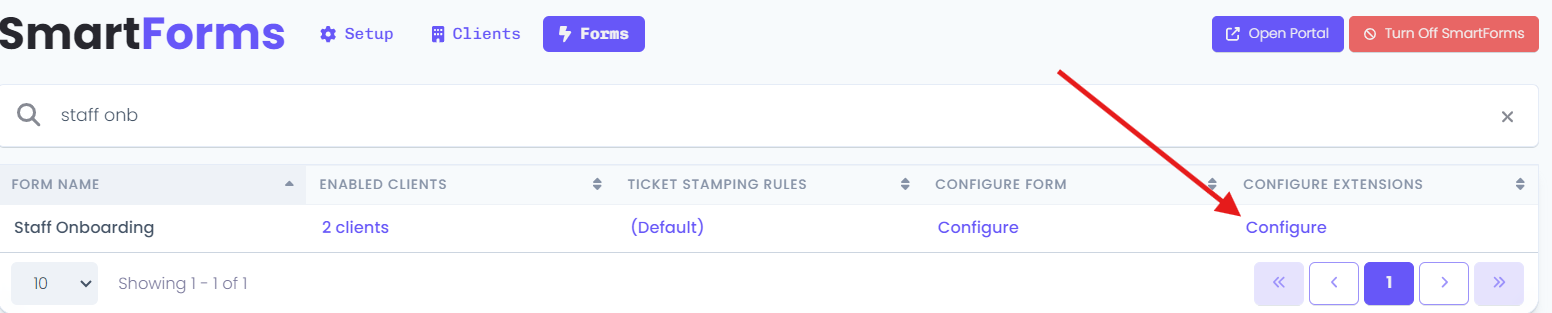
- Find the relevant form (e.g., Staff Onboarding) and click Configure under the Configure Extensions section.
🔗 Assign Extensions:
- Select the relevant client and assign the extensions:
- Append to SmartForm: Assign Child Extension 1 - Append Form.
- Process My Appended SmartForm: Assign Child Extension 2 - Read Form.
- Select the relevant client and assign the extensions:
💾 Save Configurations:
- Click Save to apply the configurations.
Step 5: Test the Configuration
- ⬆️ Promote Packages and Form to Live:
- Ensure that all packages and forms are promoted to the live environment.
- 📄 Log into SmartForms as the Target Client:
- Access the SmartForms portal as the target client to test the configuration.
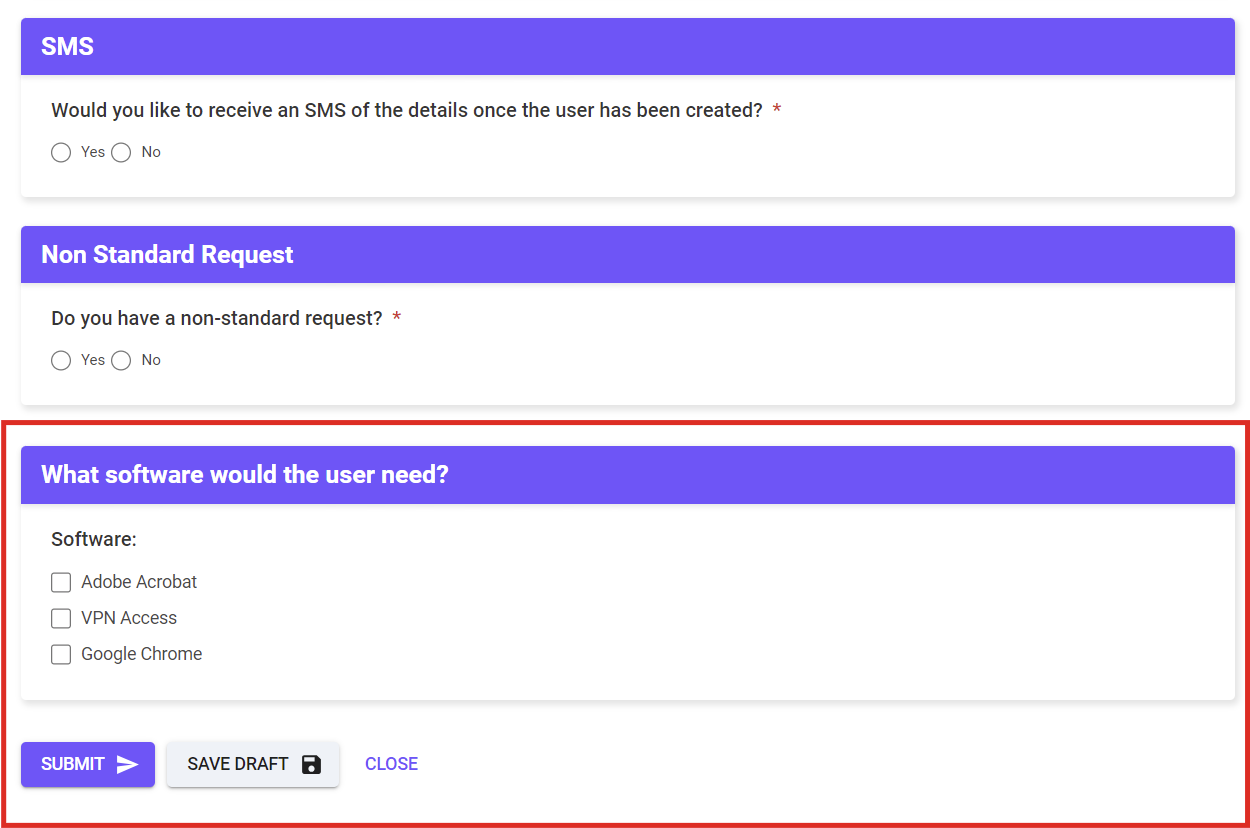
- ✅ Verify the Staff Onboarding SmartForm:
- The Staff Onboarding SmartForm should now include the newly added section for selecting software.
The form should look like the screenshot below:
- The Staff Onboarding SmartForm should now include the newly added section for selecting software.
📝 Submit the Form:
- Fill out and submit the form as the target client.
✅ Check the ChatBot Perspective for Engineers:
- Once the form is submitted, the corresponding information should appear in the Pia chatbot for your engineers. The chat interaction should look like the screenshot below:

- Once the form is submitted, the corresponding information should appear in the Pia chatbot for your engineers. The chat interaction should look like the screenshot below: