Form Editor
Overview
Pia provides you with a set of tools (form fields) that you can use to build custom forms for your packages. All of these form fields are available in the Form Editor screen.
The form editor screen in Pia is an easy-to-use feature that lets you create forms that can be added to your package to make your package more dynamic and user interactive. The form you create can be either be specific to just one package or can be generic so that it is used across multiple packages at once.
In this article, we talk about how you can create a form and use the form in your package. This article also covers different form fields that are available in the Pia Form Editor screen.
Quick Guide
Here is a step-by-step guide on how to create your own form in Pia:
Step 1: Login to your Pia portal and select a sandbox.
Step 2: Once you are on sandbox mode, go to the Form Editor screen from the left menu.
Step 3: Give your new form a Name and a Static Name. Select the other properties as required and click Create.
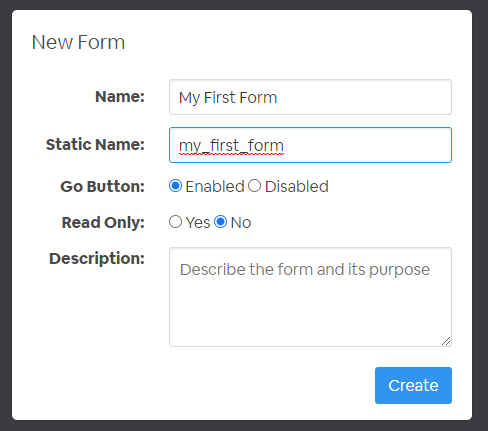
In this pop-up:
- Name: Add a meaningful name to your form. This name will appear on the form list.
- Static Name: The static name of the form is used to link the form with a package. The static name of the form should be in this format: "test_form".
- Go Button: Enables the 'Go' button in the chat output containing the form. If your form is read-only and does not require user to click 'Go' to move on to the next step, you can disable the Go button.
- Read Only: If this is set as 'Yes', the values in the form fields are non-editable when displayed in the chatbot.
- Description: Optional field that you can use to add more information about the form.
Step 4: Once you have named your form, you can now start editing your form. Click on the different options available in the toolbox on the right based on what form fields you need in your form.
In the below example, a simple form has been created with a form section and a text input field. You can use the other form fields as you like.
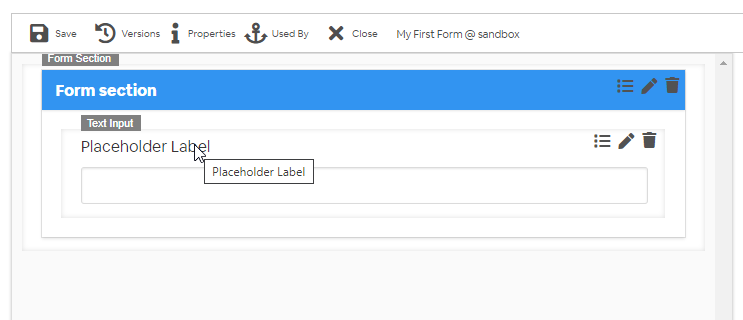
When you hover over a form field, you will see three options:
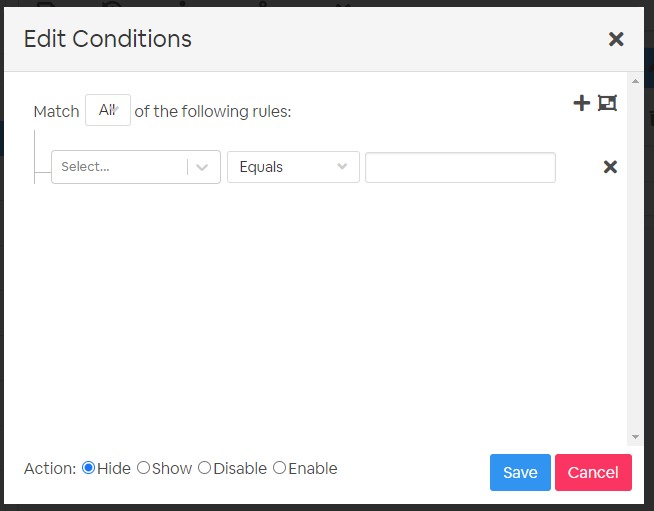
- Edit Conditions: You can use this option to create rules to specify how the field will be displayed on the form.
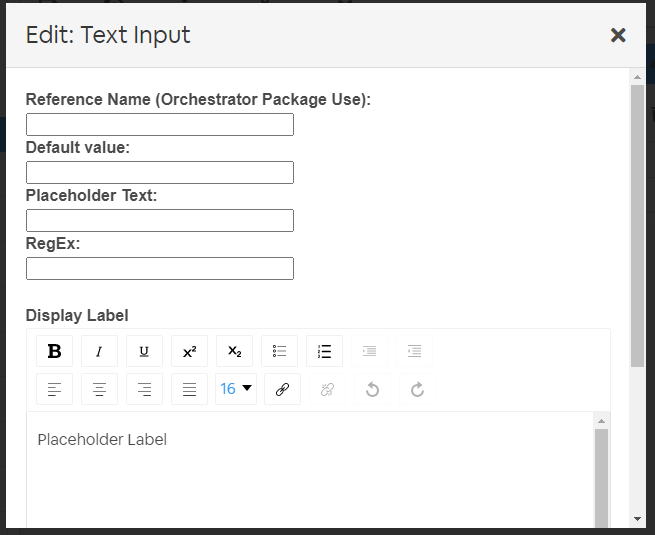
- Edit Form Field: You can use this option to edit the form field properties.
- Delete Form Field: You can use this option to delete the field from the form.
Step 5: Once you have edited the form as per your requirement, hit Save at the top. This will create your new form!
This newly created form can now be linked to a package using the chat_interaction activity in the package. To specify default values for your form, you can pass in values from the executing package. Click here for more information.
Form Fields
Pia makes the following form fields available in the Form Editor to build your custom form.
Form Section
You can divide your form into different sections using the form section tool.
Form Editor View

Pia Chatbot View:

Header Text
Add a read only header text to your form using the Header Text option:
Form Editor View:

Pia Chatbot view:

Paragraph
The paragraph field can be added to your form to display additional information in the form:
Form Editor View:

Pia Chatbot view:

Line Break
The Line Break field will add a horizontal line between two form fields to denote a section break:
Form Editor View:

Pia Chatbot view:

Drop-down
The drop-down field will display available options in a drop-down allowing users to make a single selection at once.
- Form Editor View:
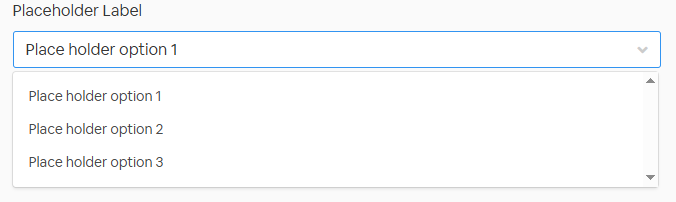
- Pia Chatbot view:

Tags
The tags field will display available options that the user can select from in a drop-down. You can allow the user to select multiple options from the drop-down by enabling multiple selections in the Tags Editor.
Form Editor View:

Pia Chatbot view:

Checkboxes
Add the checkboxes field to your form to allow the user check or tick the required options:
Form Editor View:

Pia Chatbot view:

Multiple Choice
The multiple-choice field will display radio buttons allowing users to select multiple options at once. This is also used for Yes/No forms in Pia.
Form Editor View:

Pia Chatbot view:

Action Buttons
The action buttons can be used in forms that require user to select certain action for Pia to perform. When an action button is used in a form, you will need to disable the 'Go' button (you can do this by going to form properties) as the action buttons move the user into next output.
Form Editor View:

Pia Chatbot view:

Text Input
Use the text Input field to allow users to input text values into the form:
Form Editor View:

Pia Chatbot view:

Multiple Listbox
The Multiple Listbox is another way of displaying multiple options in a listbox where the user can select/unselect required options:
Form Editor View:

Pia Chatbot view:

Number Input
Add the number input field to your form so that the user is only allowed to add numerical values in the field:
Form Editor View:

Pia Chatbot view:

Table Format
You can use the table format to display the information in a table. Table format has additional options that you can use to make your table more interactive:
Form Editor View:

Pia Chatbot view:

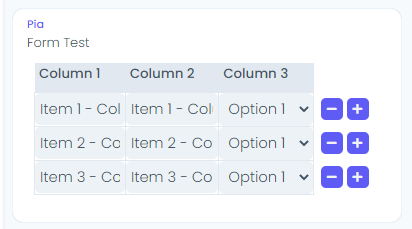
Editable Table Format
The editable table format allows users to edit the values in the table and also allows users to add/remove rows in the table:
Form Editor View:
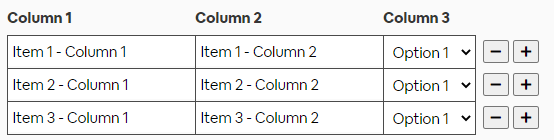
Pia Chatbot view:
Tree View
You can use the tree view to display multiple layers of information in a form e.g. displaying a folder structure. The user can select an option in the tree view and also search for items in the tree view using the filter option:
Form Editor View:

Pia Chatbot view:

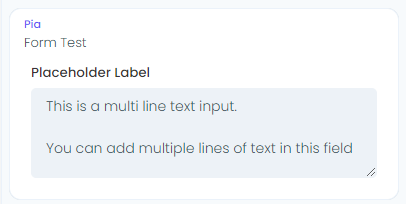
Multi line Input
Use the multi line input field to display or receive multi line text values from the user. For eg: Receiving feedback.
Form Editor View:

Pia Chatbot view:
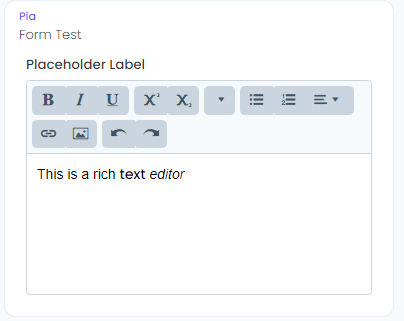
Rich Text Editor
The rich text editor can be used to allow the user to submit multi line text which they may format or attach images and embed hyperlinks:
Form Editor View:

Pia Chatbot view:
Auto Complete Text Box
The auto complete text box will suggest automatic text based on provided options:
Form Editor View:

Pia Chatbot view:

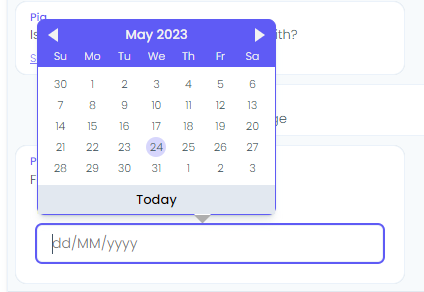
Date
Use the Date field to allow users to select date in your package:
Form Editor View:

Pia Chatbot view:
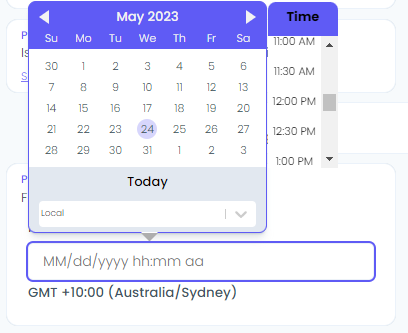
Date Picker Time Zone
The date picker time zone provides you with additional options such as selecting the time zone for the date you select:
Form Editor View:

Pia Chatbot view:
Camera
The camera field allows user to upload a picture in the Pia chatbot:
Form Editor View:

Pia Chatbot view:
