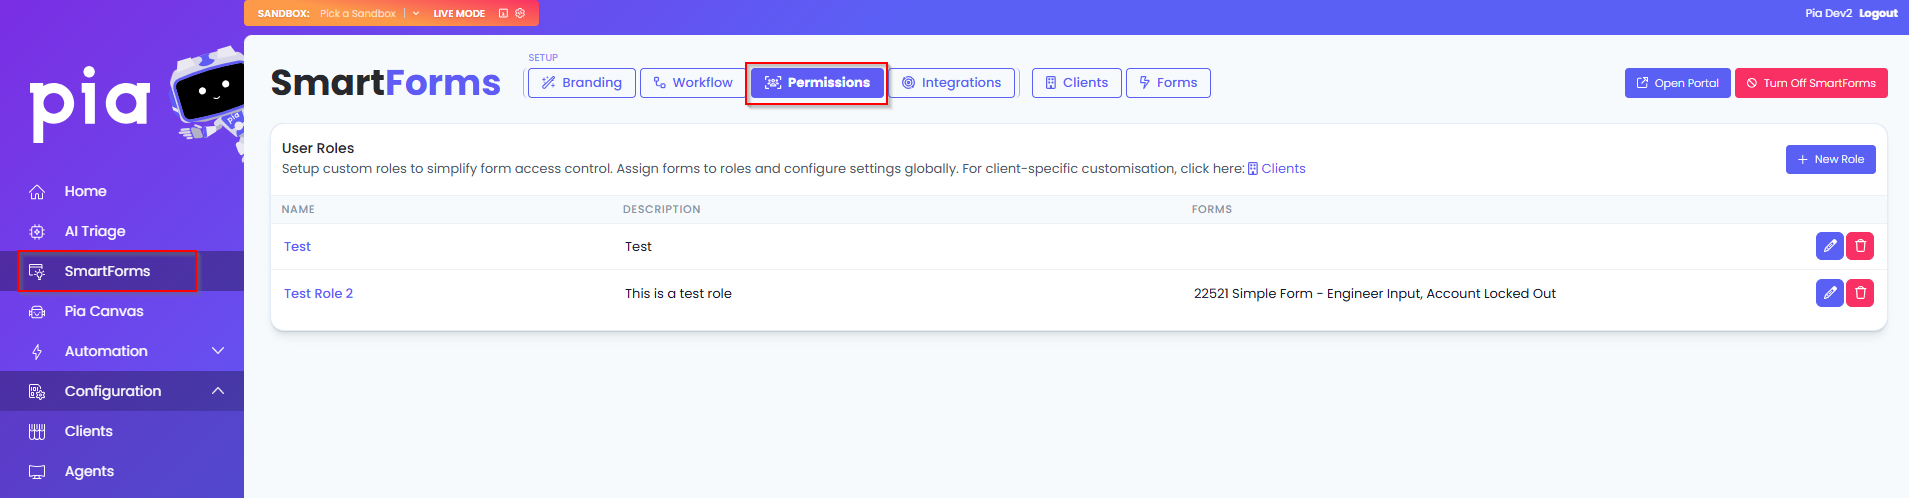
Permissions Setup
The Permission tab allows you to create custom roles that can be assigned to your SmartForms users. These custom roles are in addition to the default roles provided by Pia — Primary Administrator, Administrator, and Standard. They offer more granular control over access levels.
You can define a custom role with access to specific SmartForms and then assign that role to users who need access only to those forms. For example, if the staff members of the Human Resources department only need access to the Staff Onboarding and Staff Offboarding SmartForms, you can create a Human Resources role, associate these two forms with the role, and then assign it to the appropriate staff members.
This screen gives you the flexibility to handle SmartForms access for an individual or a group of users across all clients. Each of these roles will be automatically accessbile for all clients. However, you manage these roles on a client level or create client specific custom roles in the Clients tab.
Creating a custom role
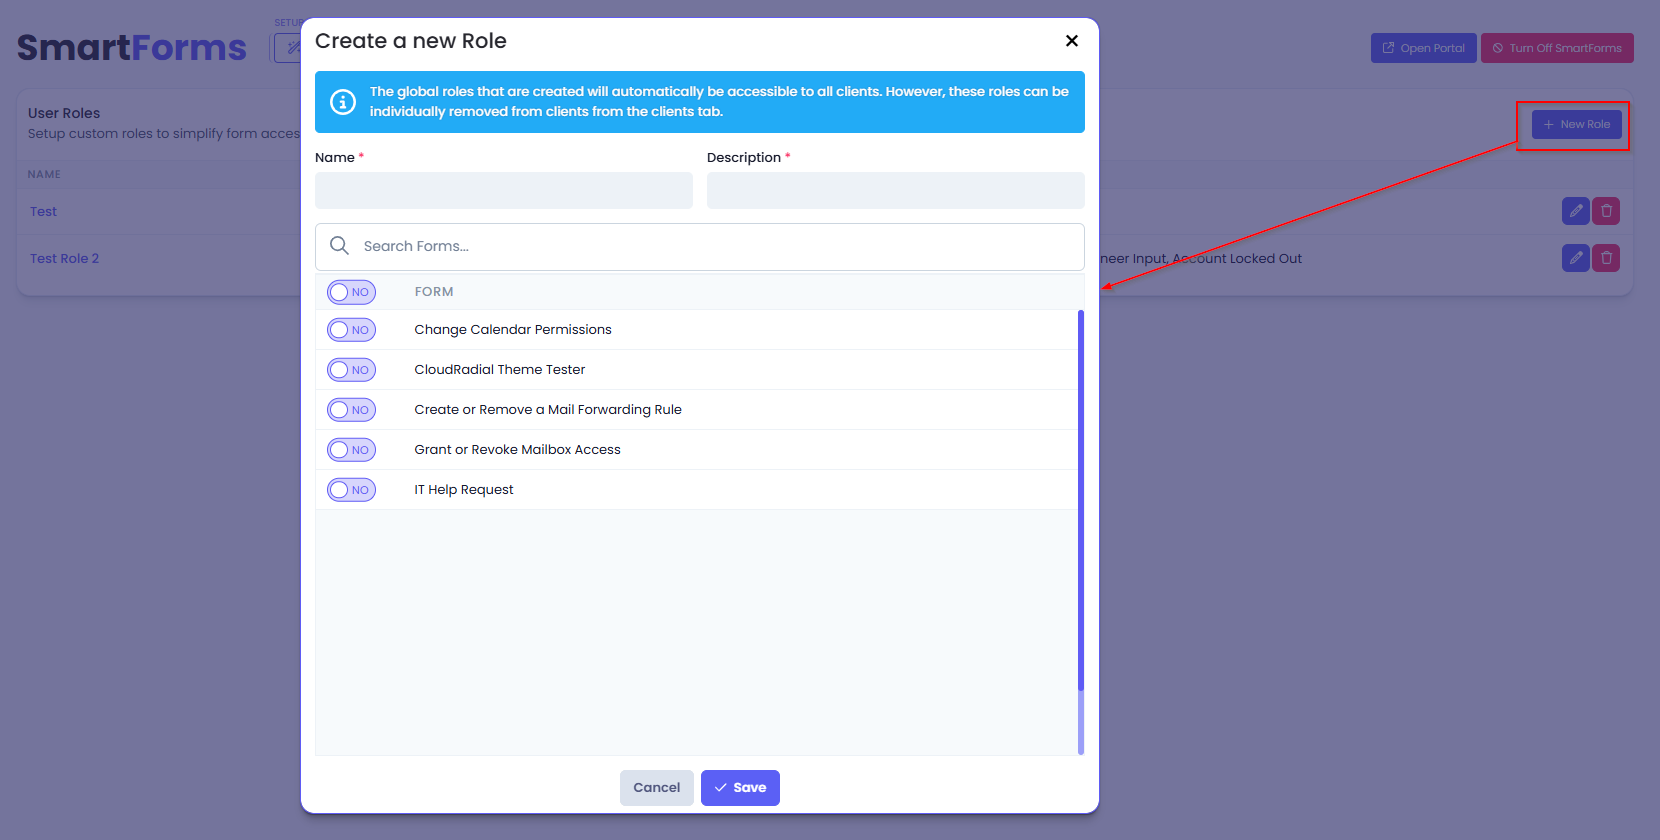
You can create a custom role in the Permissions tab by simply clicking on the "New Role" button that is available at the top right corner. Clicking on the button, Pia will display a pop-up where you will be able to add the following details about the new custom role:
- Name of the role
- Short Description of the role
- Toggle beside each form that you can enable to link the form to the role
Assigning a custom role
Once the custom roles have been created, you can assign them to the SmartForms users in the SmartForms portal. Pia allows you to assign custom roles to the SmartForms users in two ways:
- Assign single or multiple roles to an individual user
- Assign single or multiple users to a single role
Managing custom roles
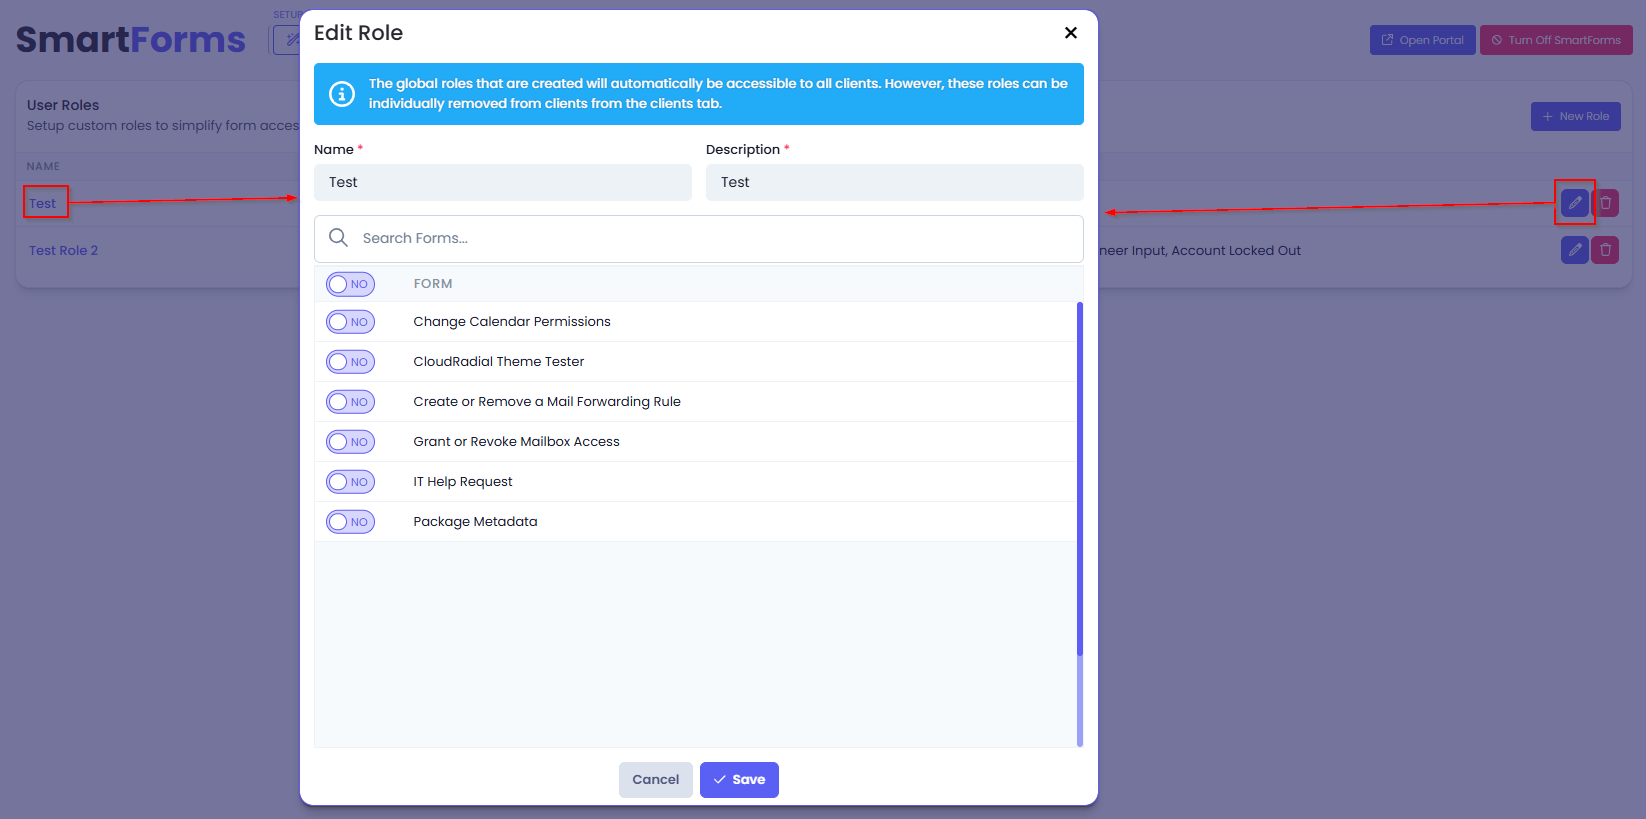
The Permissions tab displays a table where you will be able to view a list of all custom roles. Each of these roles can be further edited or deleted as required.
- To Edit a custom role, you can either click on the role name itself or the edit icon available beside the delete icon on the right. This will give you a pop-up where you can edit details about the role.
- To Delete a custom role, simply click on the delete icon available at the right of the row. This will display a prompt to confirm your actions where you can click on 'Confirm' to proceed.

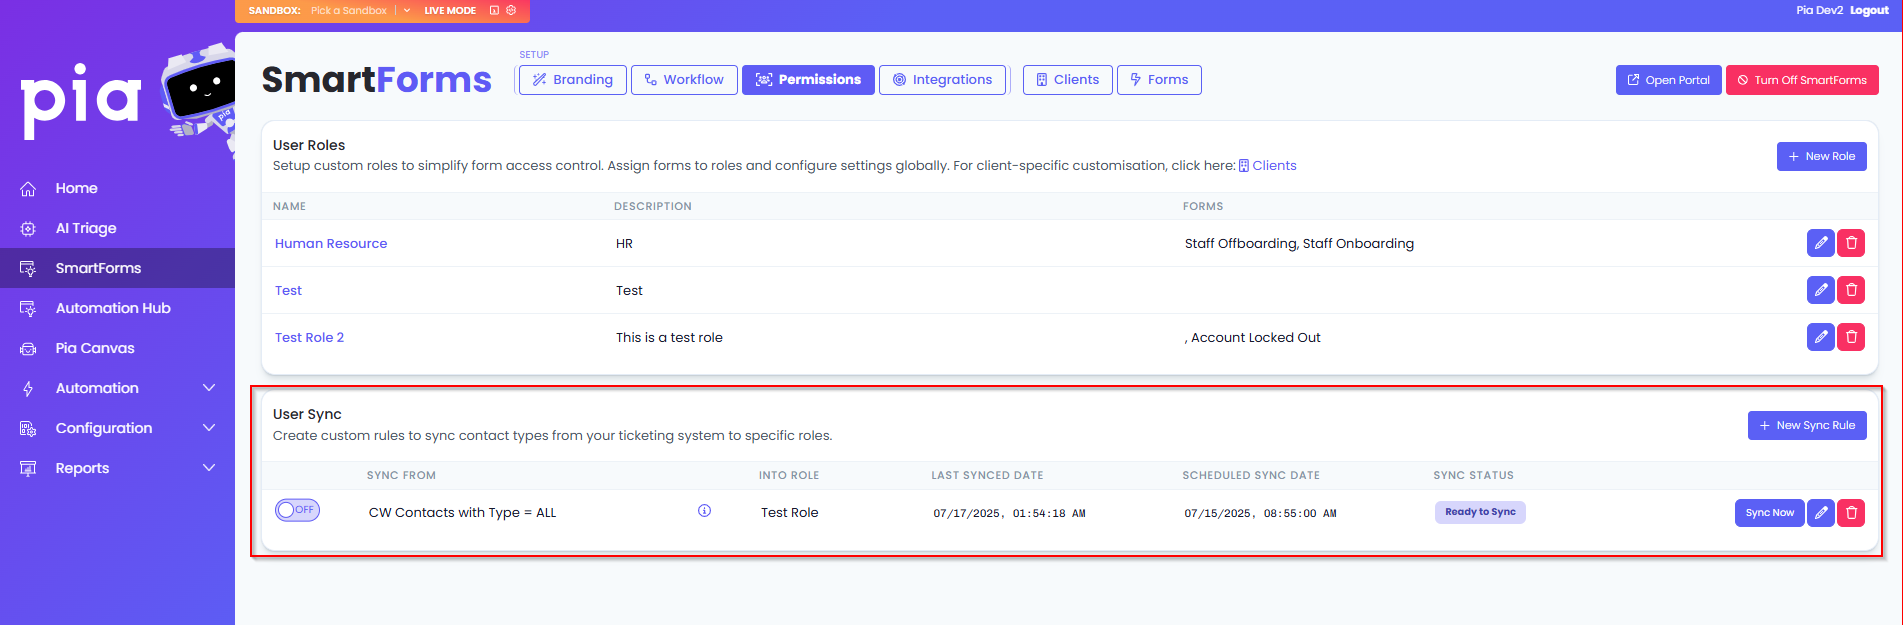
SmartForms User Sync
The SmartForms User Sync feature allows you to sync defined contact types from your ticketing system directly into the custom roles you have created. With this feature, you do not need to manually modify your SmartForms roles every time a new contact has been added or an existing contact has been deleted from your ticketing system. For this action, you will need to create a sync rule in the User Sync section.
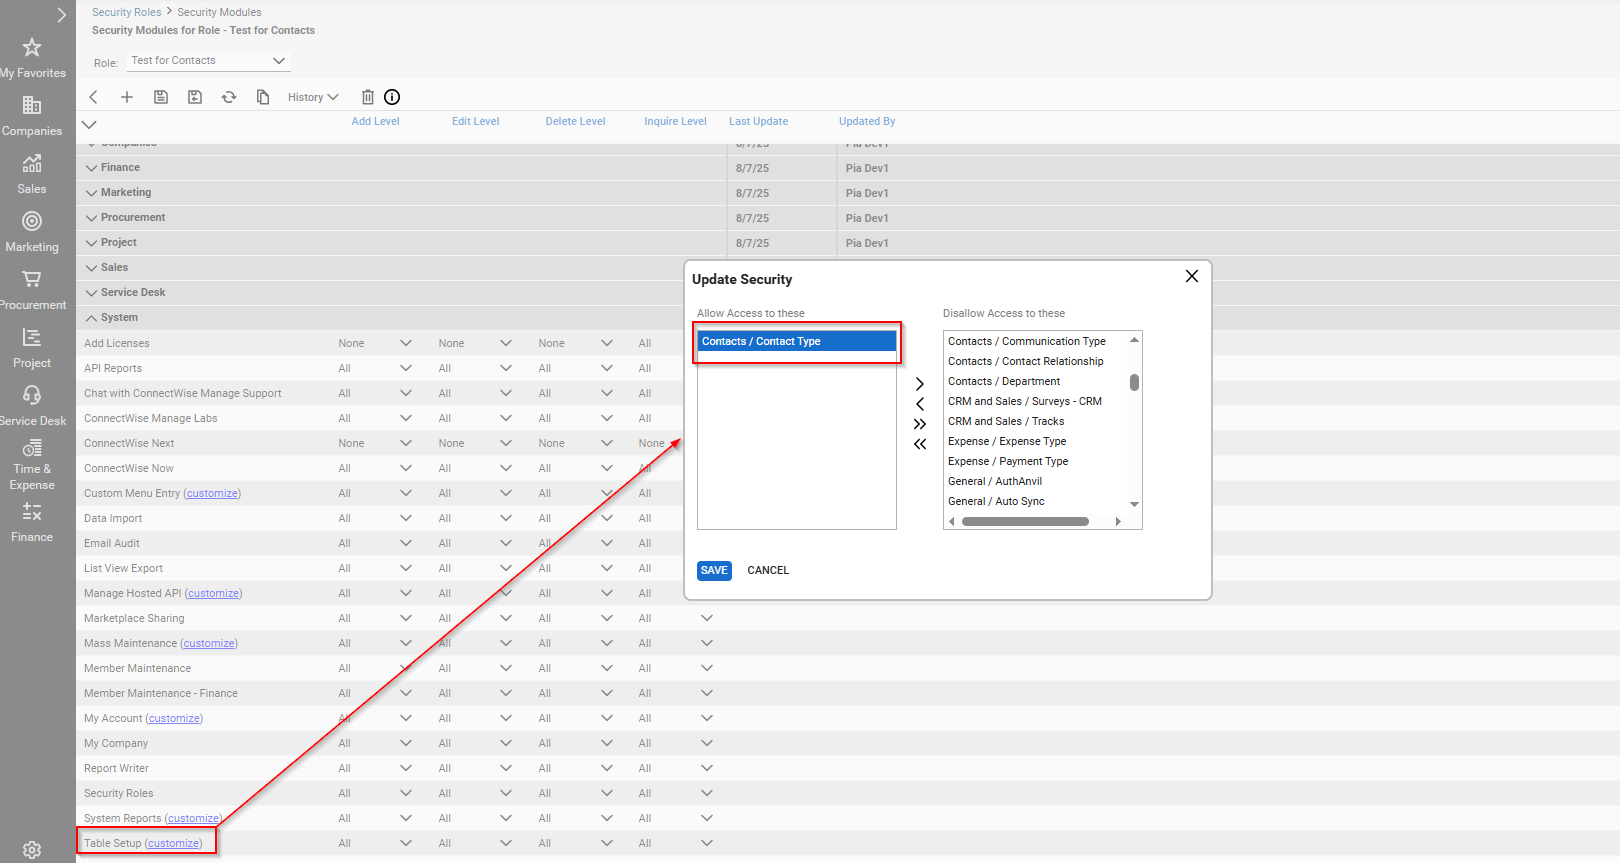
For Partners that use ConnectWise PSA, you will need to use the Contact/Contact Type Permission in the table setup for this feature to work (located in Settings Icon>Security Roles>Select the security role>System> Table Setup>move the contact type to the allow box> click Save).
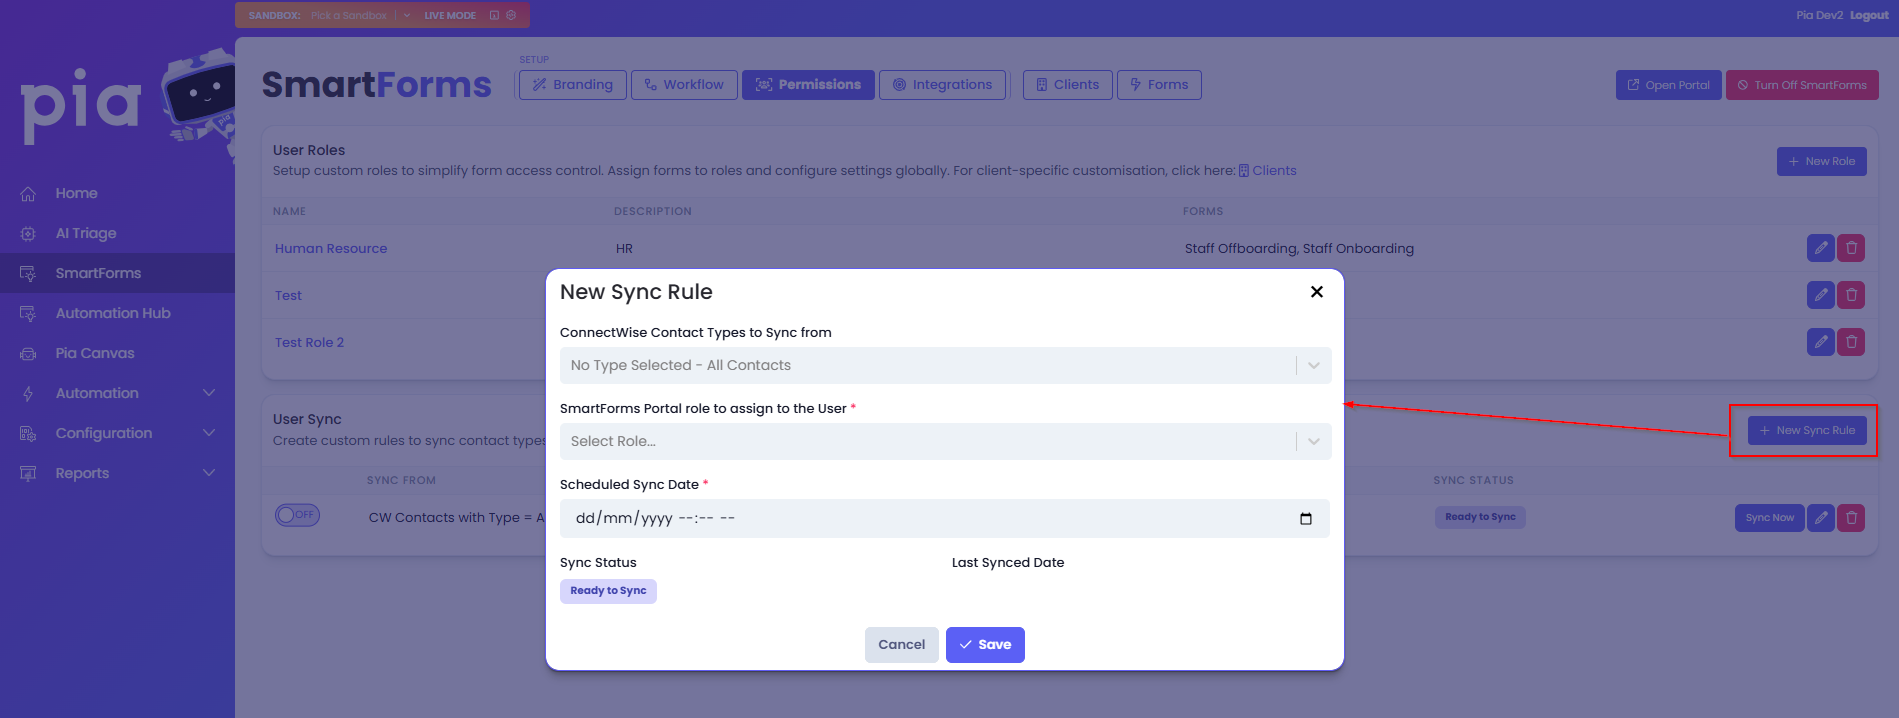
Creating a Sync Rule
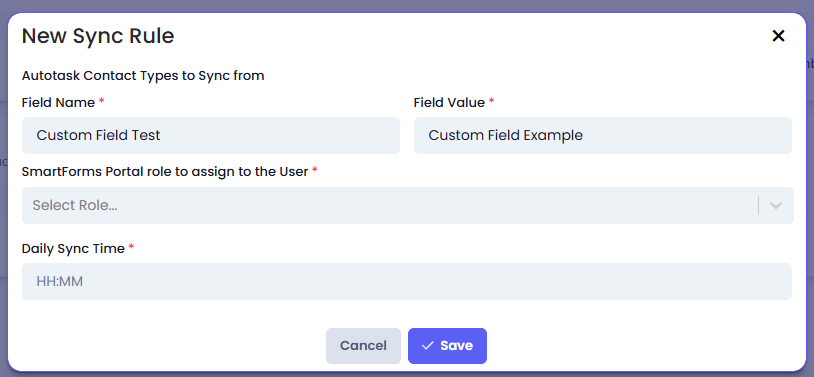
You can create a Sync Rule in the User Sync section of the Permissions tab by simply clicking on the "New Sync Rule" button. Clicking on the button, Pia will display a pop-up where you will be able to add the following details about the new sync job:
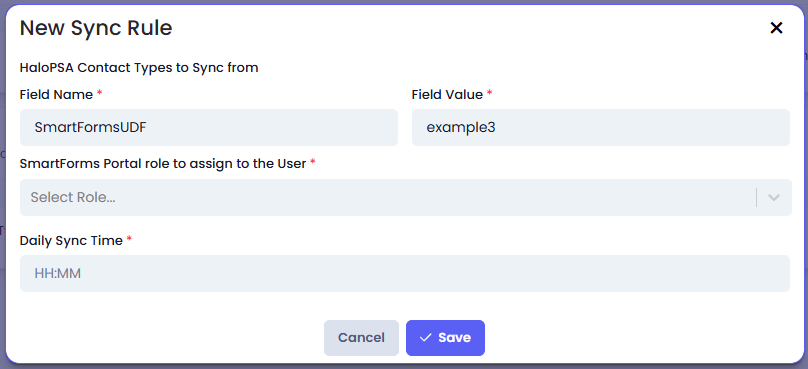
- Contact Types to Sync From: This is the ticketing system contact type(s) that you wish to be assigned with the defined custom role.
- For AutoTask and Halo users, this field will be divided into two sections — Field Name and Field Value. You will need to create custom fields in your respective ticketing system and setup a value to the field which you can populate in the above two fields.
Click here to view custom field setup in AutoTask
Step 1: Log in to your AutoTask PSA
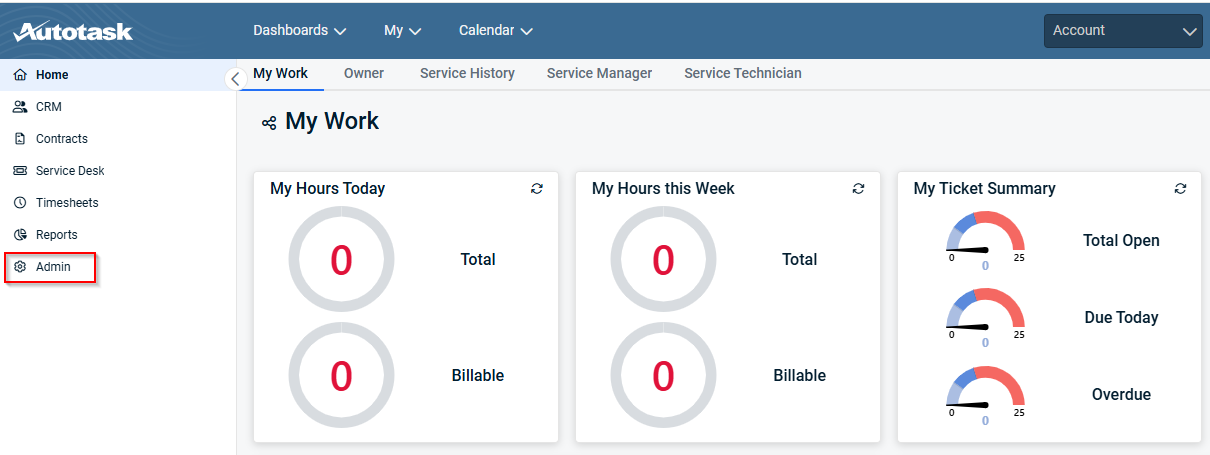
Step 2: Go to "Admin" section
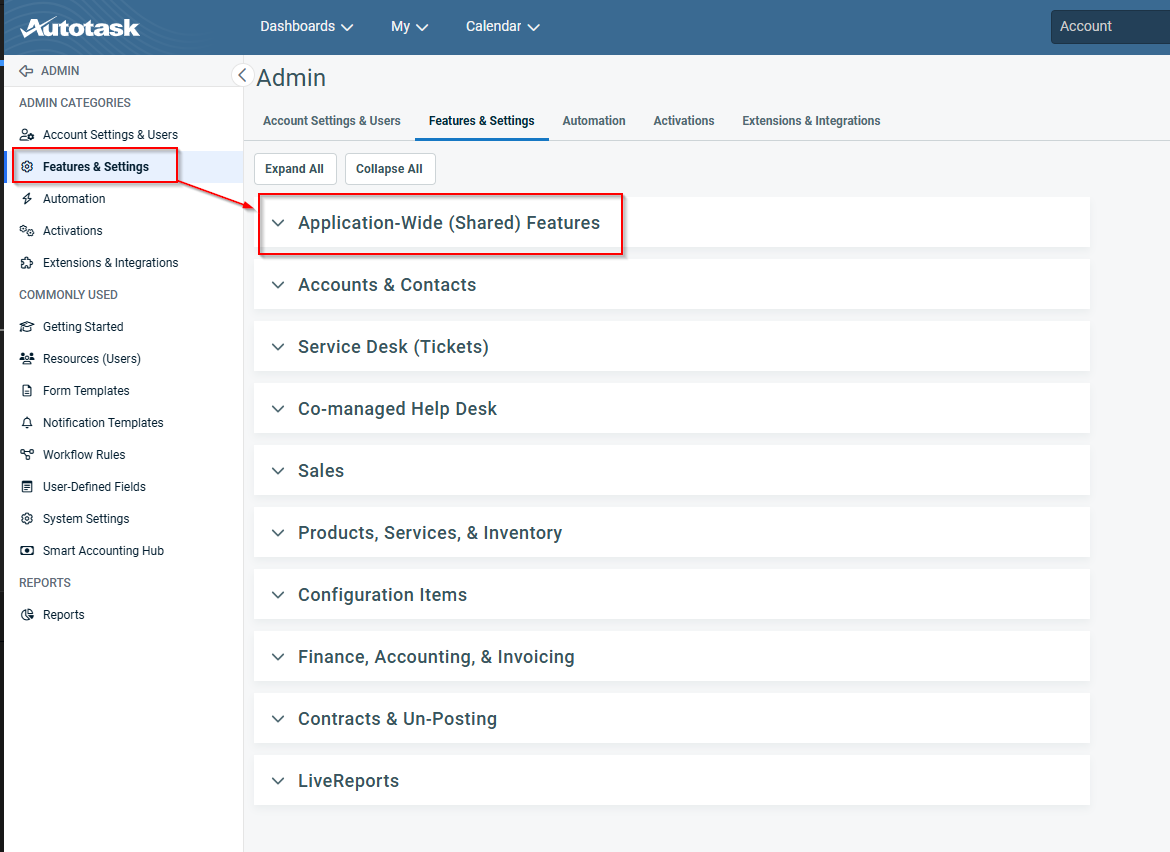
Step 3: Under the "Features & Settings" tab, go to "Application-Wide (Shared) Features"
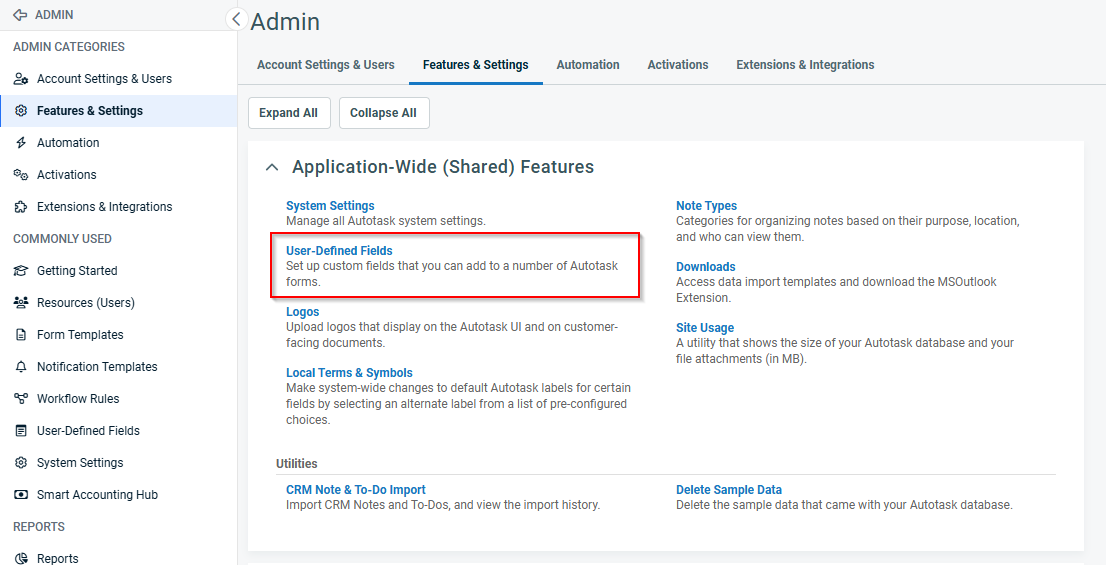
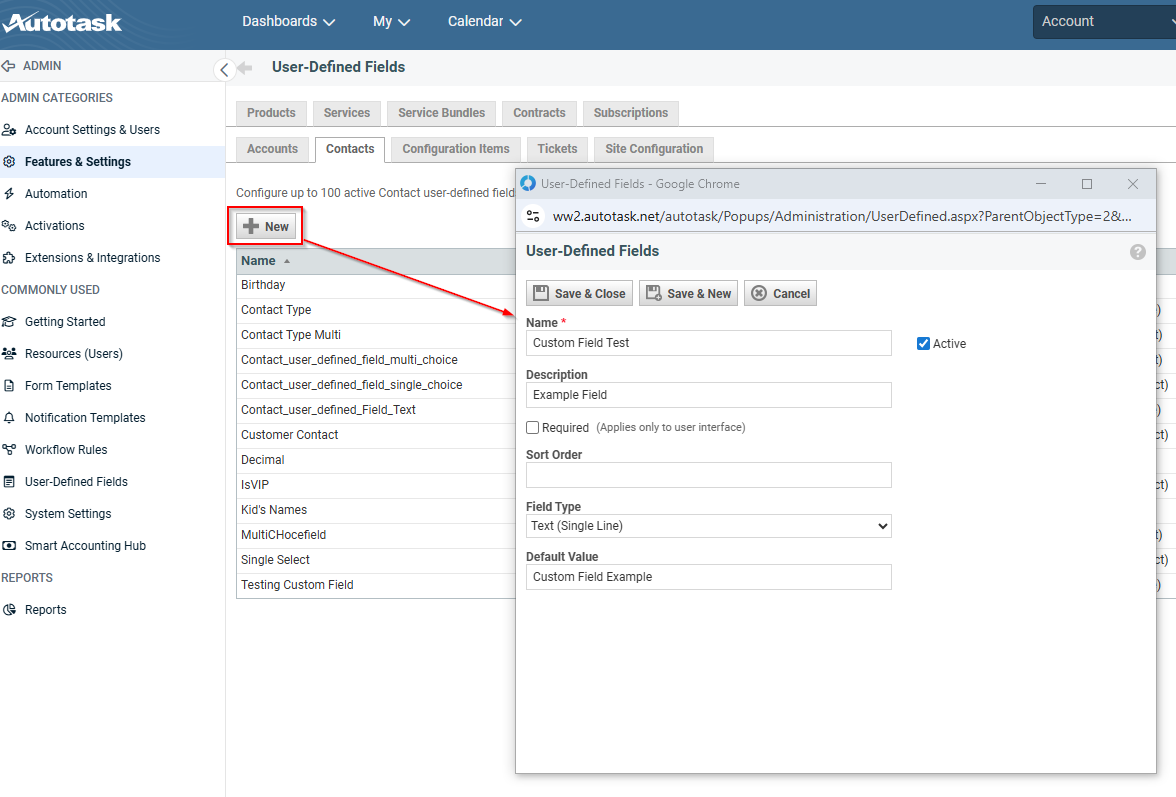
Step 4: Here, go to the "User Defined Fields"
Step 5: In the User Defined Fields screen, go to the "Contacts" tab and click on the "New" button. This will allow you to create custom contact field.
Step 6: Fill in the following details:
- Name: Add a name of the custom field
- Active: Turn the Active checkbox ON if it is OFF
- Description: Add a short description of the field
- Sort Order: This is an optional value which can be skipped
- Field Type: Set this to "Text (Single Line)"
- Default Value: Add a default value to the field. This value does not get automatically added to the existing users. So for the existing users, you will need to manually add this field and the value
Step 7: Save your changes
Step 8: Once done, the custom field name and custom field value can be added to the SmartForms sync rule
Click here to view custom field setup in Halo PSA
Step 1: Log in to your Halo PSA
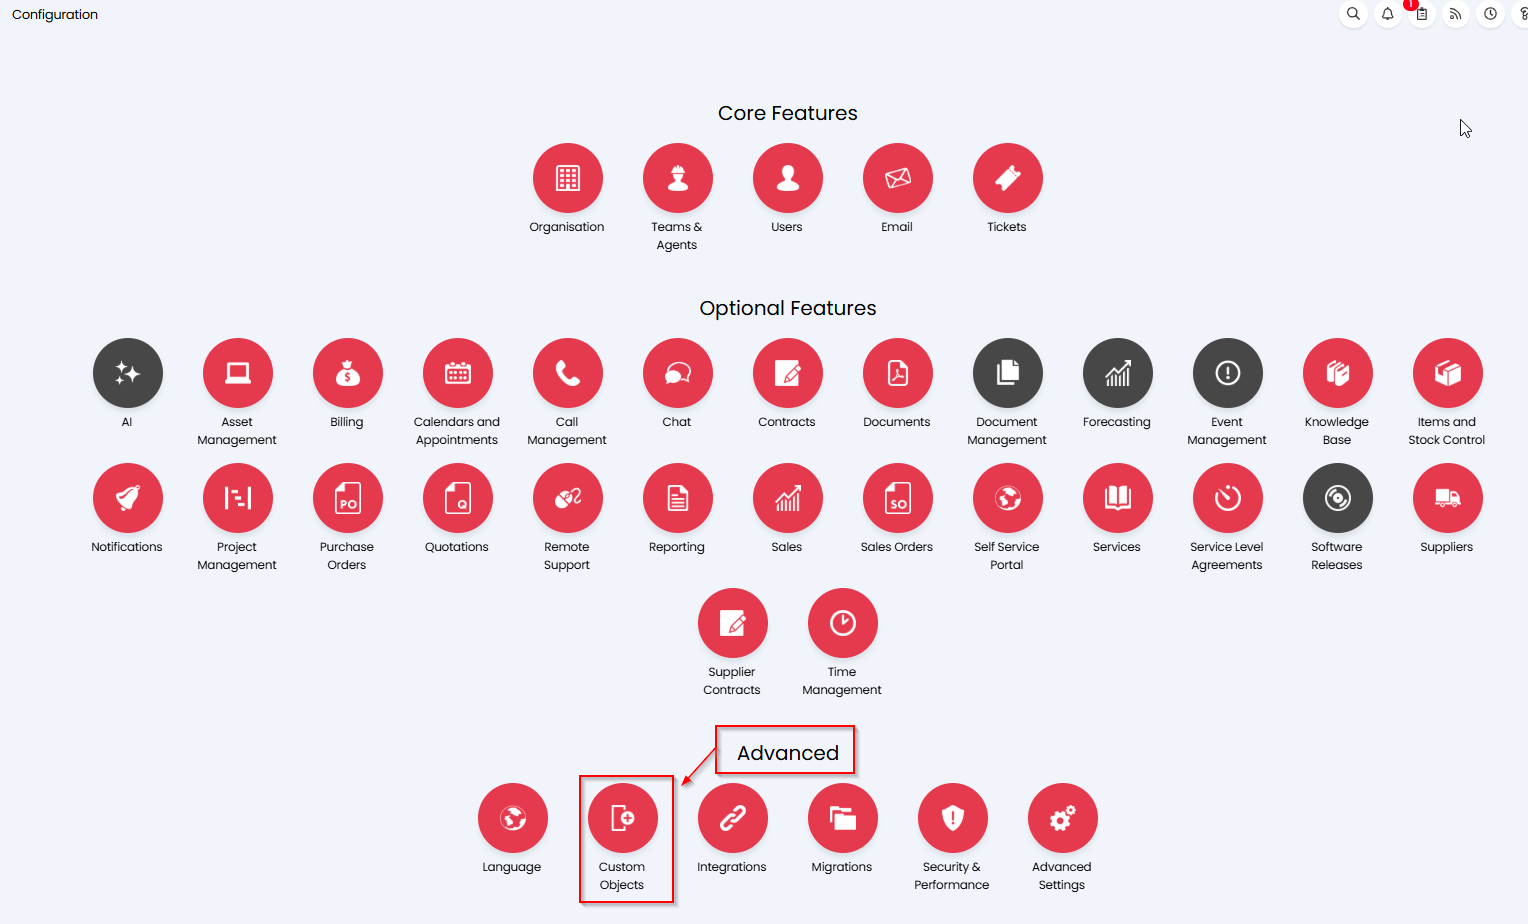
Step 2: Go to "Configuration" option

Step 3: Under the Advanced section, click on "Custom Objects"
Step 4: Here, go to "Custom Fields"
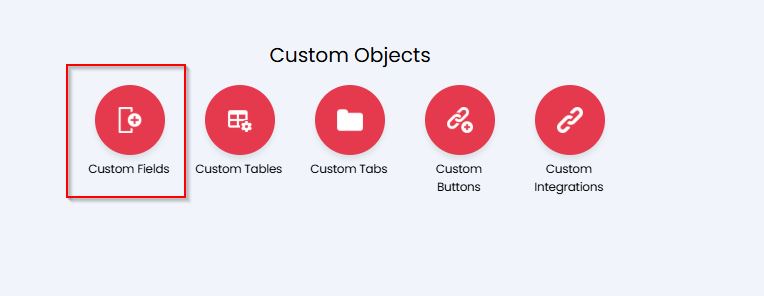
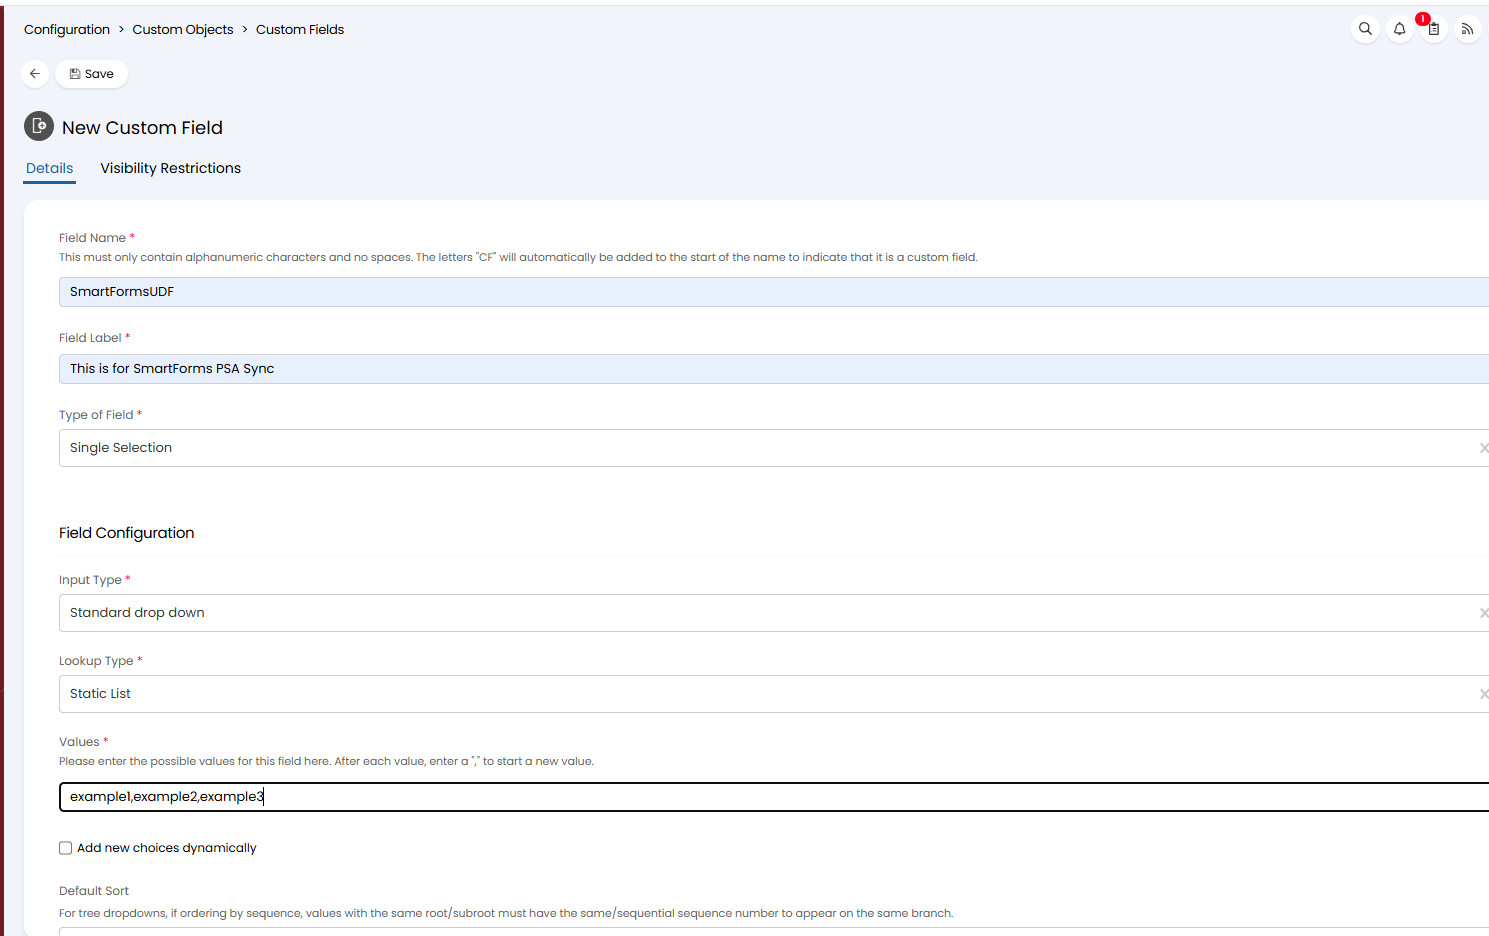
Step 5: In the Custom Fields screen, select the Entity to "User" and click on the "New" button

Step 6: Fill in the following details:
- Field Name: Add a name of the custom field
- Field Label: Add a short description of the field
- Type of Field: Set this to 'Single Selection'
- Input Type: Set this to 'Standard drop down'
- Lookup Type: Set this to 'Static List'
- Values: Set the values you want the user to be able to select in a drop-down when they set this custom field for the contact. Use this format: example1,example2,example3 for multiple options.
The rest of the fields can be left as it is.
Step 7: Save your changes
Step 8: Once done, the custom field name and custom field value that you wish to sync from can be added to the SmartForms sync rule.
Alternatively, you can also refer to this video by Halo PSA for custom field setup.
- SmartForms Roles to Sync into: This is the custom role into which the contacts will be synced into
- Scheduled Sync Time: Define the local time when the sync will execute each day. The timezone is based on the timezone settings in the Tenant Settings screen.
- Last Synced Date
- Sync Status
The User Sync section of the Permissions tab allows you to create Sync rules exclusively for the Global roles you have created in this screen. To create a sync rule for a client role, go to Client Permission Setup.
In a scenario where a Global Sync rule and a Client Sync rule overlap, the sync rule created for the Client role will override the sync rule created for the Global role.
Managing a Sync Rule
The User Sync section provides you with additional functions to manage your Sync Rule. These options are:
- Toggle to Turn the Rule ON or OFF
- Sync Now button: You can start the Sync without opening the rule by pressing on the button available on the row for each Sync rule
- Edit button: Edit your existing or newly saved rule by clicking on the Edit icon
- Delete button: Delete your Sync rule by clicking on the delete icon