My First Automation
{ }
Overview
Once you have access to Pia portal, Pia allows you to create your own packages and run them in your Pia chatbot.
At this point, you are probably eager to begin your journey of developing packages. Therefore, this article will cover a step-by-step guide on how to create your first automation in Pia.
How to create a package
Prerequisites
To be able to start with the package developement in Pia, you will need the following permissions if you have been assigned to the role of 'Engineer' in Pia portal:
- Sandbox Permissions
- Edit/Draft Permissions for: Package Editor, Form Editor and Activity Editor
- View Permissions for: Chatbot
If you do not have any of the above permissions, you can simply speak to your Pia admin to provide you with the required access.
Note: If you have been assigned the role of 'SuperAdmin', you will have automatic access to all the available features in Pia portal.
Getting Started
Now that you have the required access assigned to you, follow the steps below:
Step 1: Create a New Sandbox or open an existing one
Packages can only be created in Pia when you're in Sandbox mode. This is so that the live version remains unaffected until you have manually published the package which will minimise blunders or errors. To learn more about sandbox mode in Pia, click here
For the below example, a new sandbox "Pia Test Sandbox" has been created.

Step 2: Go to Package Editor and Create a New Package
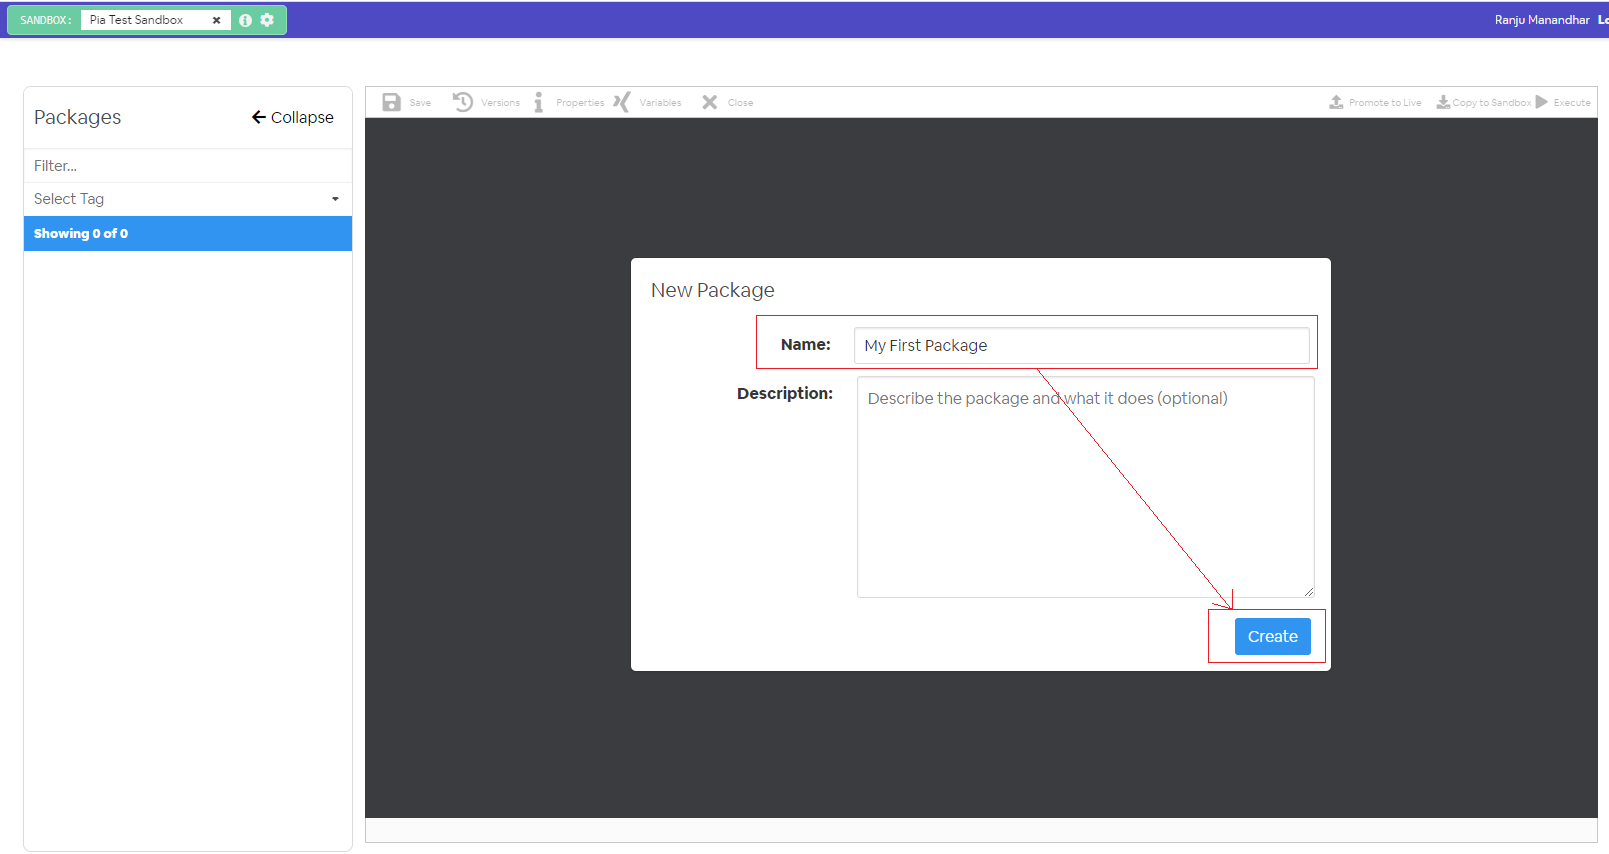
When you go to the Package Editor screen in the Sandbox Mode, you will see an option to create a new package.
Let's name the package "My First Package". You may or may not choose to add the description. Click "Create" to create the package.
Step 3: Edit Package Details
Once you've hit the 'Create' button, Pia will now take you to the Package Editor screen. In this screen, you will be able to see the following:
- The list of available packages on the left menu
- Package Editor section in center
- List of available conditions, activities and variables under three respective sections on the right menu
In the Package Editor section, you will see the a code snippet as below which can be edited or removed if not required.
# Orchestrator package
conditions:
- name: 'client_filter'
  optMode: 'OptIn'
  category: 'Testing'

steps:
- task: wait
  inputs:
    minutes: '5'
Package Conditions For this new package, we will be using the client filter condition and the chat interaction condition in the package. You can choose to add a different condition based on your requirement.
The package will now show as below:
# Orchestrator package
conditions:
- name: 'client_filter'
  optMode: 'OptIn'
  category: 'Testing'

- name: 'chat'
  option_button: 'Test Package'
  option_text: 'This is a test package.'
  option_category: 'Test Category'

steps:
- task: wait
  inputs:
    minutes: '5'
Package Activities Just like conditions, a list of available activities are displayed under the 'Activities' section at the right menu. You may select from the available activities or choose to create your own activity using the Activity Editor.
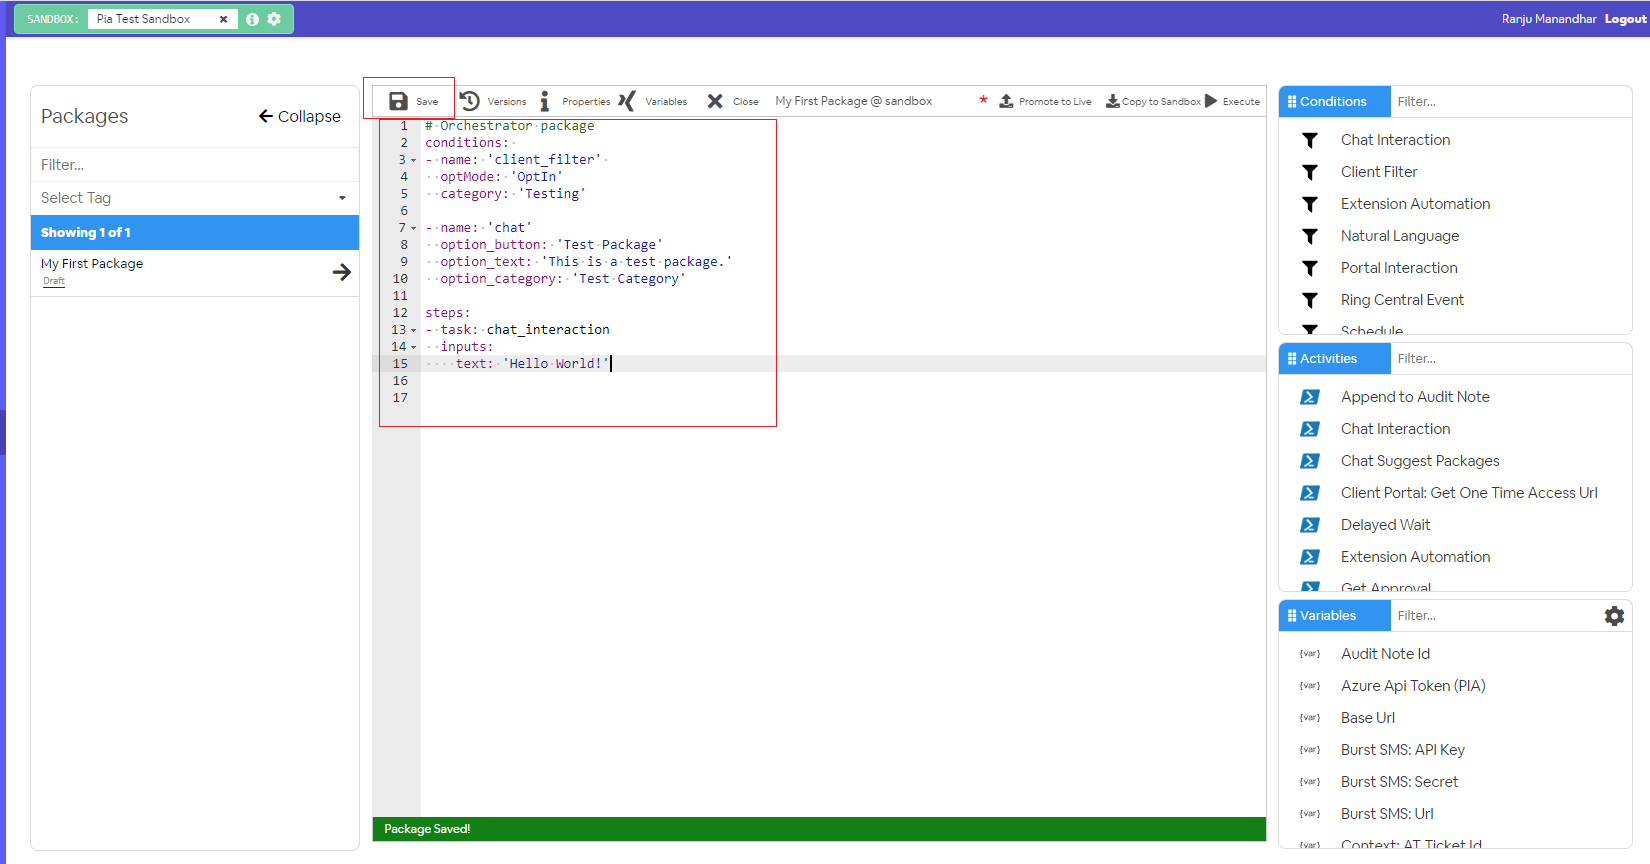
For this example, we will be using the chat interaction activity which is available in the Activities List to display a simple "Hello World!" message in the Pia chatbot.
# Orchestrator package
conditions:
- name: 'client_filter'
  optMode: 'OptIn'
  category: 'Testing'

- name: 'chat'
  option_button: 'Test Package'
  option_text: 'This is a test package.'
  option_category: 'Test Category'

steps:
- task: chat_interaction
  inputs:
    text: 'Hello World!'
Hit the save button and there you go! You have just created your first package.
Step 4: Creating forms to link to your package
If you want to make your package more interactive to the user, you can use different forms available in the Form Editor screen. Forms are mostly used in Pia package to:
- Receive Inputs from the user required for the automation
- Provide user with an ability to determine the flow of the package
You can either choose to link an existing form or create on new one based on your package requirement. For this example, let's create a new one.
Creating a new form To create a new form, go to form editor in your sandbox where you will see "New Form" section.
Fill in the name and static name of the form you want to create. You can make changes to the other option as per your requirement:
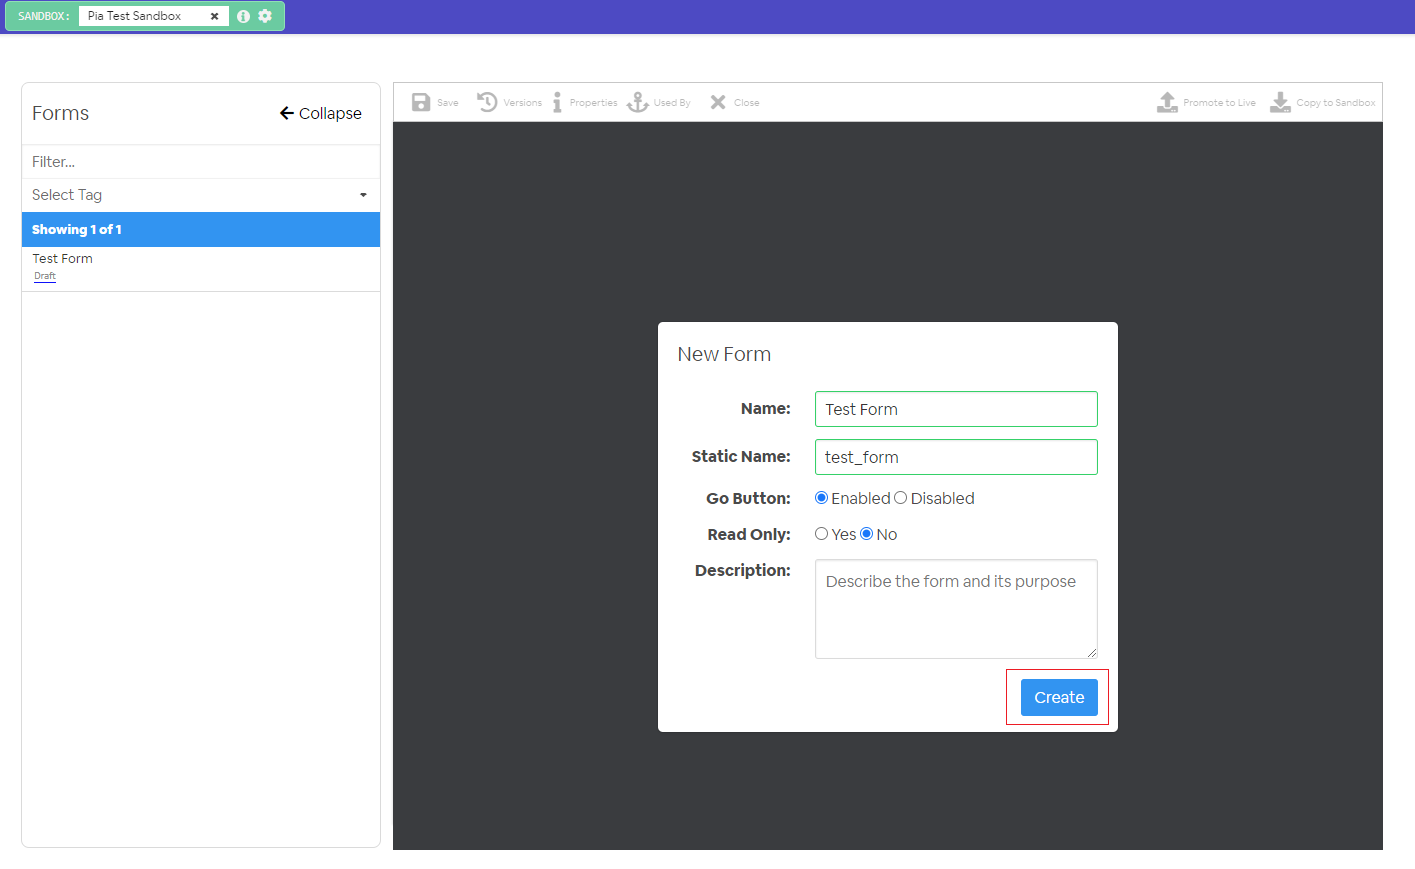
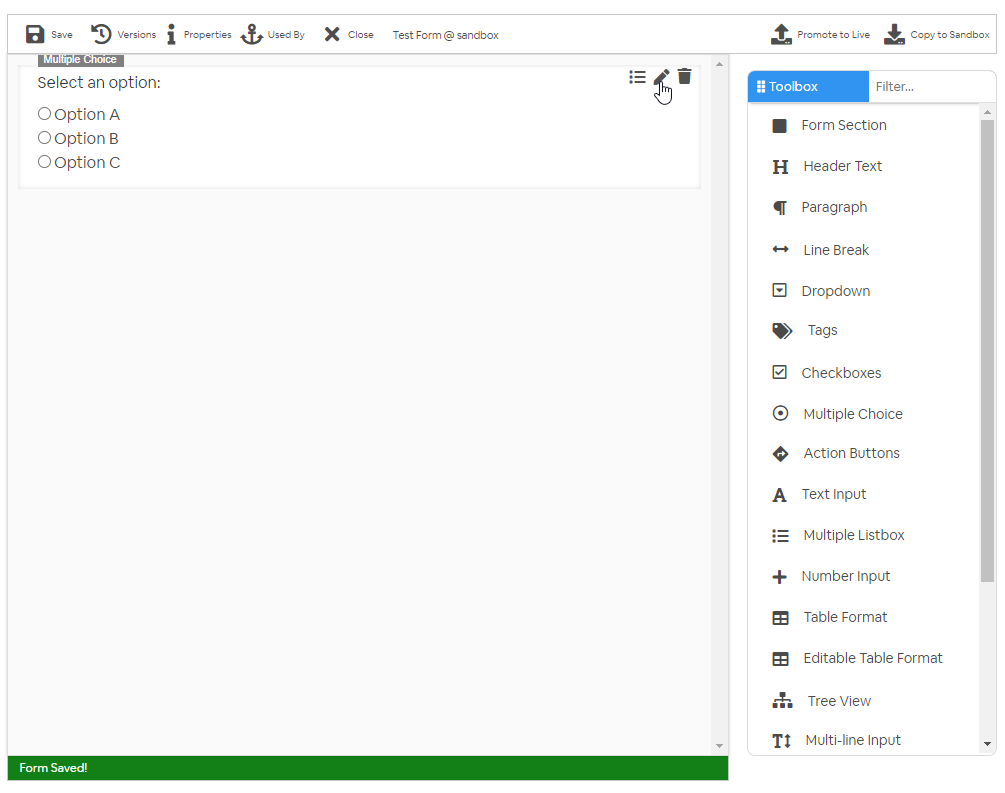
Once you click on the 'Create' button, you will be taken to the Form Editor screen where you can start editing your form. You can choose from multiple form tools depending on the type of input you want to receive from the user. Each form field, when hovered around, will also show three buttons which you can use to edit form field properties.
In this example, a multiple choice option has been used for the user to select between three options.
Step 4: Linking forms to your package
After the form has been created and saved, you can link your form to your package using the chat interaction activity.
Here, you need to add the static name of the form as the value for 'form_name' input property.
# Orchestrator package
conditions:
- name: 'client_filter'
  optMode: 'OptIn'
  category: 'Testing'

- name: 'chat'
  option_button: 'Test Package'
  option_text: 'This is a test package.'
  option_category: 'Test Category'

steps:
- task: chat_interaction
  inputs:
    text: 'Hello World!'
    form_name: 'test_form'
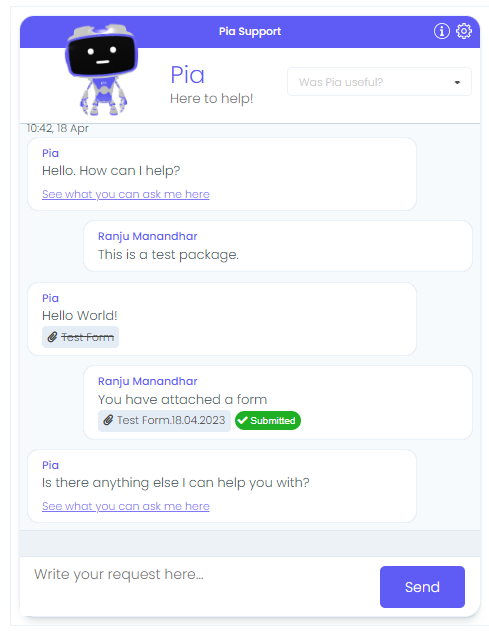
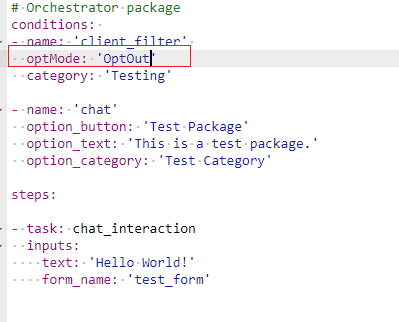
Step 5: Running the package in Pia Chatbot
Note 1: To run a package in chatbot, a valid ticket number rom your ticketing system is required. Note 2: To run your package in Pia chatbot (in Sandbox Mode), set the 'OptMode' in Client Filter Condition to 'OptOut' so that the package runs in sandbox mode for all the clients in your sandbox regardless of their OptIn/Out status.
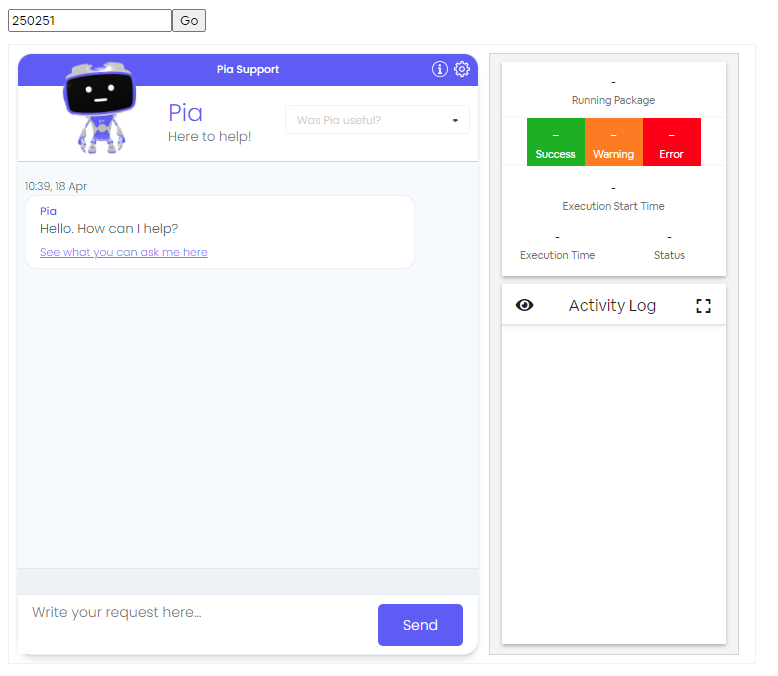
Go to the Pia chatbox screen and enter the ticket number at the ticket id section above the chatbot.
You can now search for your package clicking on "See what you can ask me here" link.
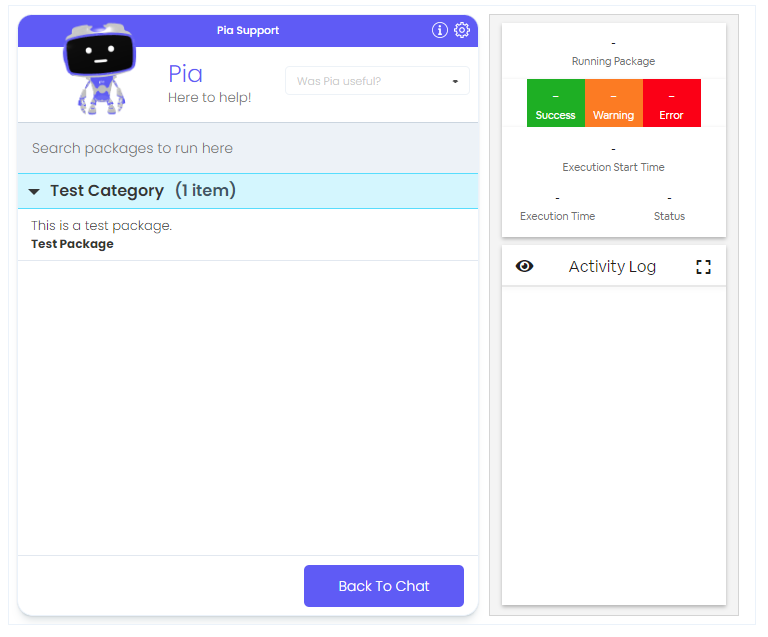
Select the package you have just created and Pia will run the package for you.