Workflow
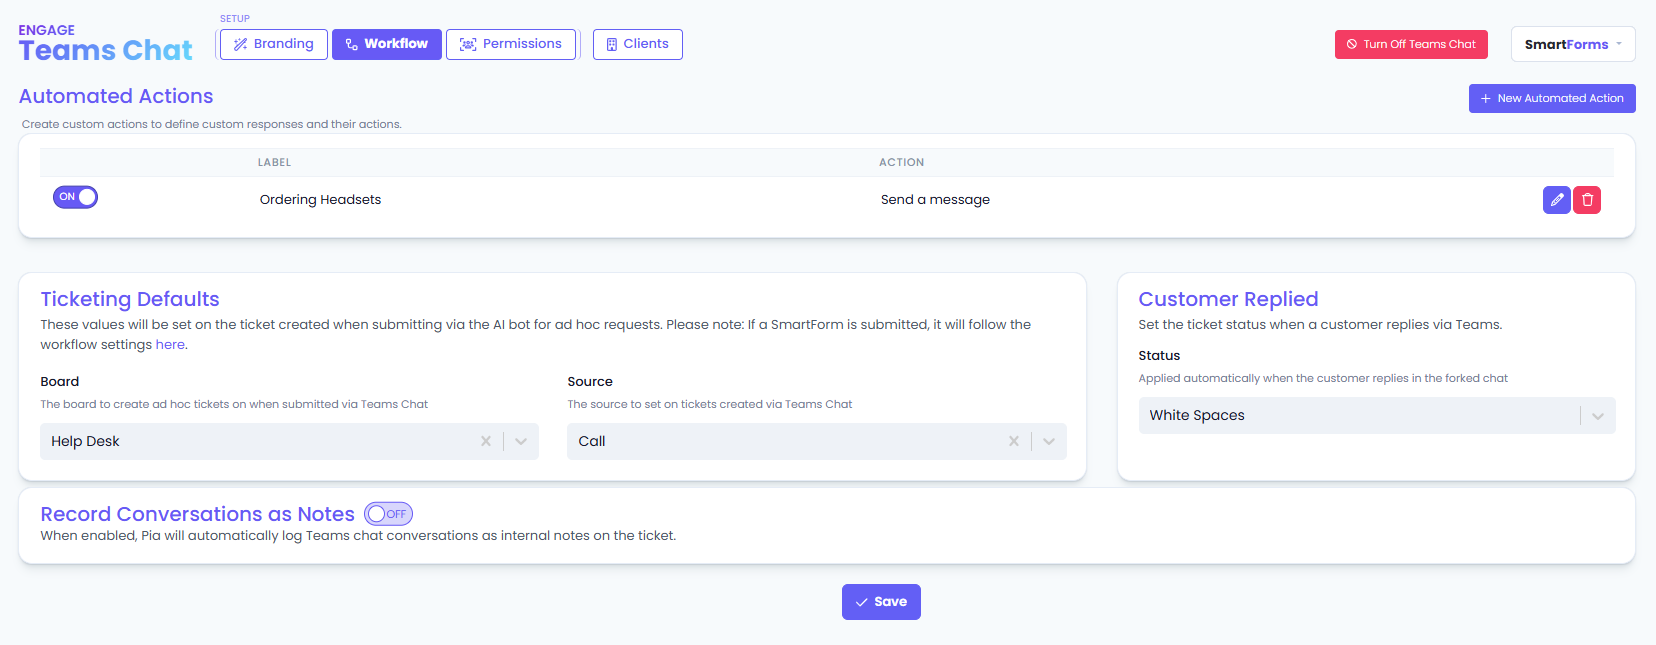
The Teams Workflow tab allows you to configure how tickets created from Teams conversations are managed. These options give you control over the customer experience inside chat, defining when clients interact with Pia’s Resolution Assistant and how the AI responds during those interactions at a global level that is applied across all clients or a client specific level.
Global Workflow
Getting to the Global Workflow settings
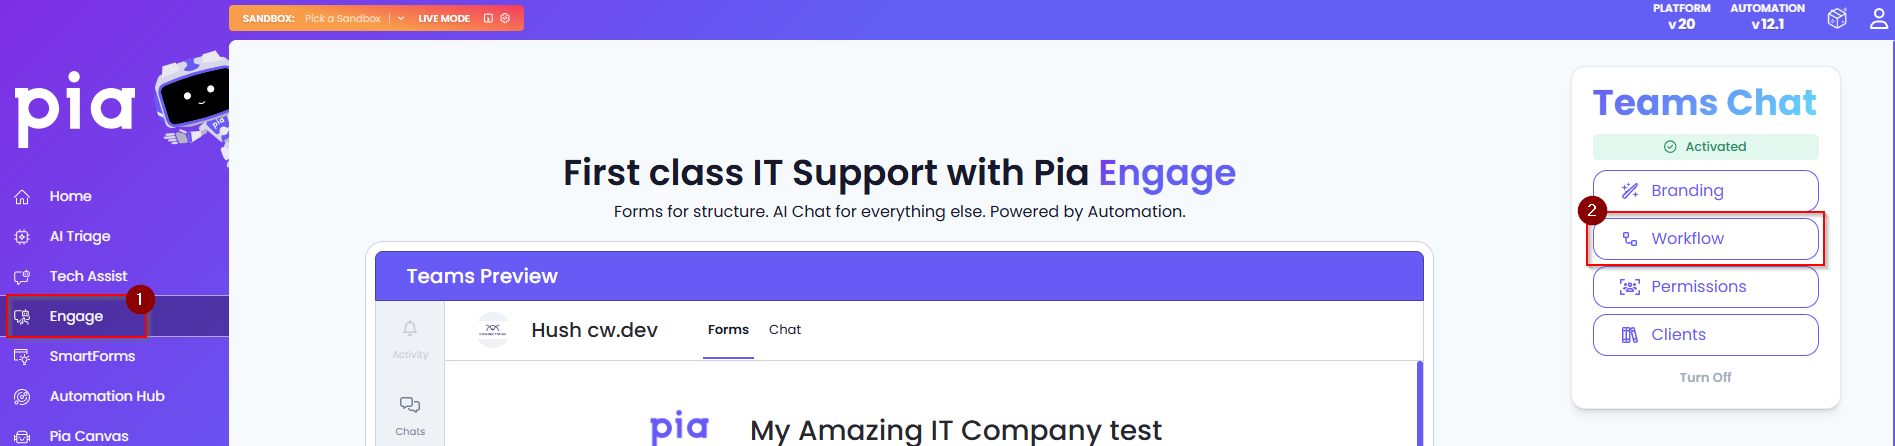
- Login to your Partner Portal and click on Engage on the left hand menu
- Click on the Workflow button on the right for Teams Chat
- Now you'll find all the global Workflow options
Client Workflow
Getting to the Client Workflow
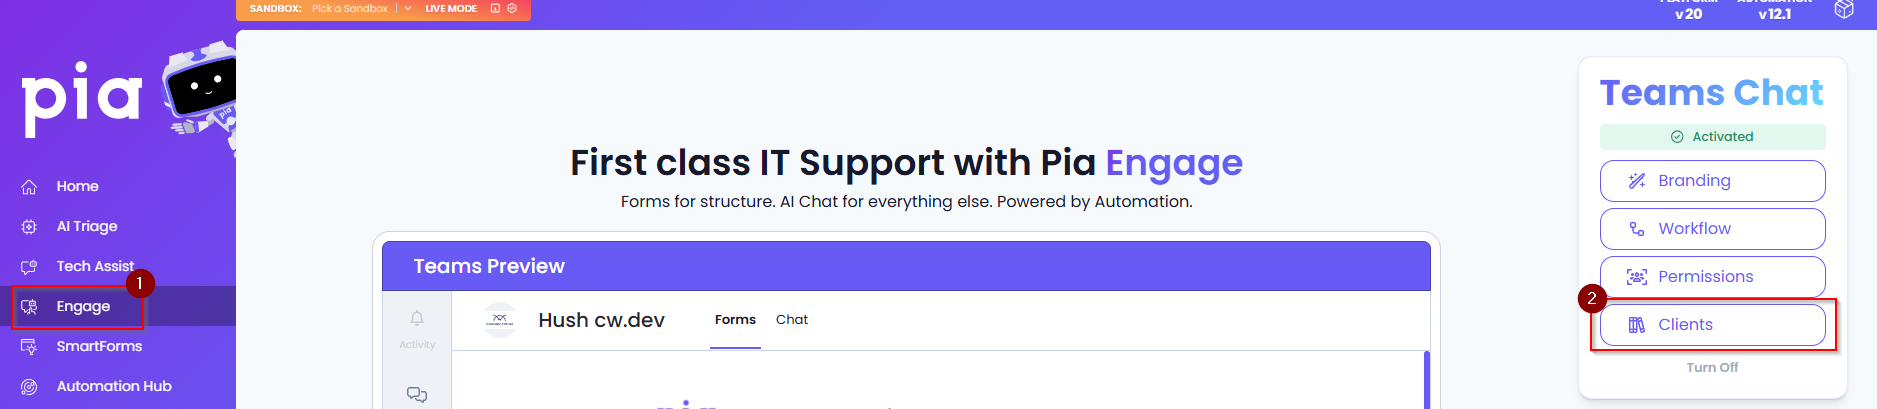
- Login to your Partner Portal and click on Engage on the left hand menu
- Click on the Clients button on the right for Teams Chat
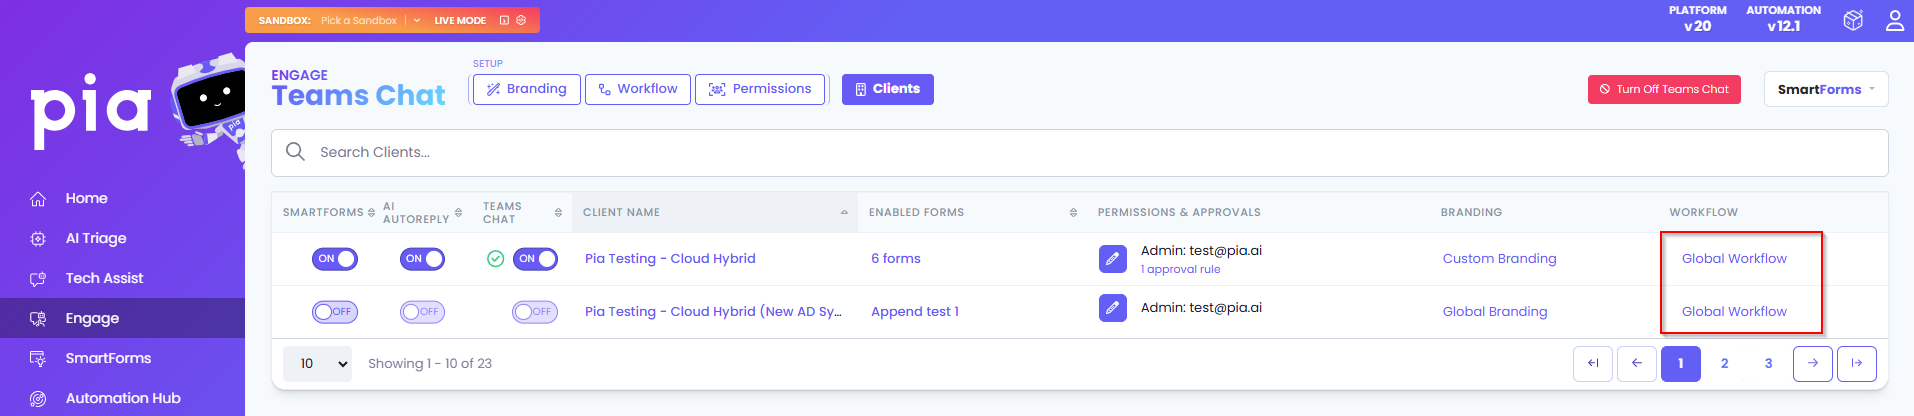
- Click on the Workflow column on the clients table
- Here, you'll find all the client specific workflow options
The Workflow column will have the value set to 'Global Workflow' if no client specific configuration has been made. In this case, the client will inherit all the global workflow rules (which can be kept or removed as required). If any client specific workflow changes have been made, the column value will show 'Custom Workflow'.
Automated Actions
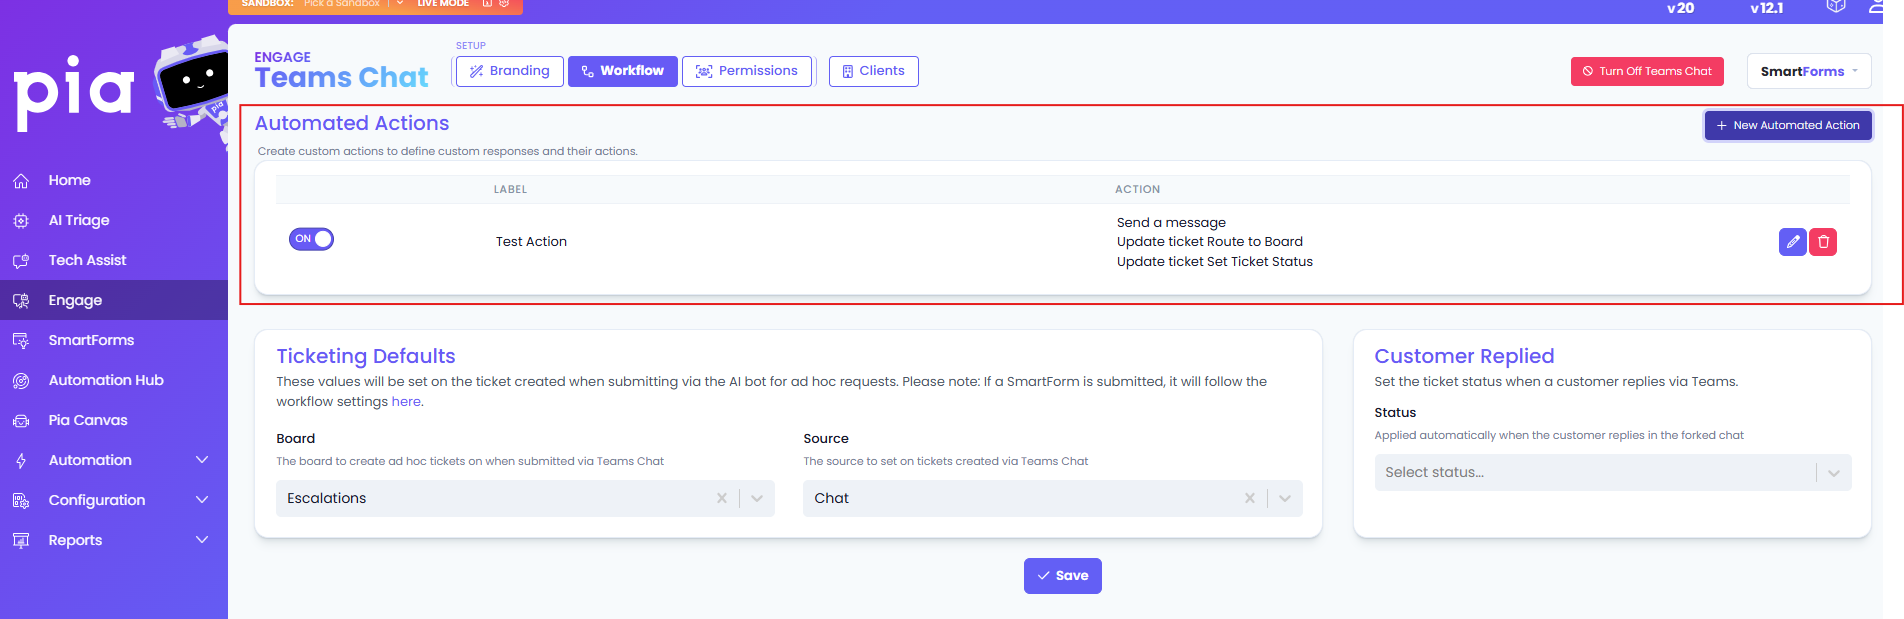
Automated Actions are tasks handled in Teams Chat by Pia when a client requests something. They are a combination of an intent and the action that will happen when that intent is matched. There are several actions that can be taken such as run an automation, serve a link such as knowledge article, setting values on a ticket etc. These can be setup both at a global level or per client level as needed.
Here are some examples of what you can do with automated actions:
- A user at your client is asking about how to setup line of business app on their mobile device, then you can use an automated action to serve them a public facing link of your knowledge article.
- When an organization admin or VIP requests that a ticket be prioritized, you can configure an automated action to adjust key ticket values such as setting the priority level, adding notes, and assigning the ticket to a designated staff member for escalation.
Setting up Teams Automated Actions
You can setup automated actions within the Workflow screen. To create a new automated action, follow the steps below:
Step 1: Click on the "New Automated Action" button. This will open a popup
Step 2: Fill out the fields as below:
- Automated Action Label: This is the name of the automated action
- Limit Automated Action to (Optional): Select a Client User Role the action will be limited to i.e. Pia will not run this action for users that are not part of this role
- Prompt Template: Select a template to help you define the prompt for your automated action. These templates provide guidance on how to structure the prompt, or you can simply use one as the ready-made prompt for your action
- Text box for Prompt: You can add your prompt for your automated actions here
- Actions button: Click on the plus (+) icon to select from the list of actions you can perform. You can select from:
- Send Link/Message: Add a link or message you want to display on the Teams chat for the request
- Start Background Automation: Select a pre-built Pia automation or a custom automation to run as a part of the request. Pia will create a PSA ticket and run the automation for this action
- Start Teams Automation: Select a Teams automation that will run as a part of this request. No PSA ticket is created for this type of automation. Click [here] to learn more about Teams automations
- Add a note: Add a note to a ticket as a part of the request
- Log a Ticket: Log a ticket as an action for the request
- Set Value on Ticket: Set a predefined value on the ticket as an action for the request. Here are the values you can modify via this action:
- Board
- Ticket Status
- Assignee
- Ticket Classification
- Ticket Custom Property
- Ticket Priority
- Ticket Category
- Ticket Team
- Ticket Company
- Ticket Contact
You can configure multiple actions for the same prompt by clicking on the plus (+) button.
- Automated Action Preview: This section will allow you to test your automated action right within the popup so that you know exactly how your configured automated action will work. All you need to do after adding details for your automated action is type a message in the box as a client would in Teams Chat and Pia will provide you with a list of AI Responses that the client will receive.
Ticketing Defaults
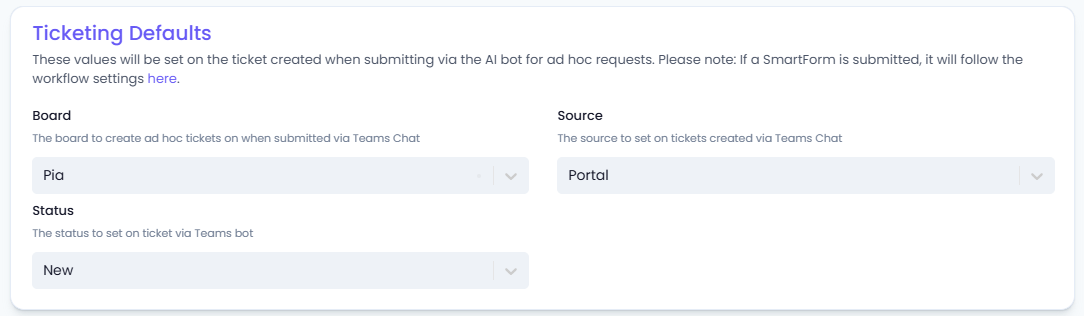
The Ticketing Defaults section provides you with a set of options to setup the default values for the tickets that are created within Teams chat.
SmartForms tickets, even when served within the Teams chat, still follow SmartForms Ticketing Defaults settings.
- Board: Select a board from your ticketing system where the ticket will be created for Teams requests.
- Source: Select a source of the request from your ticketing system which will be set on your Teams chat created ticket.
- Status: Select a status from your ticketing system which will be set on your Teams chat created ticket.
Customer Replied
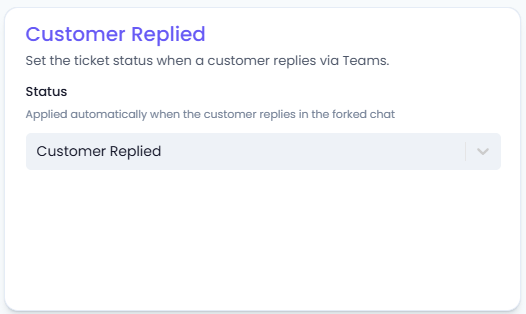
This is the status that gets applied automatically to your ticket when an end user responds in the ticket's dedicated chat. This status is set to inform your engineers that the customer has replied.
Record Notes as Conversations
This setting. when toggled ON, allows you to record your conversation as an internal audit note in your PSA ticket so that you don't have to open Teams to check your conversation history.
Here are the options available:
- Apply to: You can apply this rule to All Clients or Specific clients by clicking on 'Custom'
- When clicked on 'Custom', you can select the clients by clicking on the 'Select Clients' button
- Apply to new clients: Turn the toggle ON to automatically record conversations as notes for new clients
- Note window (minutes): Notes are posted in blocks of minute(s) selected in this section to limit the number of internal notes created in your ticket
