Challenge User Identity
Overview
Pia's Challenge User Identity automation and extension automation allows your Service Desk Engineer to authenticate a user before proceeding with their requests. Both built in automation and extension automation support the use of Microsoft Multi-Factor Authentication (MFA) as one of the three methods for secure user verification. The other options include SMS and Email.
This document details how to configure the Microsoft MFA so that it can be used for user identification during automation execution.
Pia also offers Challenge User Identity via Duo automation, which you can learn more about by clicking here.
Configuring Microsoft MFA Integration
The first step for the Microsoft MFA configuration is to setup a custom integration for Microsoft MFA in the Integration screen of the Partner Portal.
Follow the steps below to create a custom integration for Microsoft MFA:
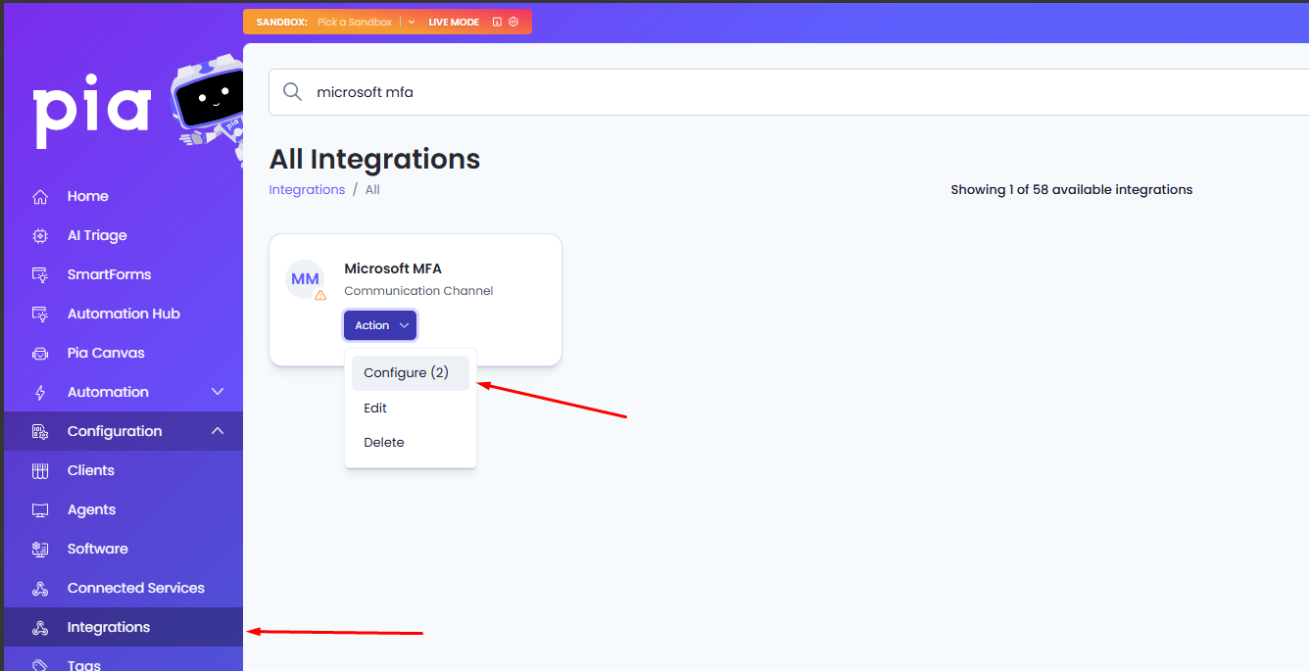
Step 1: Go to the Integrations screen and click on 'Custom Integration'. Step 2: Add the following values into the fields:
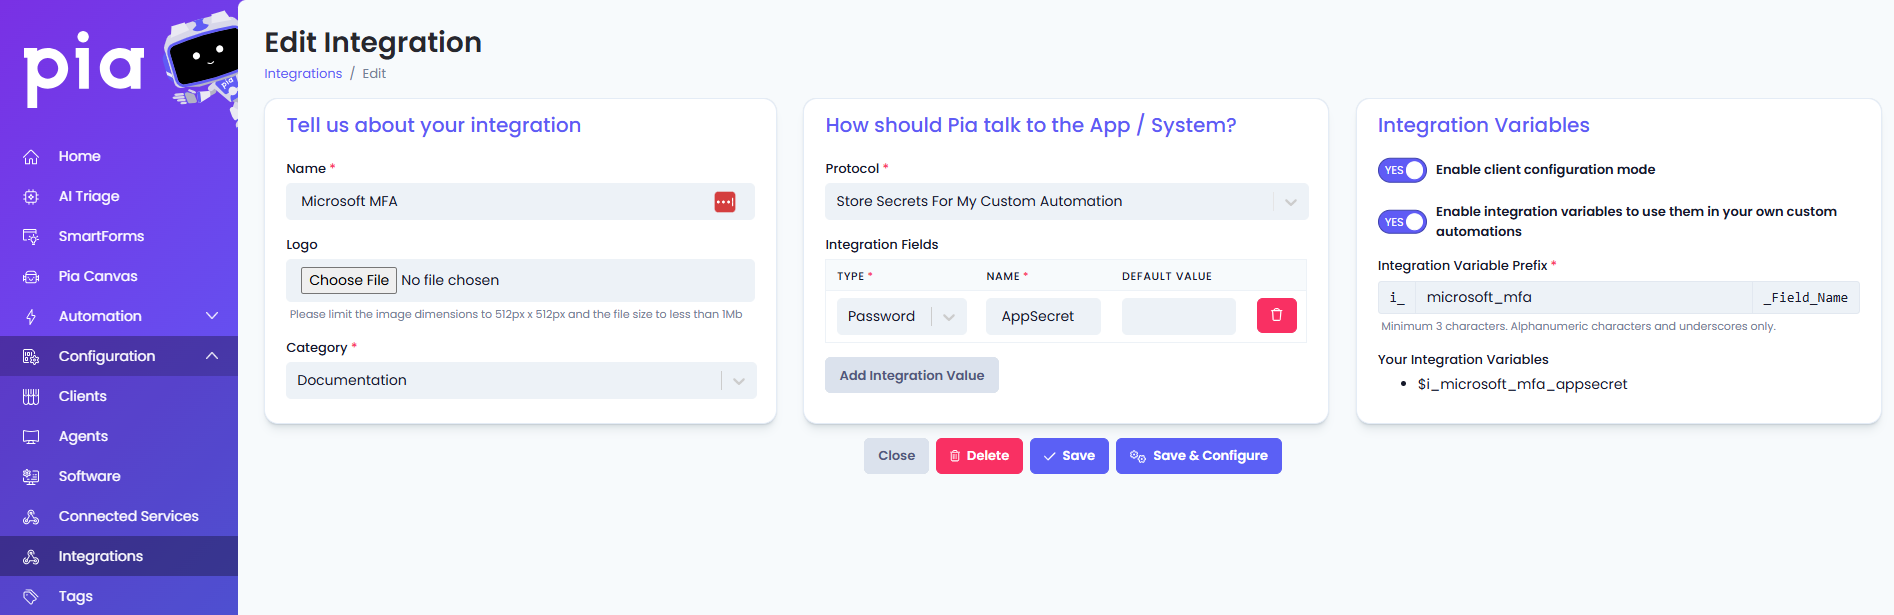
Tell us about your integration
- Name: Set a meaningful name such as 'Microsoft MFA'
- Category: Documentation
How should Pia talk to the App / System?
- Protocol: Store Secrets For My Custom Automation
- Integration Fields:
- Type: Password
- Name: AppSecret
Integration Variables
- Toggle ON 'Enable client configuration mode'
- Toggle ON 'Enable integration variables to use them in your own custom automations'
- Integration Variable Prefix: microsoft_mfa
Step 3: Once done, Save your settings.
Confirm Delegated Accounts on the Client
The second step for the Microsoft MFA configuration is to ensure Pia can generate Application Secret (AppSecret) values for each client when the automation is running.
In order for Pia to be able to generate the Application Secret, follow the steps below:
Step 1: Go to Clients screen and select a client you wish to run the automation for
Step 2: In the Microsoft Graph API widget, click on the 'Delegate' button
Step 3: Confirm if the client has 'Azure user_impersonation' permission assigned to them
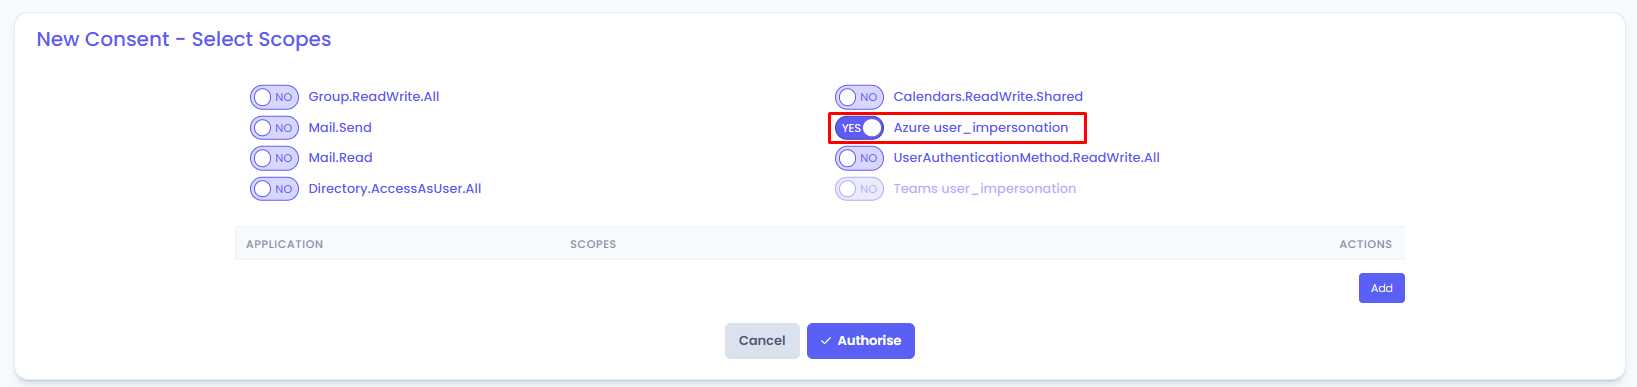
Step 4: If not, click on 'New Consent'
Step 5: Enable the 'Azure user_impersonation' scope and click 'Authorize'. You must authorize with an Azure "Global Administrator" to be able to generate the Application Secret Automatically as the automation runs. If you don't want to use a Global administrator please see the section below on how to manually setup this up for each client.
Once done, you will be able to find the Microsoft MFA option during the execution of the Challenge User Identity automation and extension automation.
Script to create an Application Secret manually
Click to view the script
$PSGallery = Set-PackageSource -Name PSGallery -Trusted:$true -Force -Confirm:$false
$PSGet = $(Get-InstalledModule -Name 'PowerShellGet' -AllVersions -ea SilentlyContinue | Sort -Property PublishedDate -Descending | Select -First 1).Version
Write-Host "PSGallery Version: $PSGet"
if($null -ne $PSGet -and $PSGet -lt '2.2.5'){
    Write-Host "Installing PowerShellGet Version 2.2.5"
    $InstallPSGet = Install-Module -Name 'PowerShellGet' -MinimumVersion '2.2.5' -Scope AllUsers -AllowClobber -Force -Confirm:$false
}

$requiredModules = @(
    "Microsoft.Graph.DirectoryObjects"
    "Microsoft.Graph.Applications"
    "Microsoft.Graph.Authentication"
)

foreach($module in $requiredModules) {
    if($null -eq $(Get-InstalledModule -Name $module -MinimumVersion 2.24.0 -ea SilentlyContinue)) {
        Install-Module -Name $module -MinimumVersion 2.24.0 -AllowClobber -AcceptLicense -Force -Confirm:$false -SkipPublisherCheck
    }
}

$MFAAppID = '981f26a1-7f43-403b-a875-f8b09b8cd720'

Connect-MgGraph -Scopes 'Application.ReadWrite.All' -NoWelcome

$ServicePrincipal = (Get-MgServicePrincipal -Filter "appid eq '$MFAAppID'") | Select -First 1

function GetMfaAppToken($secret, $tenantId, $appId){
    $body = @{
        'resource' = 'https://adnotifications.windowsazure.com/StrongAuthenticationService.svc/Connector'
        'client_id' = "$appId"
        'client_secret' = "$($secret)"
        'grant_type' = "client_credentials"
        'scope' = "openid"
    }

    $mfaAppToken = Invoke-RestMethod -Method 'POST' -Uri "https://login.microsoftonline.com/$tenantId/oauth2/token" -Body $body -UseBasicParsing
    return $mfaAppToken
}

if($null -eq $ServicePrincipal){
    try{
        $ServicePrincipal = New-MgServicePrincipal -AppId $MFAAppID
    }catch{
        Write-Warning $($_.Exception.Message)
    }
}

if($null -ne $ServicePrincipal){
    $params = @{passwordCredential = @{DisplayName = "MFAPassword"}}
    try{
        $SPPass = Add-MgServicePrincipalPassword -ServicePrincipalId $ServicePrincipal.Id -BodyParameter $params -ea Stop
    }catch{
        Write-Warning $($_.Exception.Message)
    }
    if($null -ne $SPPass){
        $tenantId = $(Get-MgContext).TenantId
        Start-Sleep -Seconds 15
        $mfaToken = GetMfaAppToken -secret $($SPPass.SecretText) -tenantId $tenantId -appId $MFAAppID
        if($null -ne $mfaToken.access_token){
            Write-Host "Confirmed newly generated App Secret."
            Write-Host "Please store this in against the Integration for the Client."
            Write-Host "App Secret: $($SPPass.SecretText)" -ForegroundColor Green
        }
    }
}
From here you can copy out the generated App Secret and provide it within the Microsoft MFA integration configuration for the client which the secret was generated for.
Select the client from the dropdown list, then provide the App Secret.
