Installing a PiaPack
With the Automation Hub, you now have the ability to browse through a wide range of PiaPacks and install the ones that suit your workflow.
The new Pia Automation Hub Installation experience will:
- Present complete information about each automation without ever leaving the Pia tenant to help you better understand why the automation is exists, what problem the automation is solving and how it is solving the problem.
- Guide you through a step-by-step installation process to ensure clarity, consistency and speed up the rollout of automations to your clients by:
- Bringing all the relevant set up steps for the PiaPack into a single location
- Offering bulk configuration options for delegates, client selections, extension points, and package settings etc
- Clarifying which clients have been configured at a glance
- Give you the control to install to a sandbox and build upon what we have written or make it Live to get value out of the PiaPack straight away
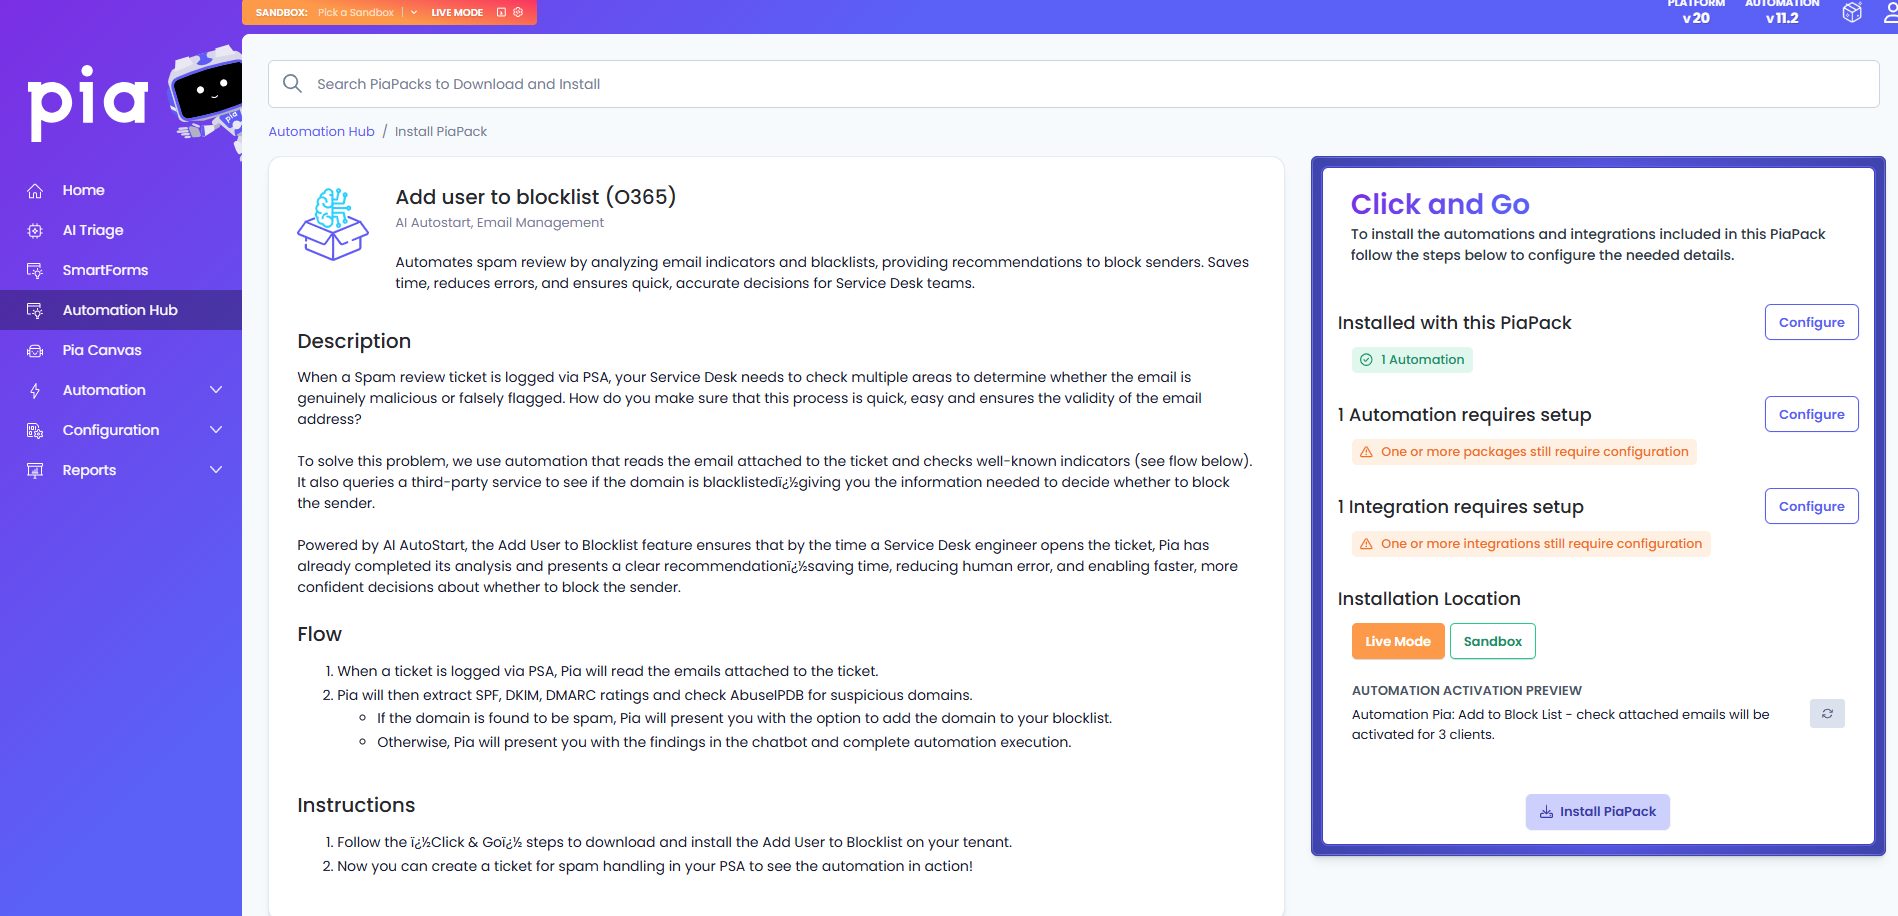
To Install a PiaPack, simply click on the Install button beside your selected PiaPack. This will take you to a new screen where you will be presented withe extra information about your selected PiaPack on the left and the step by step process to install it on the right.
Click and Go Section
The Click and Go section includes all the required configuration you need to make before you can successfully install the PiaPack on your tenant.
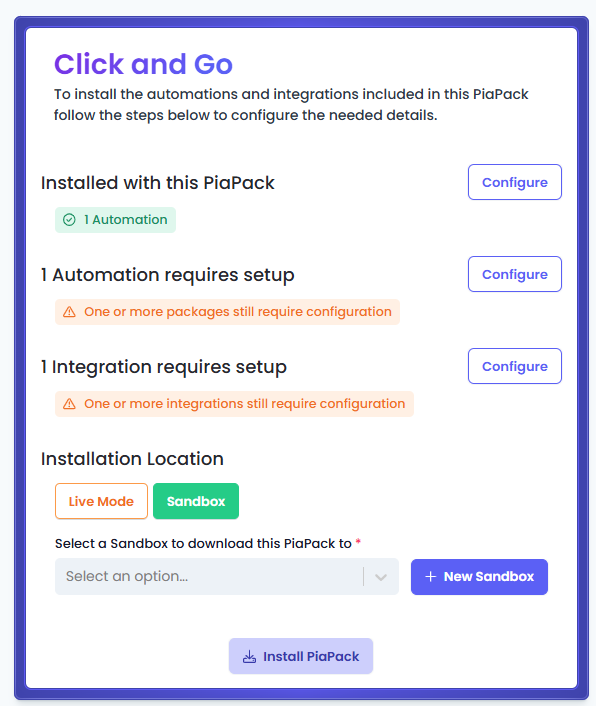
This section will show you the relevant setup steps required for your PiaPack. For example: If the PiaPack includes an integration then you will be prompted for setting up that integration as required by the PiaPack.