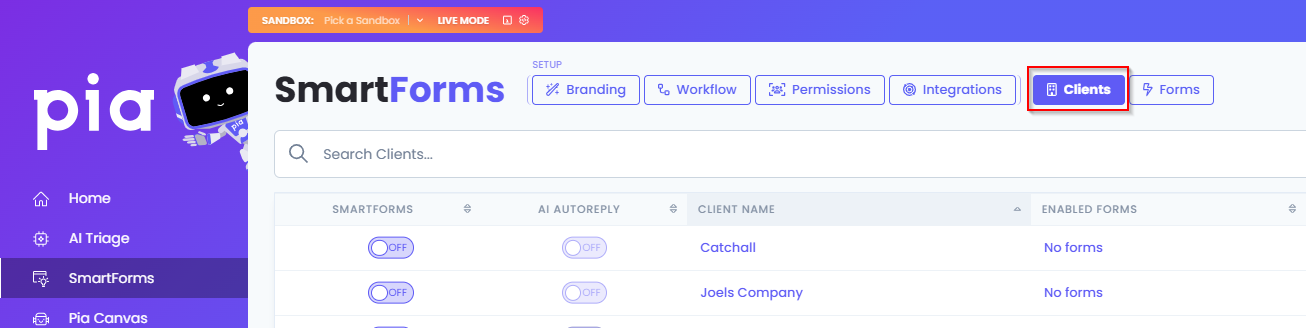
Clients
In order for your clients to be able to use SmartForms and Pia Chat, you need to configure your clients in the Engage section of your Partner portal.
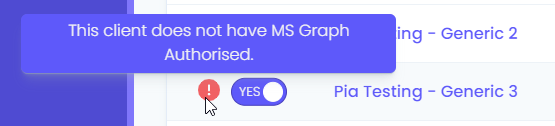
You can only enable SmartForms and Pia Chat for clients which have Microsoft Graph Authorization. To learn more on Microsoft Graph API Authorizations, refer to this article.
Use the Clients Tab to configure Pia Chat and SmartForms for your clients. On this page, you will be able to toggle Pia Chat or SmartForm ON or OFF, Select the SmartForms to enable for your clients, Set the customer specific configuration for approvals, permissions, Teams branding and Teams workflow.
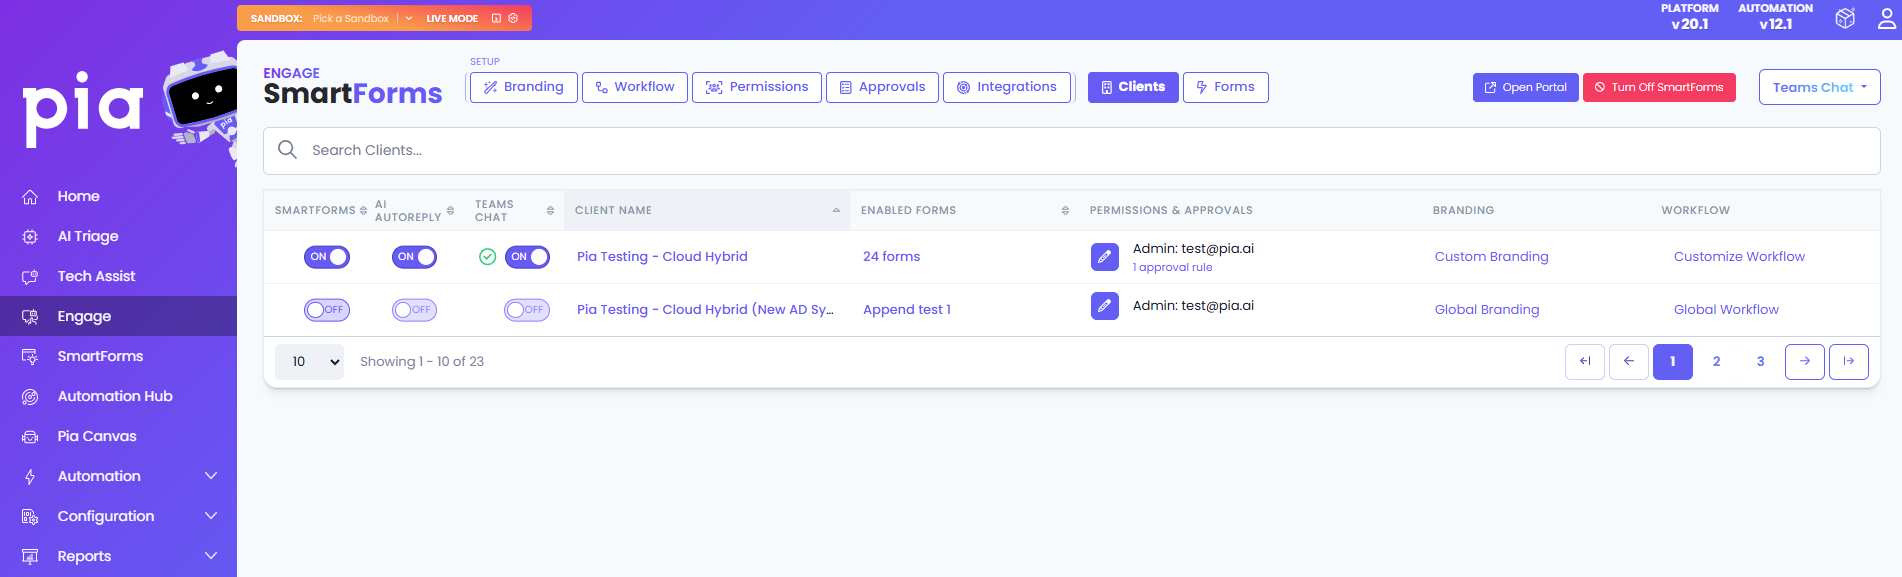
Open Portal: Click on this button at the top right to open the SmartForms portal. This button is ONLY available when you're in the SmartForms section
SmartForms: Toggle this ON or OFF to enable or disable the SmartForms Portal for your clients. If the client you are attempting to turn ON SmartForms for does not have MS Graph authorization, an error will be displayed:
AI AutoReply: Toggle this ON or OFF to enable or disable AI AutoReply for your clients. When this is ON, an automated email guiding the user to the SmartForms portal is sent every time they submit a request through email that can completed via SmartForms.
Teams Chat: Toggle this ON or OFF to enable or disable Pia Chat for your clients. If the client you are attempting to turn ON Pia Chat for does not have MS Graph authorization, this toggle will be disabled.
Client Name: Clicking on each client in this list will take you to the Clients dashboard where you can edit the client details in Pia.
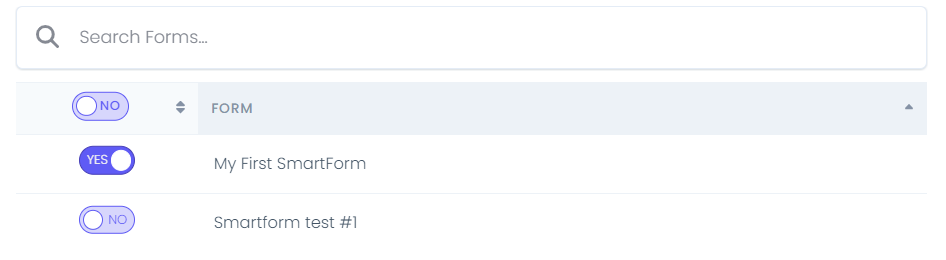
Enabled Forms: Click on the link to toggle ON or OFF individual forms for your clients.
Note: This will determine which forms your clients can see in the SmartForms Portal. However, you will still need to configure individual user permissions for the forms in the SmartForms settings screen.
Client Permissions Setup
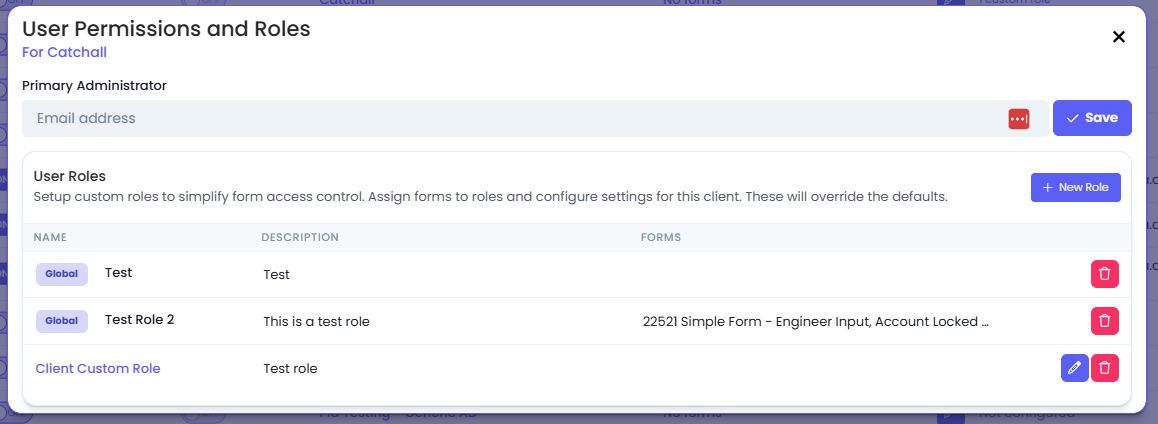
You can configure SmartForms permissions specific for your clients on the Permissions column of the table. When the value on the Permission column is clicked, a pop-up will appear that allows you to configure the following:
Primary Administrator
Set the Primary Administrator to your primary point of contact or admin user for your clients.
User Roles
Create custom roles to manage user access to the SmartForms by clicking on the "New Role" button within the pop-up. These roles can be deleted using the delete icon and edited using the edit icon.
This section allows you to create custom roles on a client level. However, you can also create and manage custom roles on a global level that automatically applies to all clients by going to the Permissions Tab.
User Sync
You can create custom sync rules for your clients to sync their contact types into the specified client role using the User Sync section. To create a new sync rule, click on the "New Sync Rule" button available at the top right of the table. This should open a pop-up with the following options:
- Contact Types to Sync From: This is the ticketing system contact type(s) that you wish to be assigned with the defined custom role
- SmartForms Roles to Sync into: This is the custom role into which the contacts will be synced into
- Scheduled Sync Time: Define the time when the sync will execute each day
- Last Synced Date
- Sync Status
This section allows you to create custom sync rule on a client level. However, you can also create and manage sync rules on a global level that automatically applies to all clients by going to the Permissions Tab.
Additionally, you can also manage your custom user sync rule with the following options available on the table:
- Toggle to Turn the Rule ON or OFF
- Sync Now button: You can start the Sync without opening the rule by pressing on the button available on the row for each Sync rule
- Edit button: Edit your existing or newly saved rule by clicking on the Edit icon
- Delete button: Delete your Sync rule by clicking on the delete icon
Pia Chat Branding
Refer to this article for Teams Chat Branding.
Teams Chat Workflow
Refer to this article for Teams Chat Workflow.
Using SmartForms outside of Teams Chat
Once the configuration is complete, you can provide a link to the SmartForms Portal to your clients which they can use to submit IT requests. You can do so by going into the SmartForms screen of your Partner Portal and clicking on the "Open Portal" button in the right corner beside the "Turn off SmartForms" button.
This will open the SmartForms portal for you where you can copy the URL to send to your clients.
The format of the link to the SmartForms Portal will be similar to the link format of your Partner Portal:
- https://tenantname.pia.ai - This is the URL of the Pia Partner Portal that you use
- https://tenantname.forms.pia.ai - This is the URL of the SmartForms Portal that your clients will use