Microsoft Graph API Authorisation
For each client, the Microsoft Graph API Authorisation for Pia must be granted against their Azure Tenant.
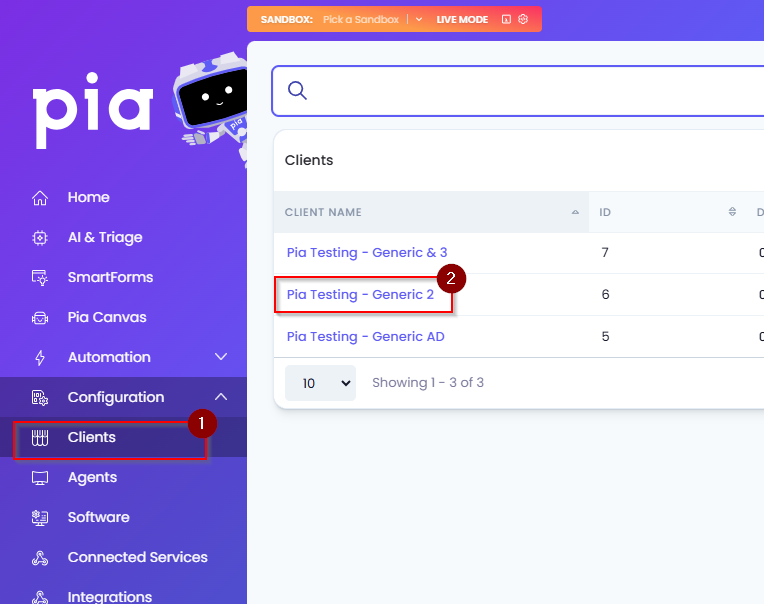
- In the Pia Tenant, click on "Clients" and select a Client to be authorised.
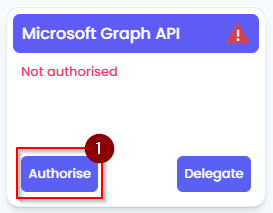
- On the Client Dashboard, click on the green “Authorise” button on the Microsoft Graph API tile.
You will be taken to a Microsoft 365 sign-in page, sign in with the Client’s Microsoft 365 credentials.
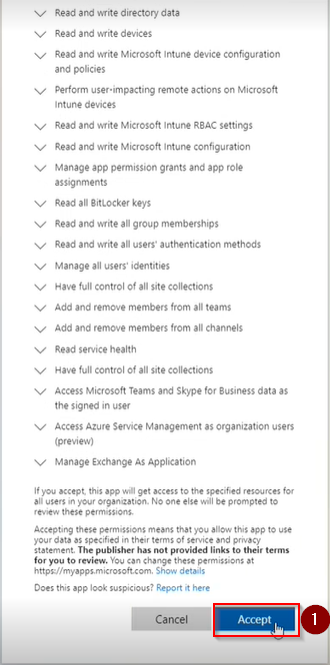
You will be presented with a list of permissions to be approved for Pia’s functionality, scroll to the bottom of the list and click “Accept”.
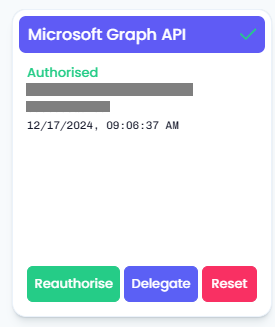
- Refresh the page and the Microsoft Graph API tile will show an “Authorised” status.
Troubleshooting
In rare events, you may observe that one of your Clients is failing the Microsoft Graph API authorisation. This behaviour may show as any of the following:
- The "Accept" permissions window shown above in Step 5 does not appear after entering in Office 365 Global Admin credentials.
- Clicking the "Accept" button for the permissions does not turn the Microsoft Graph API tile to a green colour with an "authorised" status, even after repeated attempts.
This sometimes happens if the Office 365 tenant is new or, they don’t use Teams/have any licenses with Teams entitlements. What this means is that the Service Principal for Microsoft Teams is missing from the Office 365 tenancy.
We can forcefully create the Service Principal via Powershell however, instructions are below.
- Start Powershell as an Administrator.
- Install the Az module if not already installed, the command for this is below;
$ProgressPreference = 'SilentlyContinue'; Invoke-WebRequest -Uri https://aka.ms/installazurecliwindows -OutFile .\AzureCLI.msi; Start-Process msiexec.exe -Wait -ArgumentList '/I AzureCLI.msi /quiet'; rm .\AzureCLI.msi
- After the module installs, close Powershell and run again as Administrator.
- Enter the command
Az login
- A browser window/tab should appear with a Microsoft 365 sign-in page.
- Log in with the Global Admin credentials for the tenant.
- After logging in, return to the Powershell window.
- Enter the command
az ad sp create --id 48ac35b8-9aa8-4d74-927d-1f4a14a0b239
- The Service Principal should now be created.
- Wait 5-10mins and try the MS Graph API authorisation again.
Microsoft Graph API Delegation Consent
The ability to reset passwords of users in Office 365 requires additional permissions which are not part of the Microsoft Graph API authorisation. We recommend configuring this for all Clients with Office 365, even ones which have Azure AD Connect to sync password hashes from on-prem.
- Click on the “Delegate” button on the Microsoft Graph API tile.
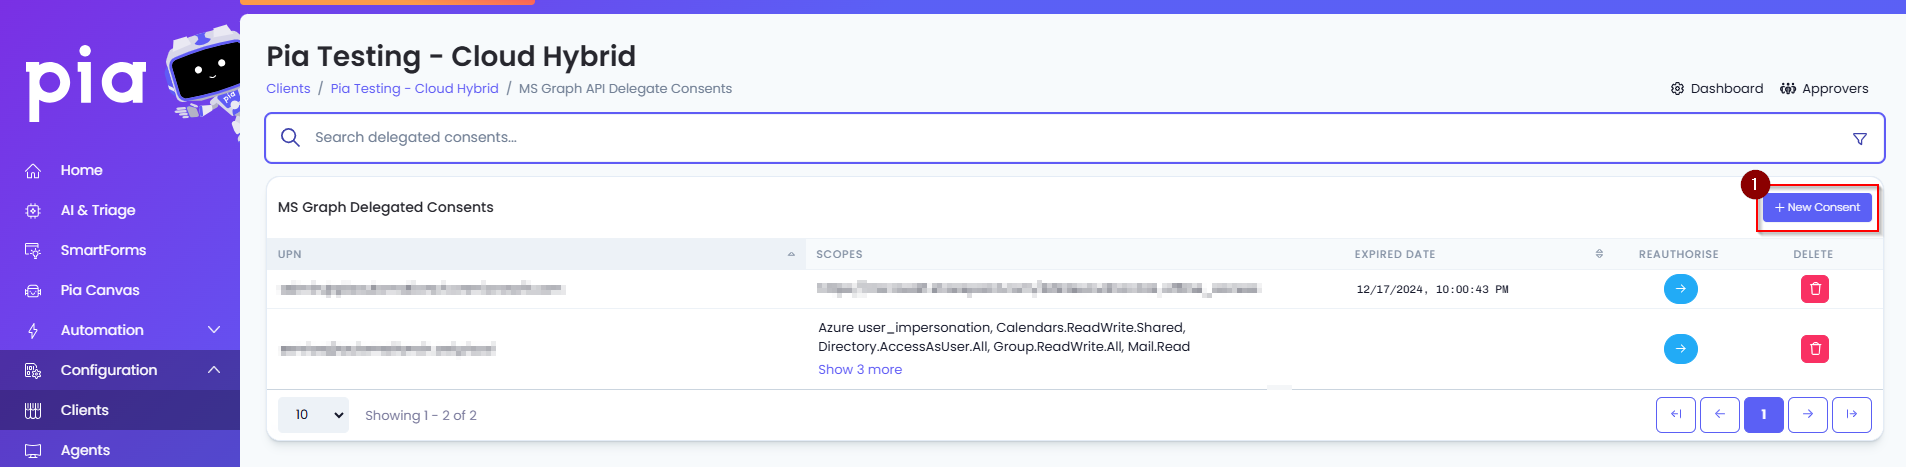
- Click on the "New Consent" button.
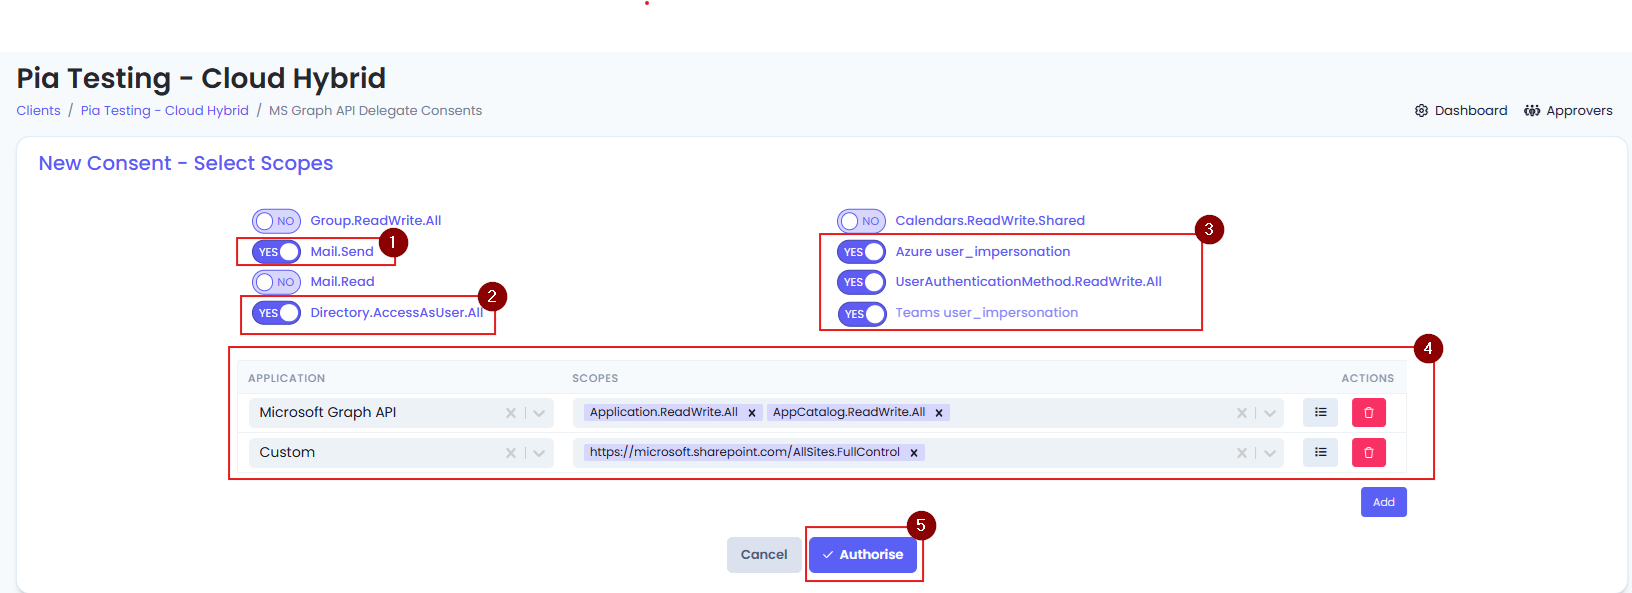
- To use the full Pia platform, you only need to grant the permissions that match the features you plan to enable. Below is a simple breakdown so you can choose the right access for your organization.
Core Permissions (Required for all Pia Products)
These permissions power Tech Assist, Engage (Pia Chat) and Automation Hub:
- Mail.Send
- Azure user_impersonation
- UserAuthenticationMethod.ReadWrite.All
- Directory.AccessAsUser.All
Additional Permissions for Automation Hub
Only required if you plan to use the following PiaPacks:
- Challenge User Identity — Application.ReadWrite.All
- OneDrive Data Management — https://microsoft.sharepoint.com/AllSites.FullControl
Additional Permissions for Pia Chat
To unlock the full Pia Chat experience, enable the above permissions plus:
- AppCatalog.ReadWrite.All
Optional (If you want to use Teams left‑rail pinning feature):
- teams/user_impersonation
Once you've selected the required permissions, click "Authorise".
You will see a Microsoft 365 log-in page, enter in the Client’s Microsoft 365 credentials into the prompt.
You will be taken back to the Client Dashboard for the Client again.
Click on the "Delegate" button again.
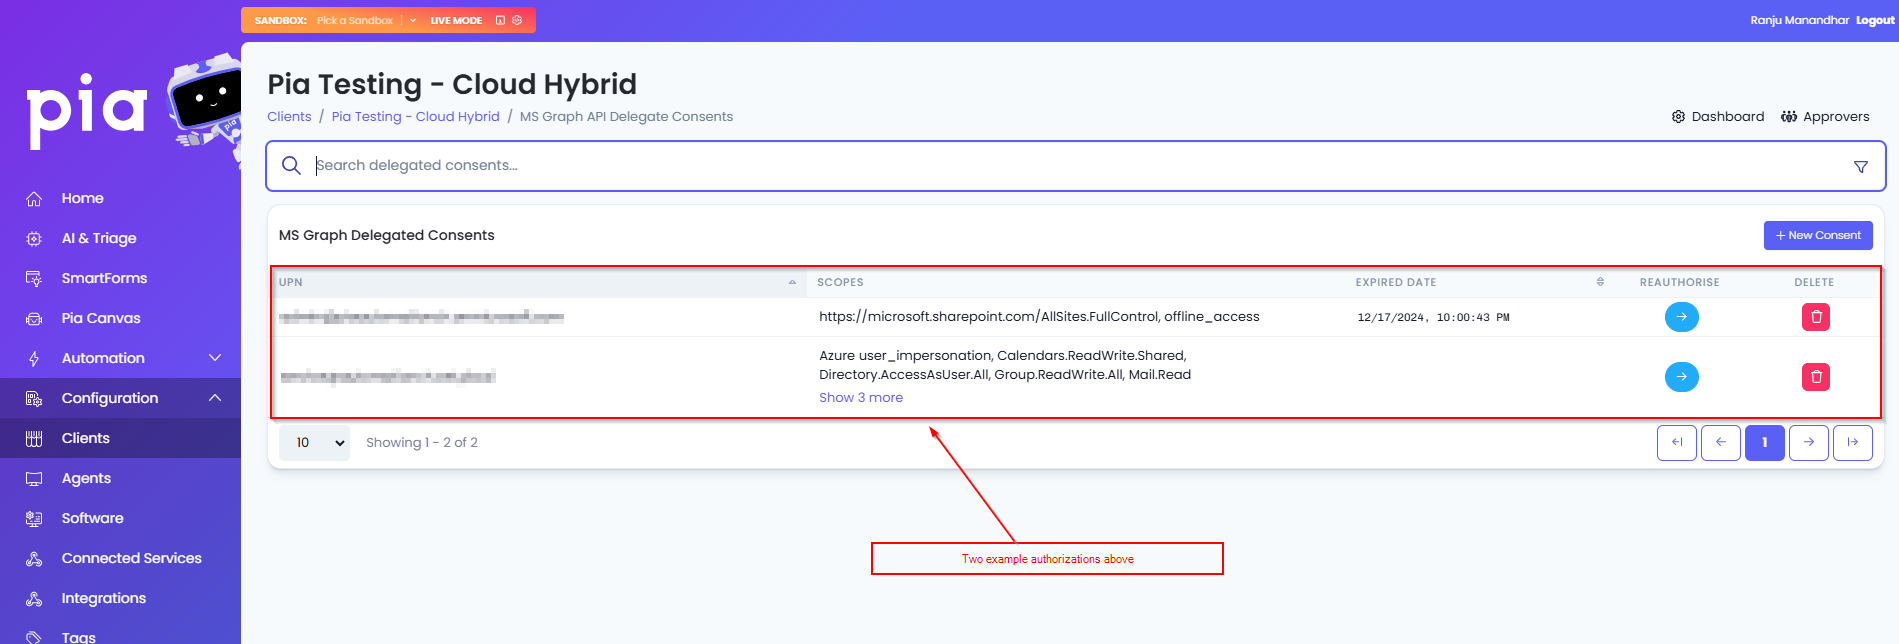
You should now see the delegated consents page with the user you entered credentials for in Step 4 in the list.
Additional Consent for custom automations
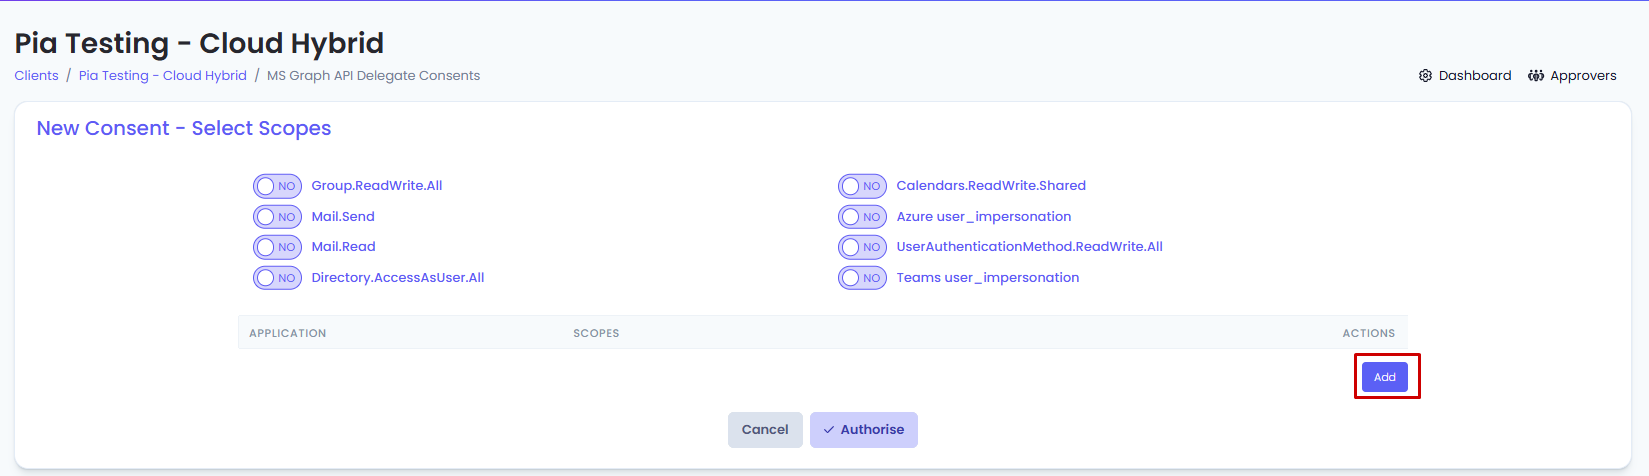
The above scopes are required by Pia for its built-in automation. However, you can also assign additional scopes to Pia for your custom automations. You can add these scopes by selecting from commonly used applications and scopes available in the table just below the toggles.
To add a new scope in your consent:
- Click on the "Add" button in the table
- From the first drop-down, select the Application and from the second drop-down, select the relevant scopes.
For custom scopes, you can select 'Custom' from the Application drop-down and add one or multiple scopes in a comma separated format in the Scopes text box.
The name of the custom scope added should be EXACT match to the name defined by Microsoft.
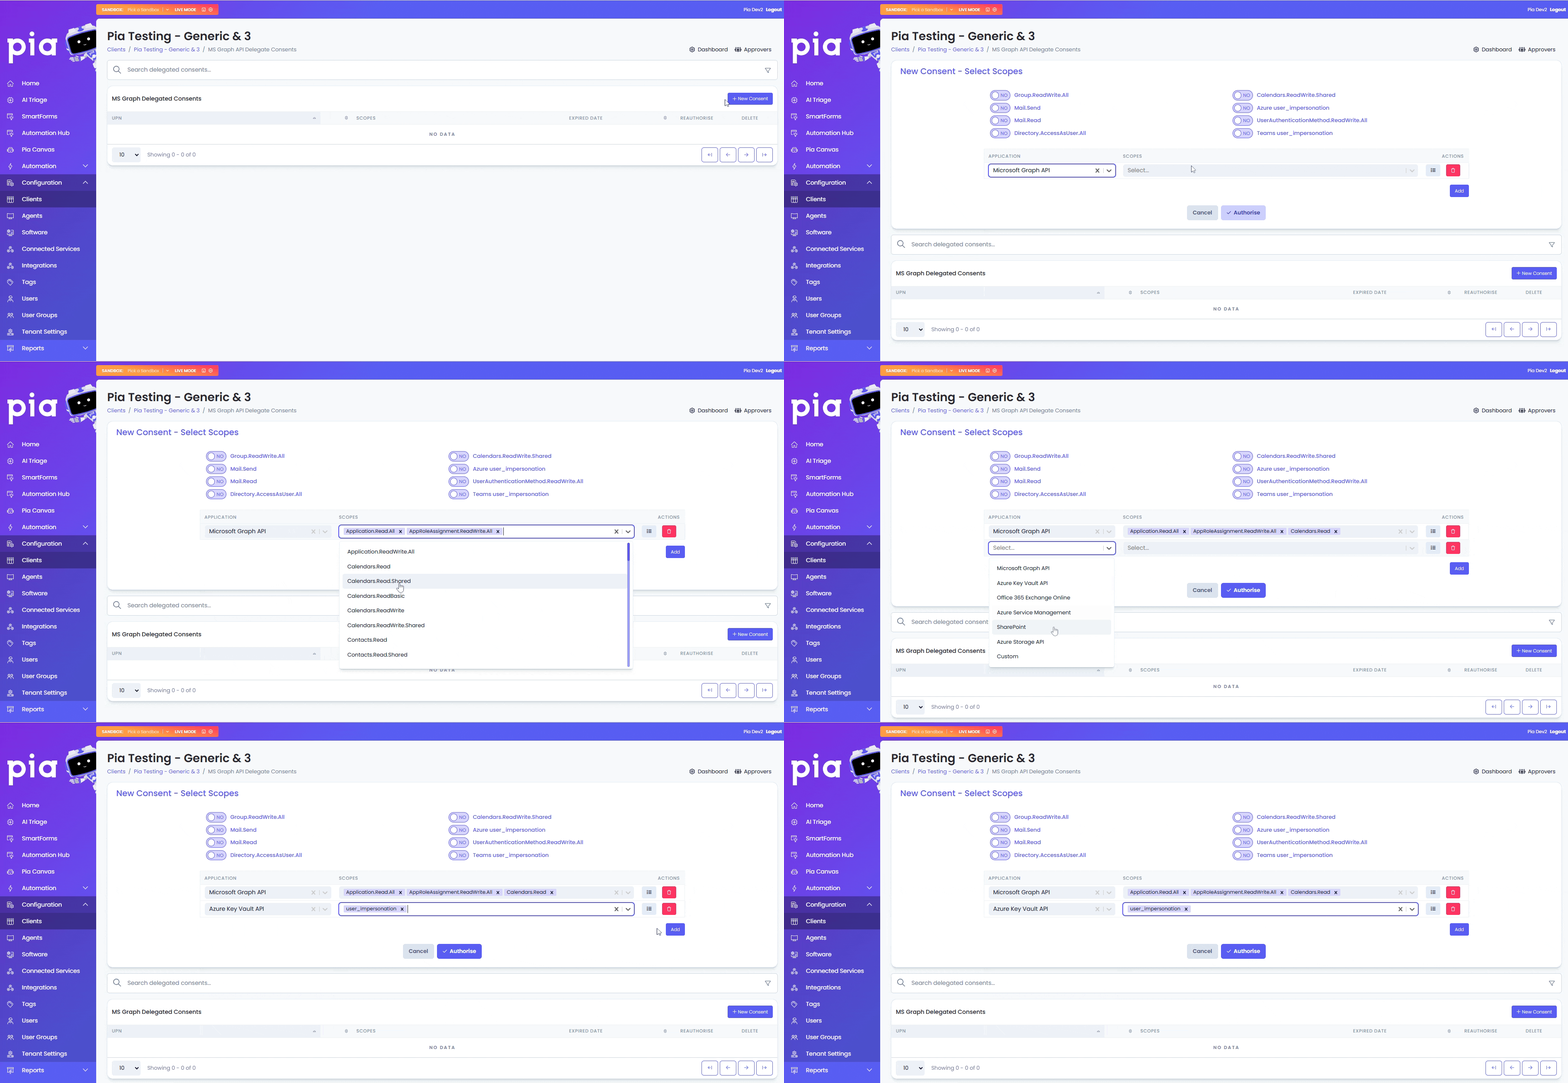
- Click "Authorise"