Setting up Custom Teams Automated Action
The Workflow screen in Pia Chat allows you to create Automated Actions that can be configured to run within your clients' Microsoft Teams environments. This article provides a step-by-step guide to creating and configuring Automated Actions that executes automations in Microsoft Teams.
Step 1: Create your custom automation
Step 1.1: Start by creating a custom automation in your Sandbox.
💡 Learn How
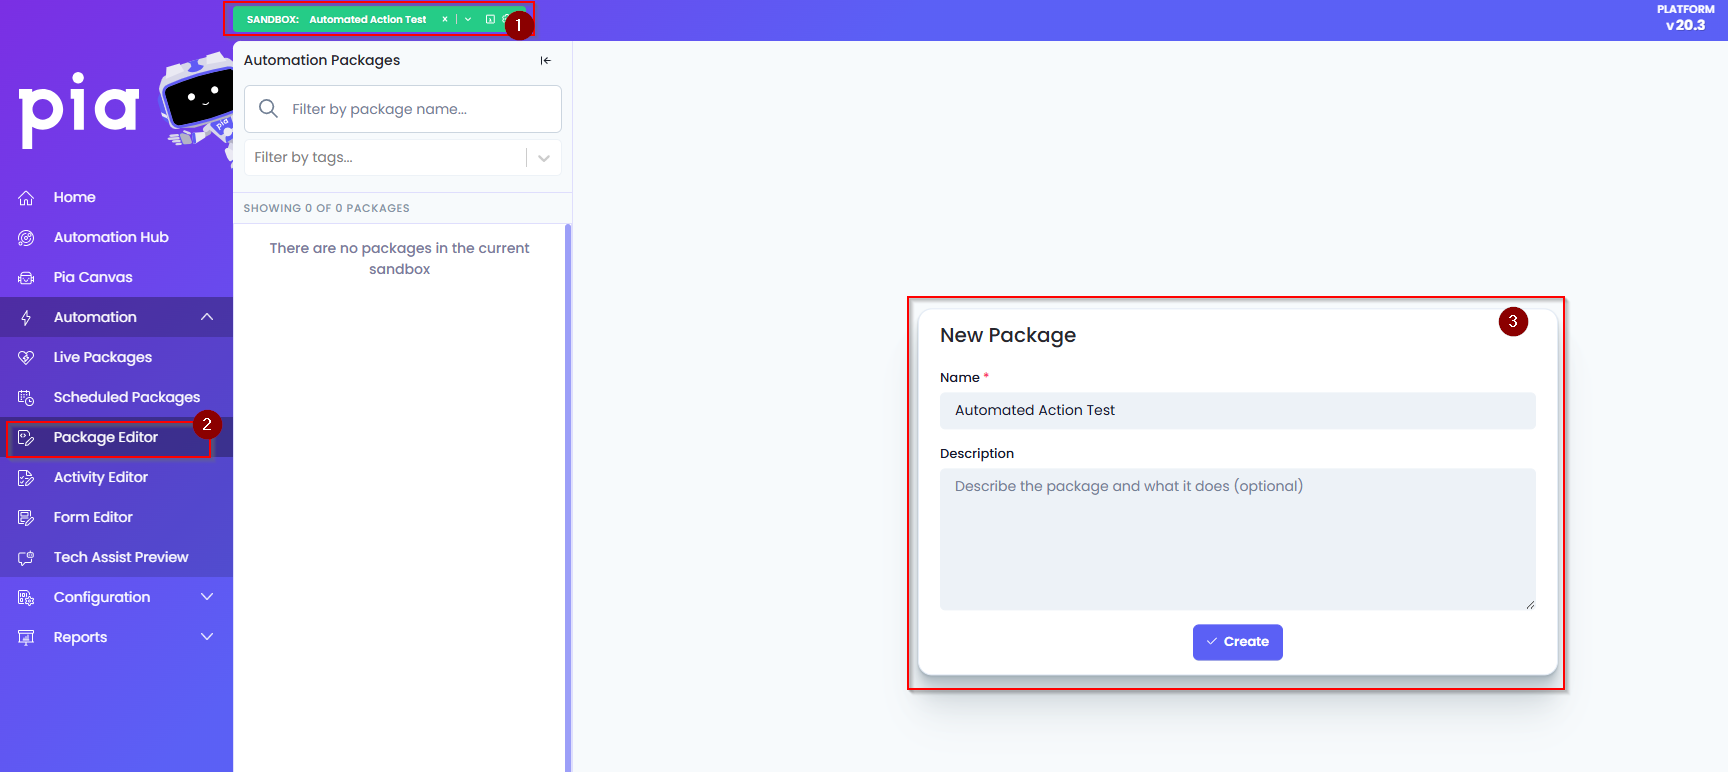
- Go to your Sandbox in your Partner Portal
- Navigate to the Package Editor from the left menu
- Create a new Package in the Package Editor. For this example, we'll name the automation "Automated Action Test"
Step 1.2: Add the required Package condition
To enable your custom automation to run in Microsoft Teams, you must add the Teams Chat Action condition to the automation.
Your automation will now show as below:
# Pia Automation Package
conditions:
- name: 'client_filter'
  optMode: 'OptOut'
  category: 'Hello World'

- name: 'chat'
  option_button: 'The name of the button in Pia'
  option_text: 'Text which is displayed in the Pia Chatbot'
  option_category: 'Pia Chatbot Category'

- name: teams_chat_action # New Condition

steps:
- task: chat_interaction
  inputs:
    text: 'Hello World!'
Step 1.3: Modify your Chat interaction Activity to include required input properties
For this example, we will create a simple automation that displays a text in Pia Chat when it is run through automated action.
The Audience input property in the Chat Interaction activity determines where your chat message will be sent. It supports two values:
- Engineer – Your message will be sent to Tech Assist.
- Client – Your message will be sent to your client in Microsoft Teams via Pia Chat.
# Pia Automation Package
conditions:
- name: 'client_filter'
  optMode: 'OptOut'
  category: 'Hello World'

- name: 'chat'
  option_button: 'The name of the button in Pia'
  option_text: 'Text which is displayed in the Pia Chatbot'
  option_category: 'Pia Chatbot Category'

- name: teams_chat_action

steps:

- task: inline_powershell
  inputs:
    script: |
            Write-Host "This is running!"

- task: chat_interaction
  inputs:
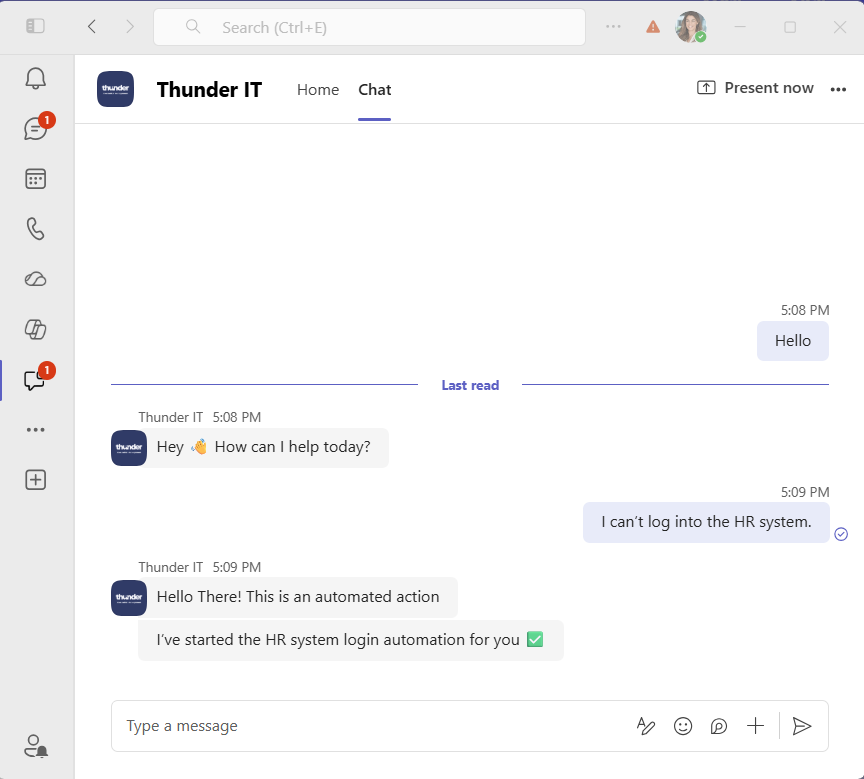
    text: 'Hello There! This is an automated action'
    audience: 'Client'
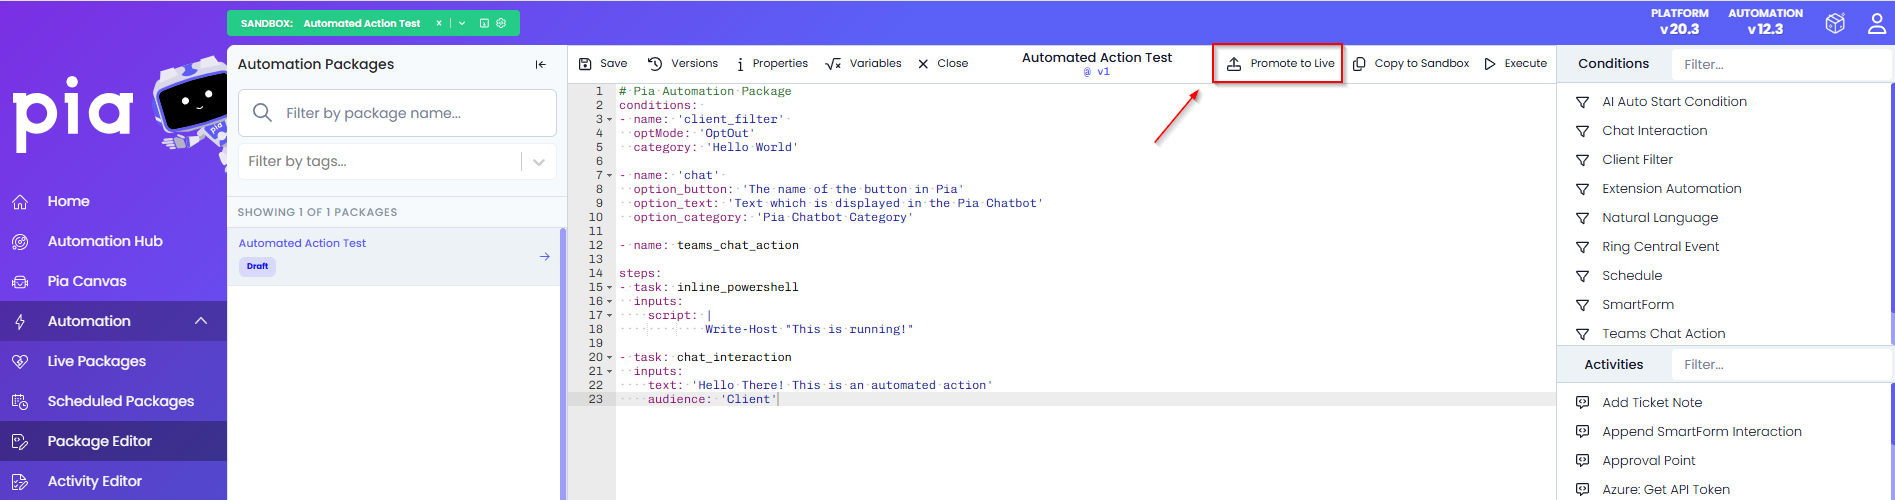
Step 1.4: Save and Promote your newly created custom automation to live
Automated Actions are supported only in Live mode. If you want your automation to be available for selection and configuration within Automated Actions, it must first be promoted to Live.
If you're new to custom automation development and want to start with the basics, follow this article.
Step 2: Create your automated action
- Step 2.1: Start by creating a new automated action
💡 Learn How
- Go to the Engage screen in your Partner Portal
- Click on the Workflow option under Pia Chat menu
- Click on the "New Automated Action" button at the top right corner of the Automated Actions table

- Step 2.2: Create intent for your automated action
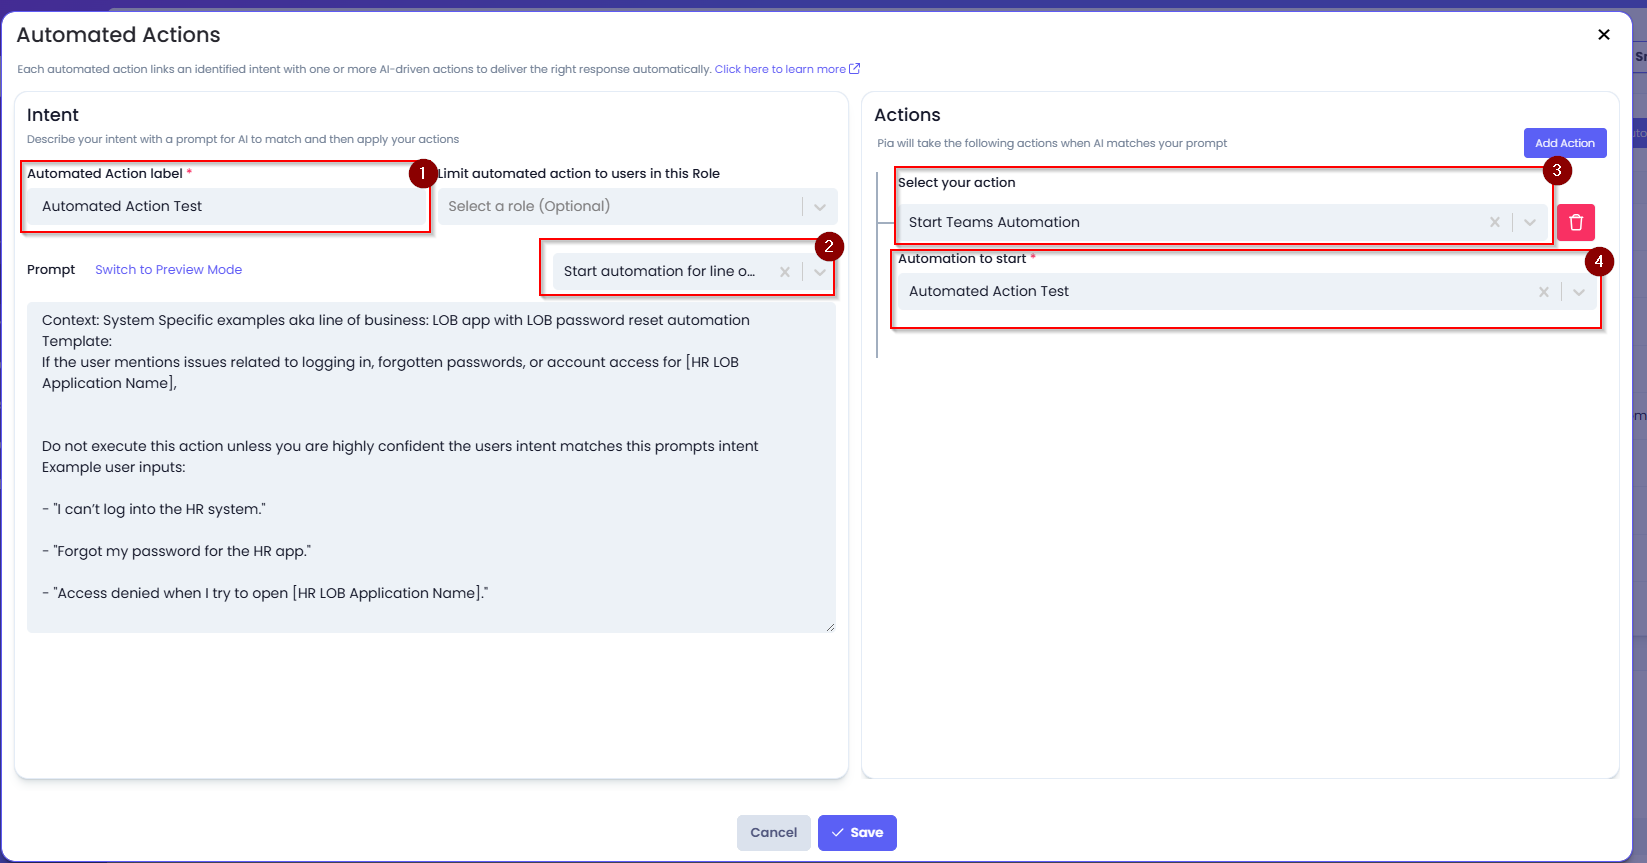
Use the following details:
Automated Action Label: Automated Action Test
Prompt: Set a prompt for your automated action. For this Example, we will be selecting the first template from the list.
Add Action: Select "Start Teams Automation"
Automation to Start: The custom automation that you created in Step 1 should show on the list. Select the automation.
Step 2.3: Save your automated action
Step 3: Test your Automated Action in Pia Chat
- Step 3.1: Open Pia Chat in your Microsoft Teams
💡 Learn How
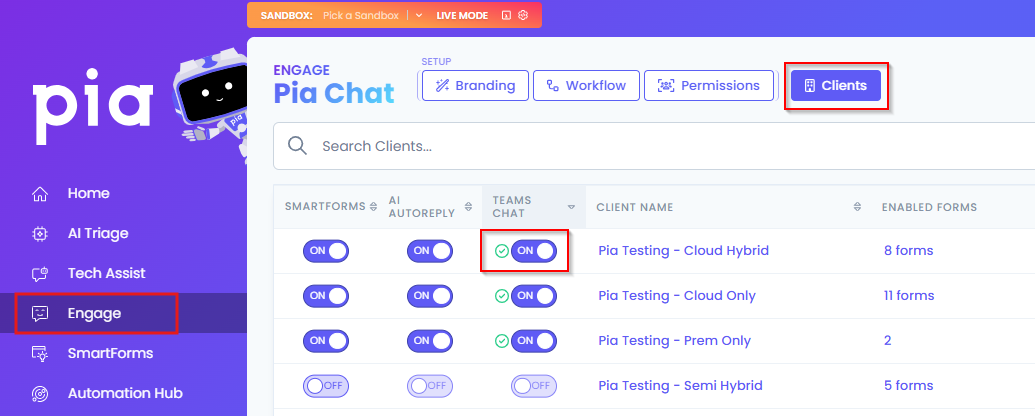
- Go to the Clients Tab for Pia Chat in the Engage Screen
- Turn ON Pia Chat toggle for the client that you will be testing this against. Read this article to learn about Pia Chat first time installation requirements
 3. Make sure your user account has correct permissions
For a user to be able to access Pia Chat, they must be assigned with required permissions. For this, the user must be added to a Client User Role that has Pia Chat enabled. To learn more about this setup, click here.
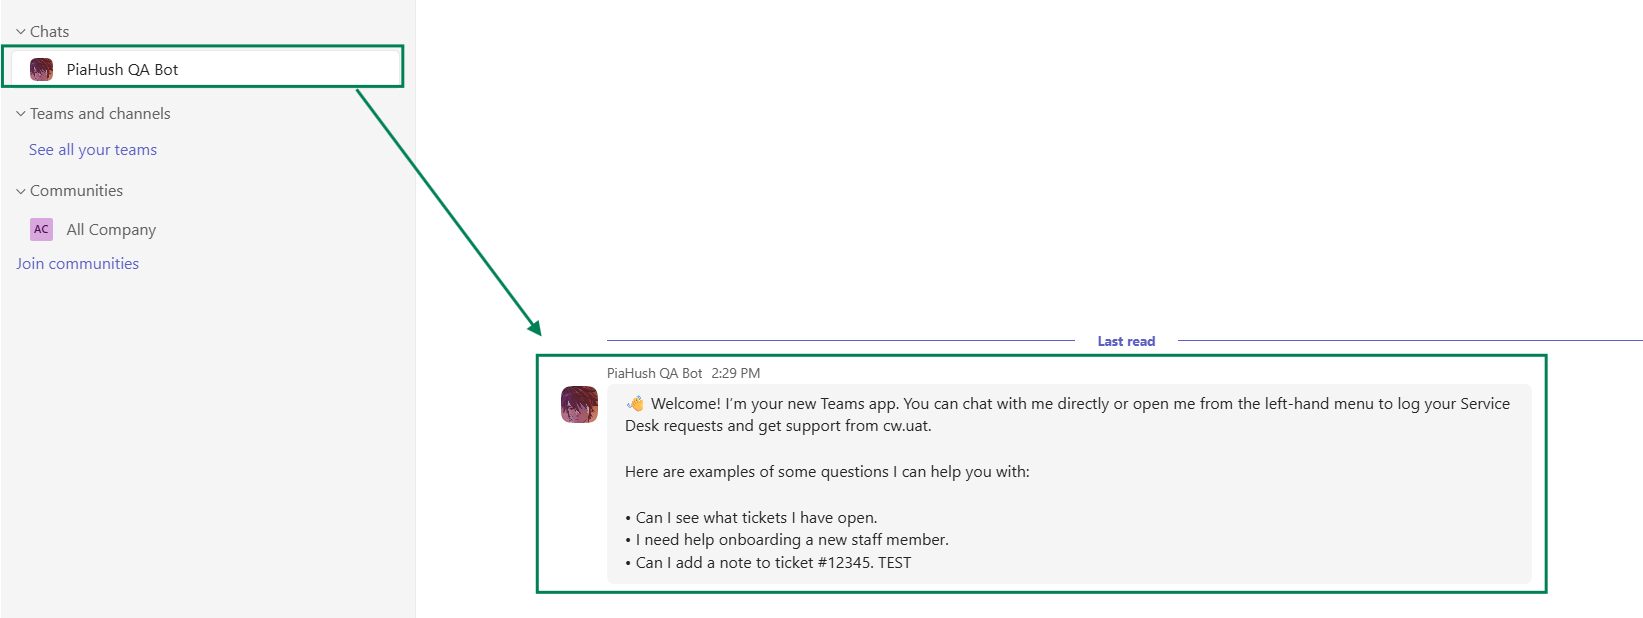
- Once done, open your Microsoft Teams where you will be greeted with a Welcome message from Pia Chat
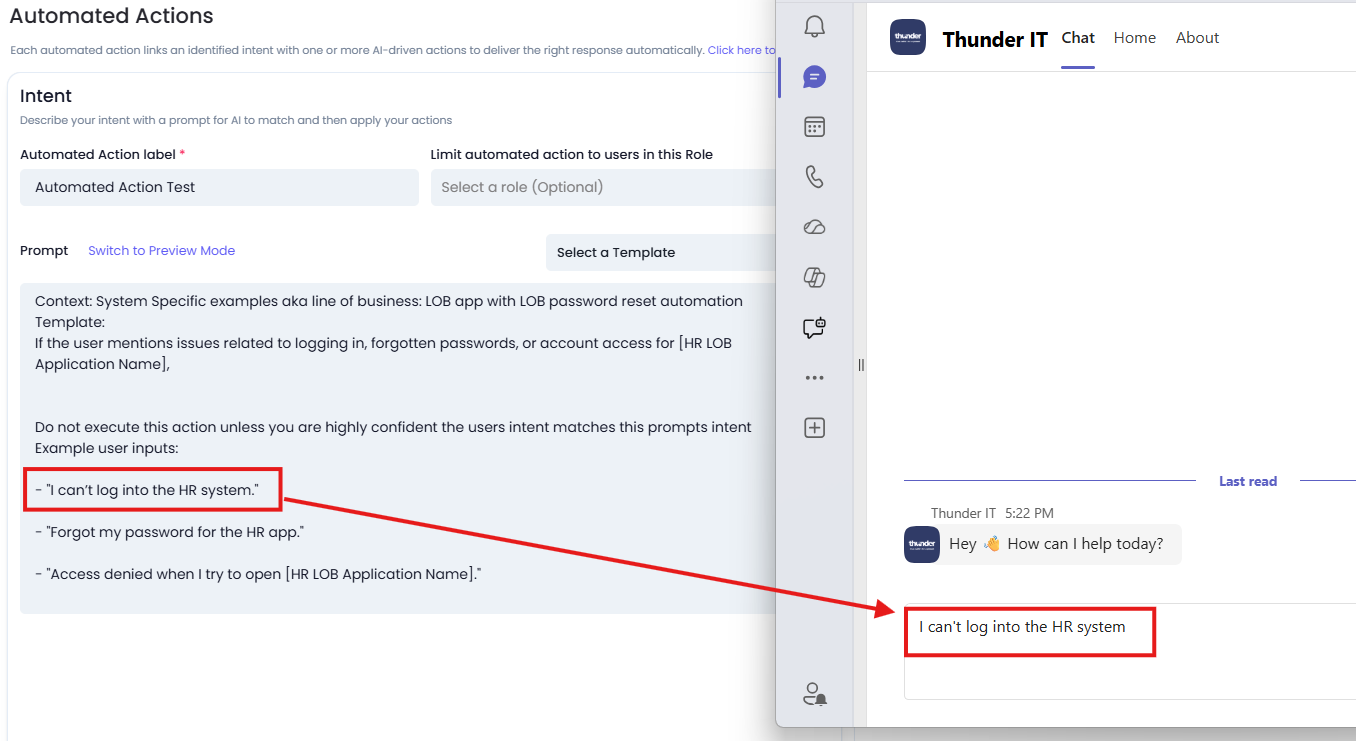
- Step 3.2: In the AI Resolution Assistant, type your request matching the intent you have set
- Verify your custom automation is working
Once your request matches the intent, Pia will automatically execute your custom automation in Teams.
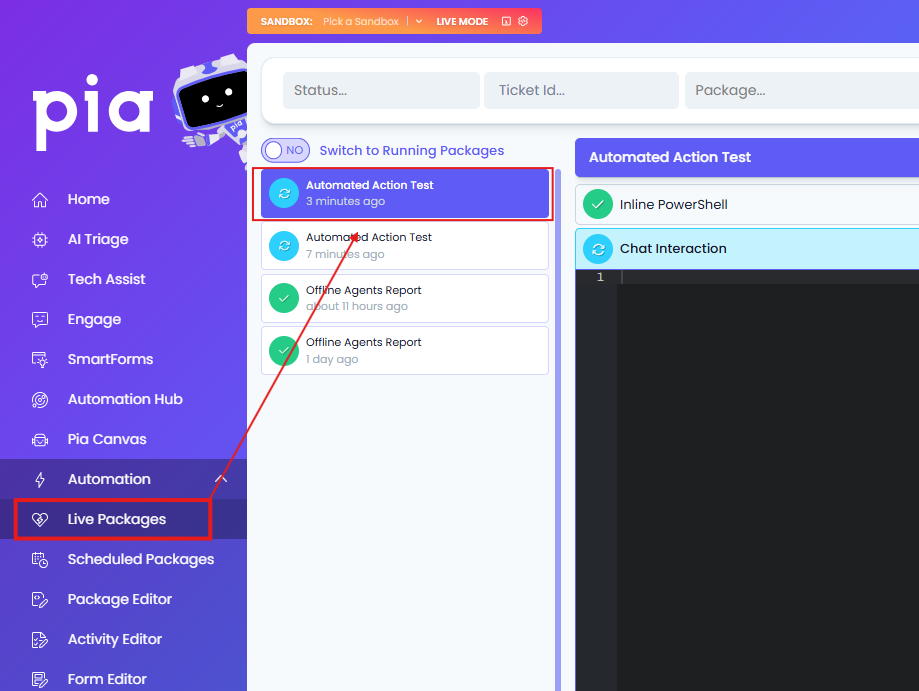
You can also view your automation execution from the Live Packages View screen.