Approvers Setup
The Approvals feature lets you require review before certain automation steps run, allowing you to set one or more approval layers for added control and compliance. For example, your Level 1 team can handle onboarding, but if a step involves license provisioning or compliance checks, you can route approvals to a client contact or your Security team. You can assign specific approvers or use Pia’s role sync feature to target groups like HR or your internal MSP staff, making approval management simpler and more consistent across automations.
You can configure approvers for any built in Pia automation or custom automation by creating Approval Rules. These Approval Rules can be created on a Global Level which will be applied to all clients for the configured automation or on a per client basis.
Creating Approval Rules
To create an approval rule, an automation must have a defined approval point. The Approval points can be defined in an automation using the Approval Points Activity. Whilst all of Pia's native automations already include predefined approval points, you can still extend them further by adding additional approval points using Extension automations.
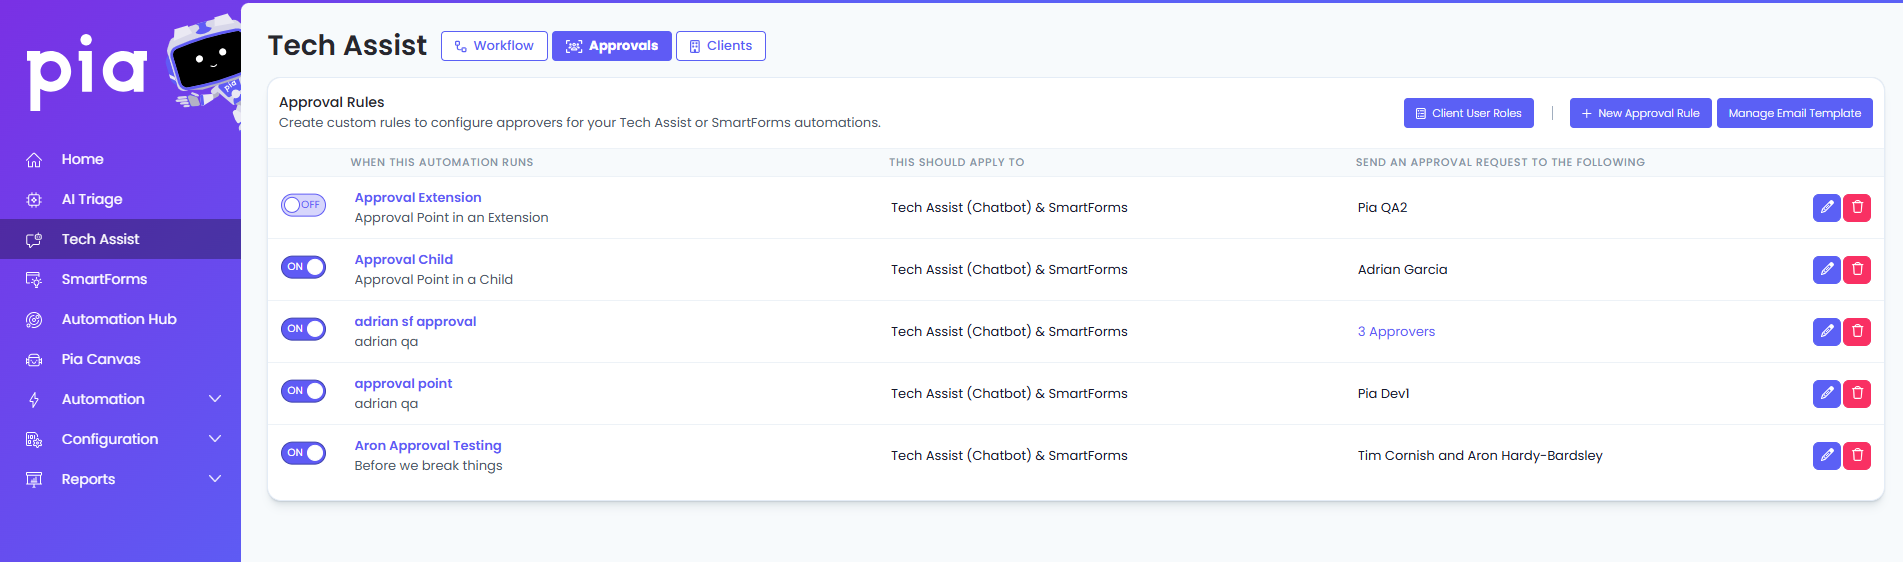
Creating Global Approval Rules
To set up a global approval rule for an automation, login to your Pia Partner Portal and follow the steps below:
Step 1: Click on the Tech Assist menu link on the left
Step 2: Go to the Approvals Tab
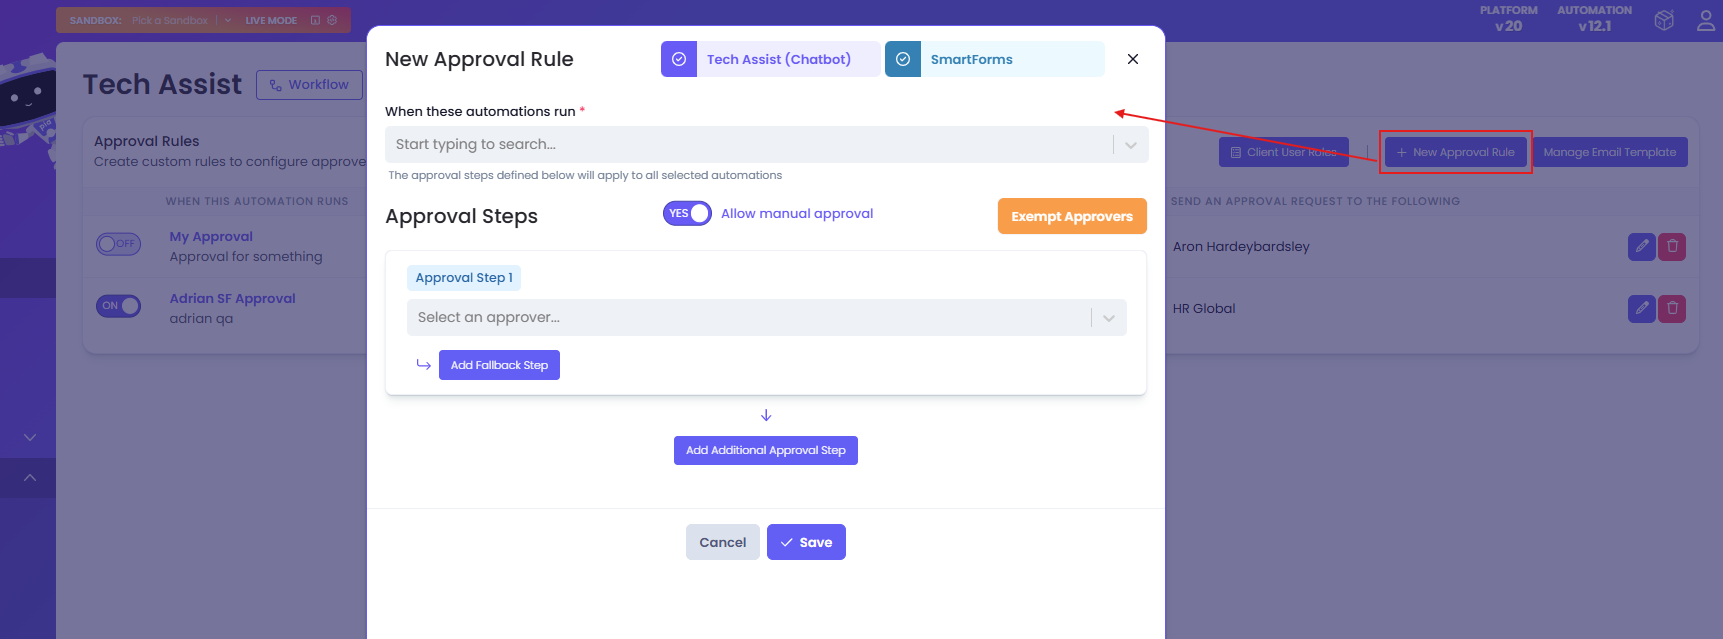
Step 3: Click on the 'New Approval Rule' button
Step 4: When creating an approval rule, a pop‑up window will appear where you can:
- Choose one or more automations to include in the rule
- Choose one or more approval points for the selected automations
- Enable or disable manual approval as part of the rule
- Select approvers who will be exempt from the rule
- create multi-step approval process
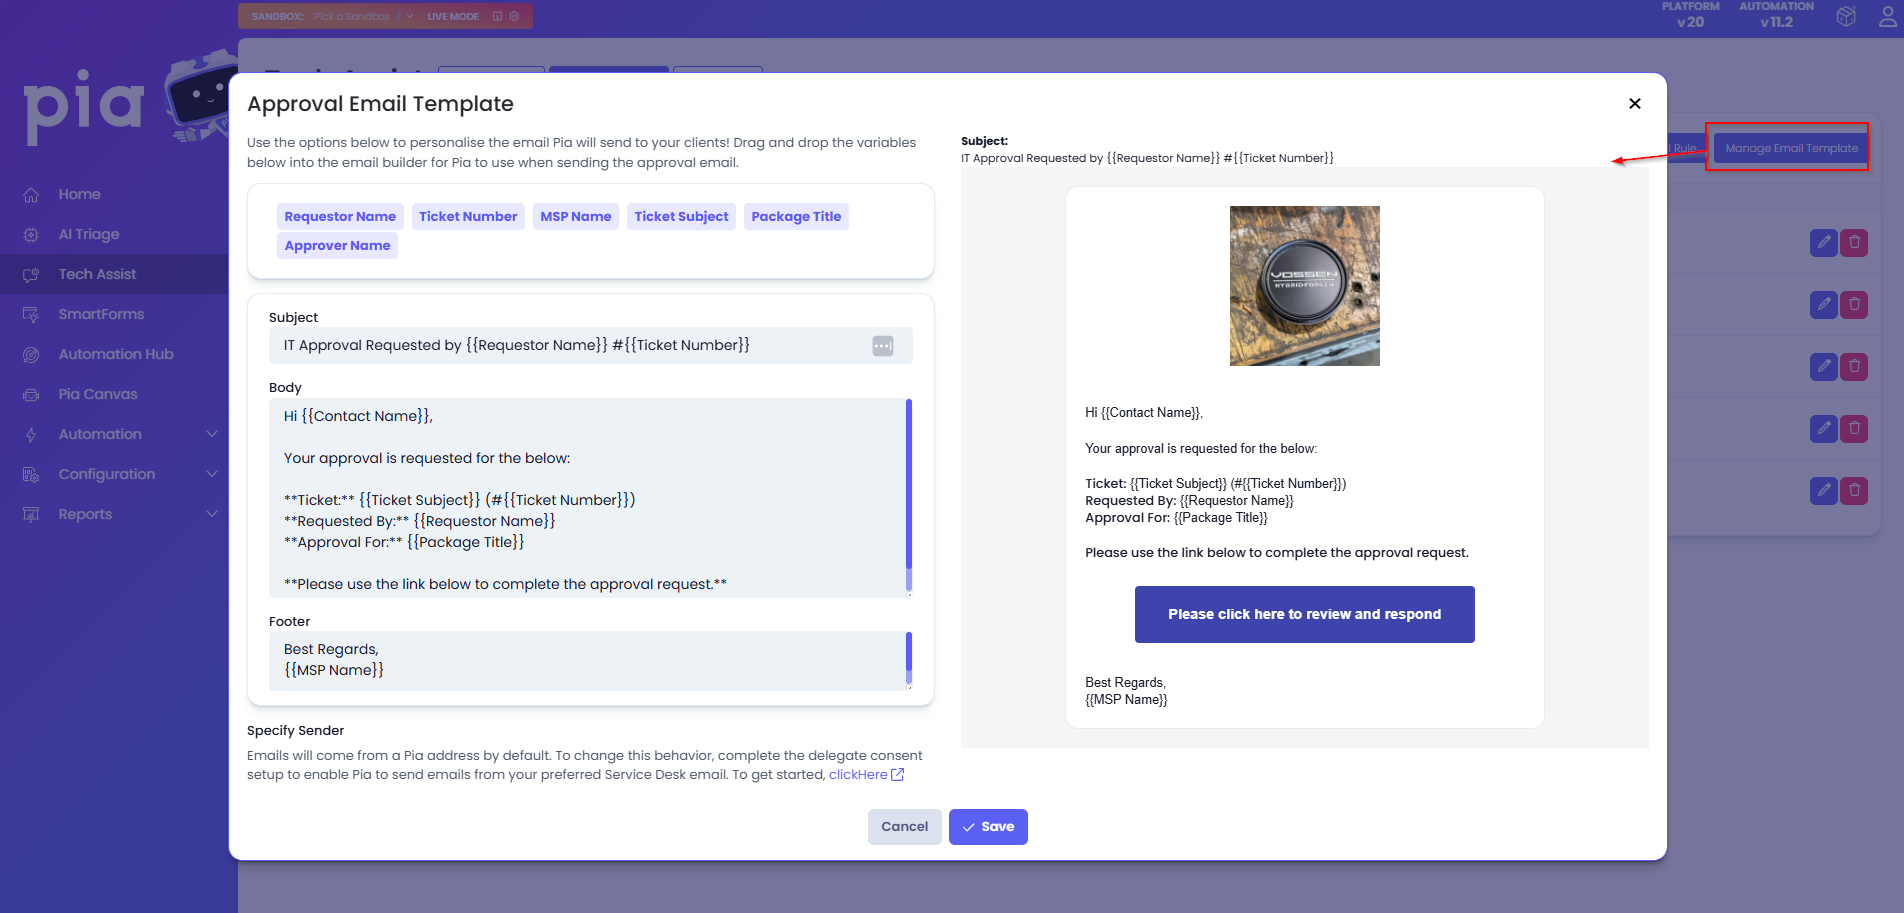
Step 5: Use the Email Template option to preview the approval emails to see what they look like and also make any changes as required. Pia will use the default email template if no changes are made
Approval Experience Preview
Click here to view the email template setup process
To configure the approval email template, simply click on the 'Manage Email Template' button beside the 'New Approval Rule' button. A popup will appear where you can:
- Define the email Subject, Body and Footer
- Complete the MS Graph Delegate setup so Pia can send emails on your behalf
- Insert available variables to automatically include additional information in the email request
Click to view a sample email and the approval request that appears when the user opens the link

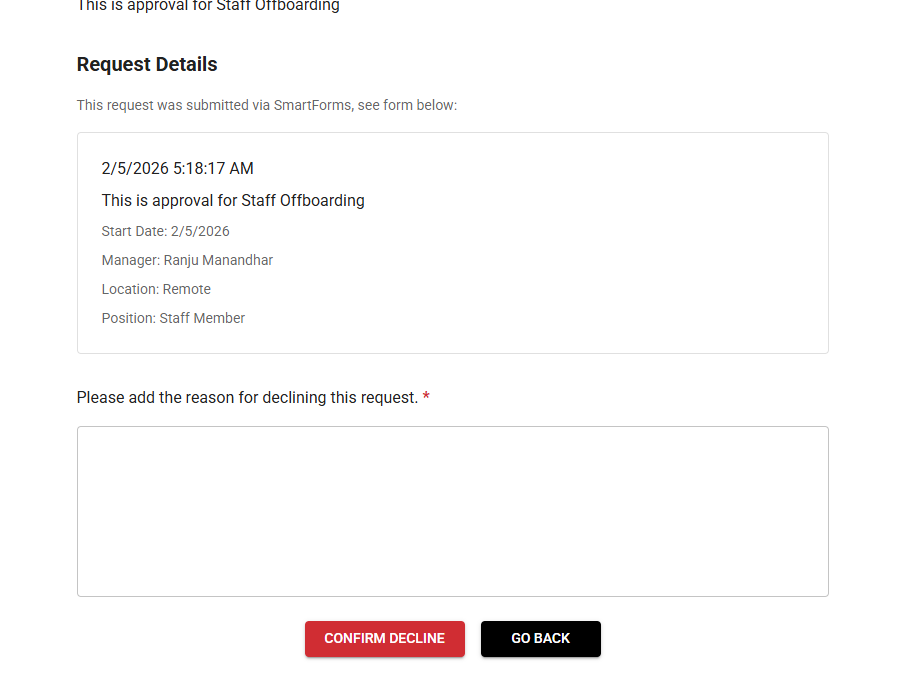
When the approver clicks on the link in the email, they are redirected to the SmartForms portal where they can either approve or decline the request.

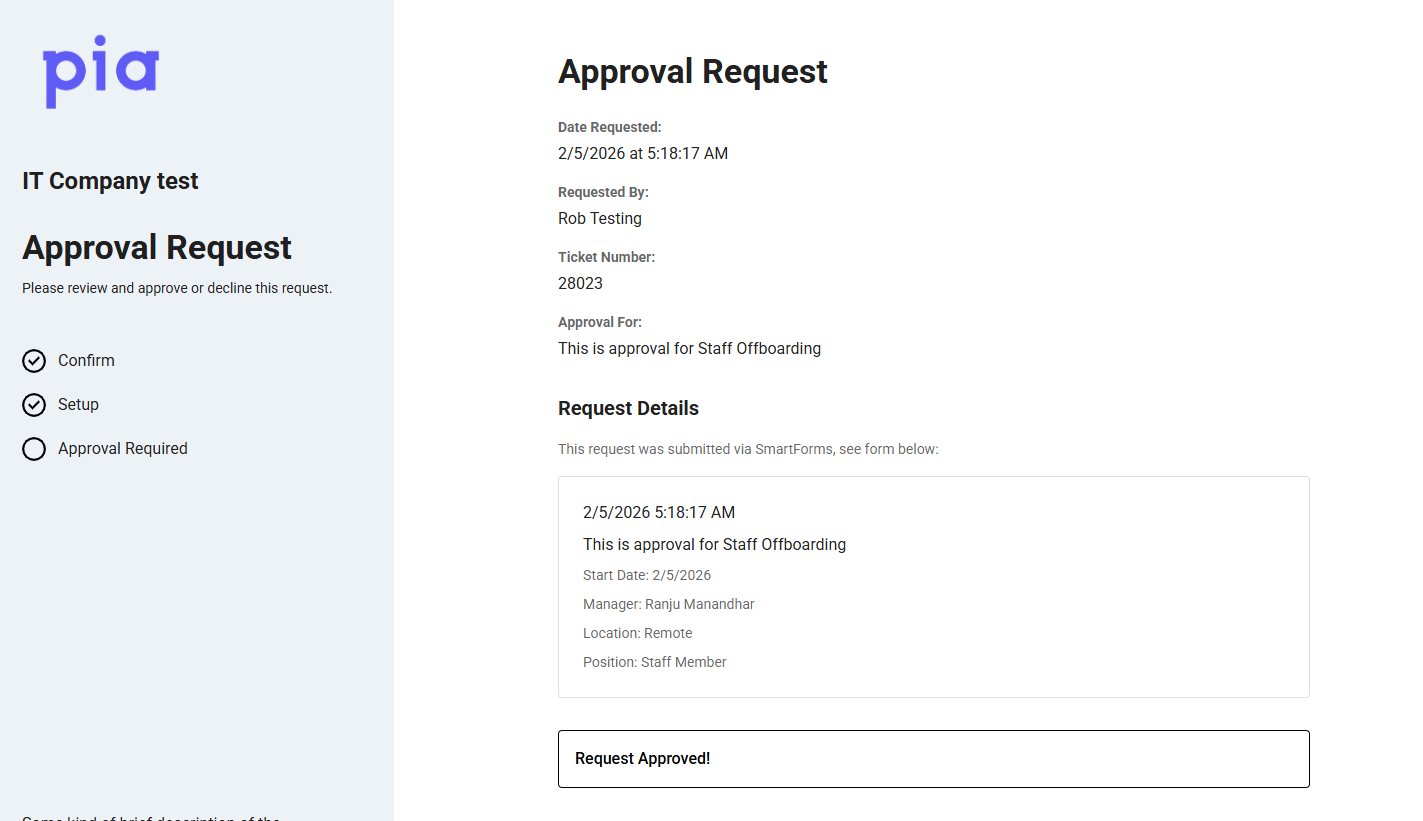
Additional reason must be provided if the approver chooses to decline the request.
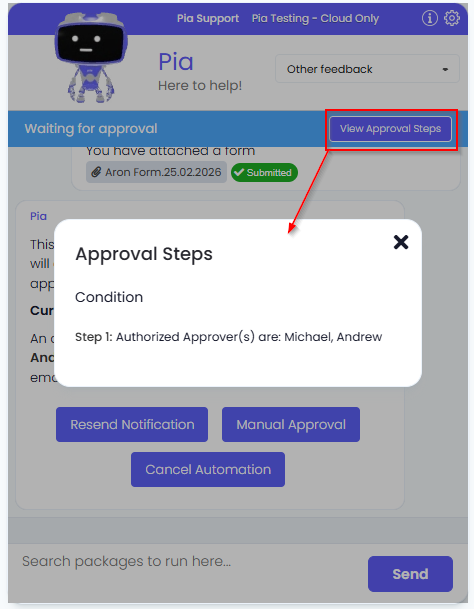
Click to view the Approval Workflow in the Tech Assist Chatbot
When an automation that has an approval rule configured is executed in the Tech Assist chatbot, Pia will show the following message:
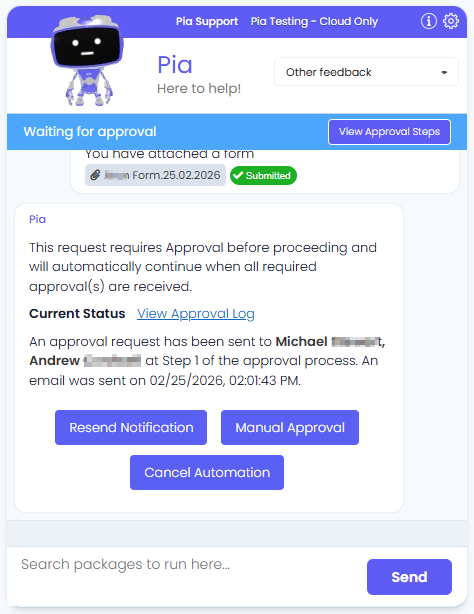
Here, engineers are able to:
- View approval steps required for the automation by clicking on the 'View Approval Steps' button in the blue bar
- View approval status by clicking on the 'View Approval Log' link in the chat. This log will update as the approval request passes through each step.

Once the approver responds to the approval request, Pia will display a chat message based on whether the approval is approved or denied and continue with the automation execution.
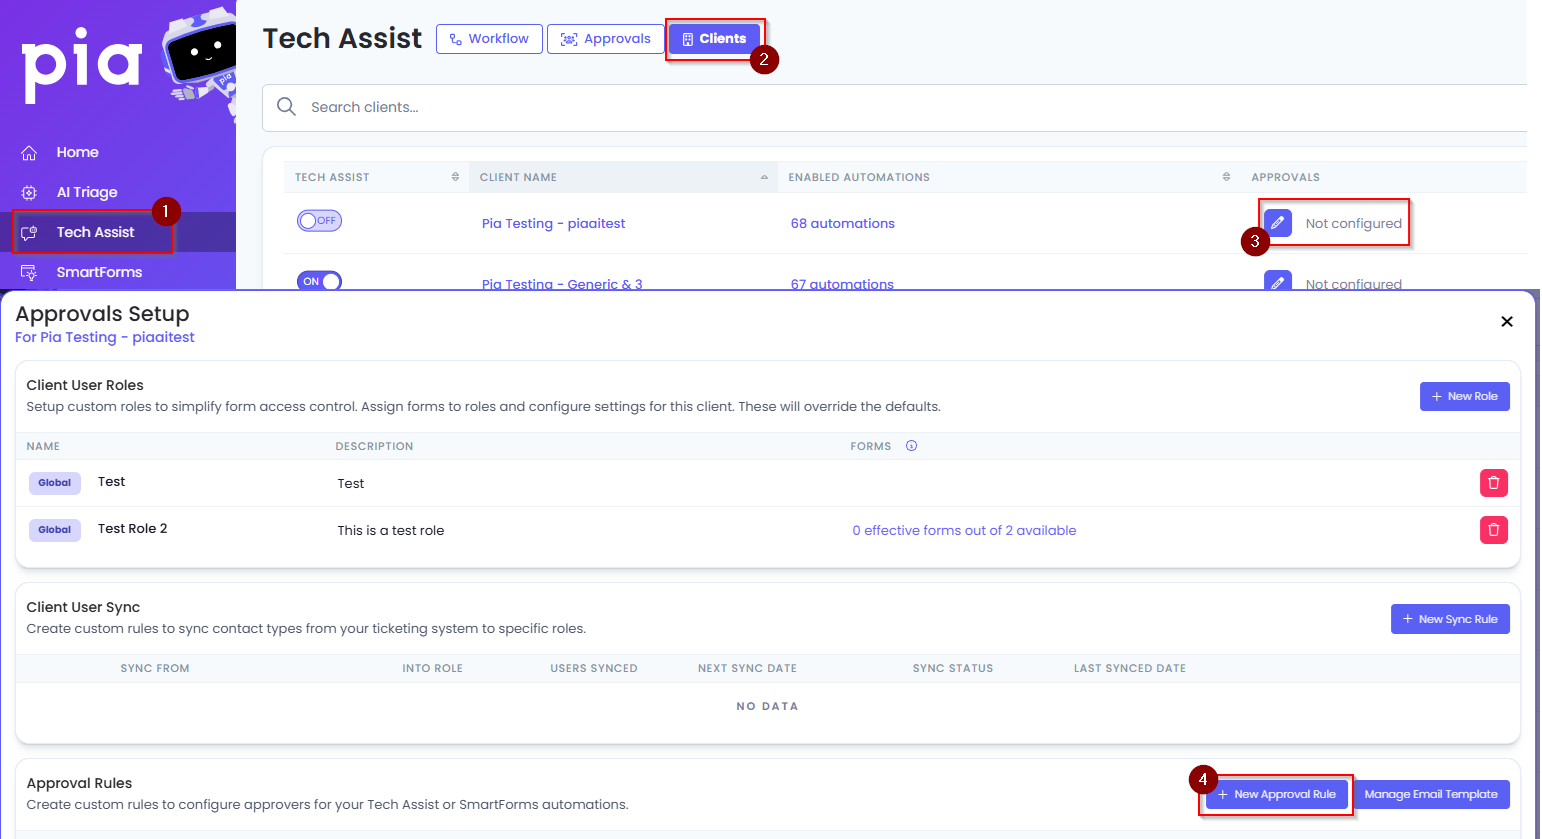
Creating Client Specific Approval Rules
Step 1: Click on the Tech Assist menu link on the left
Step 2: Go to the Clients Tab
Step 3: Navigate to the Approval column, and click on the edit icon for the selected client
Step 4: This will display a pop-up where you can select one or more automations and one or more approval points you wish to create an approval rule for the selected client
Step 5: Use the Email Template option to preview the approval emails to see what they look like and also make any changes as required. Pia will use the default email template if no changes are made
The clients also tab allows you to disable Global approval rule on a per client basis.