Dispatch

What are Dispatch Rules and why use them?
In the context of IT Managed Service Providers (MSPs), "Dispatch" refers to the process of routing and assigning service tickets to the appropriate team members or service boards. Traditionally, this involves manual intervention, leading to inefficiencies and delays in ticket processing. Pia's aiDesk Dispatch tool is here to solve this challenge, replacing time-consuming manual dispatching with automated rules that streamline ticket routing and processing.
With Pia's Dispatch, tickets are automatically assigned, prioritized and moved to the nominated board based on predefined conditions, such as classification identifiers and stamps and many others. It can adjust critical fields like Ticket Status and Ticket Assignee. When a ticket is ingested via your PSA and meets specific criteria, Dispatch ensures it is routed to the right team, reducing the need for manual oversight and speeding up service delivery.
Configuring Dispatch Rules
Dispatch Rules will not be active unless you enable Triage. To do this, refer to Ticket Ingestion.
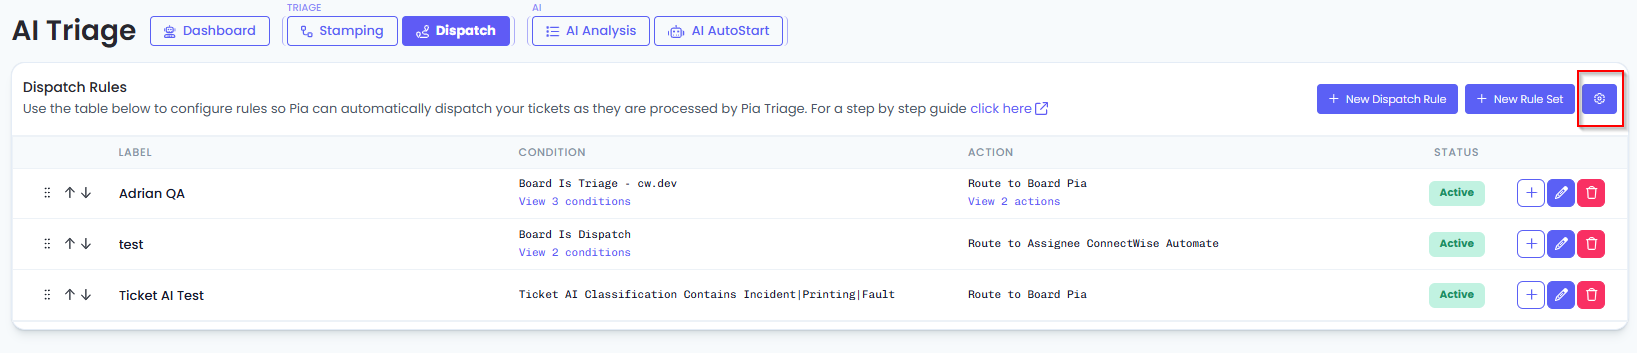
- Open the Pia portal, navigate to AI Triage.
- Then select the Dispatch tab.

Adding Dispatch Rules
- Click either the + New Dispatch Rule or + button
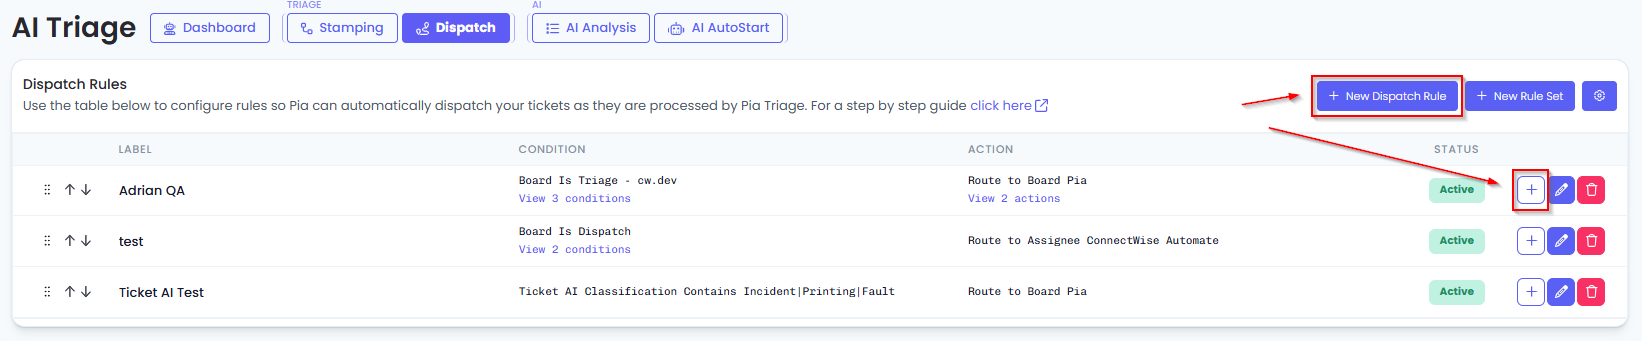
+ New Dispatch Rule adds the new rule to the top of the list, whereas the + button adds the new Dispatch Rule underneath the respective rule.
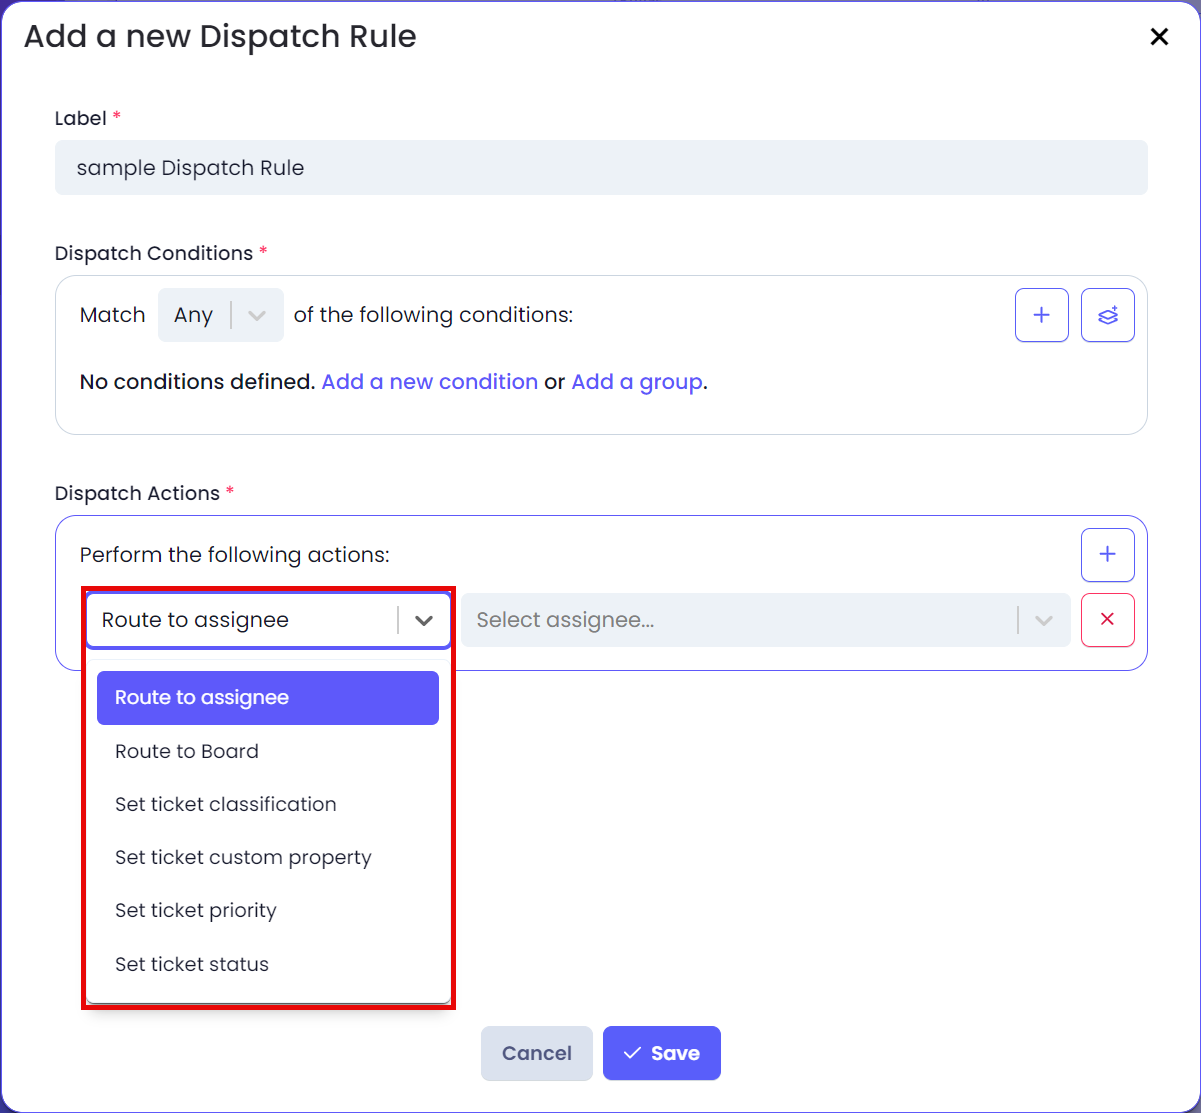
Add a new Dispatch Rule pop-up displays
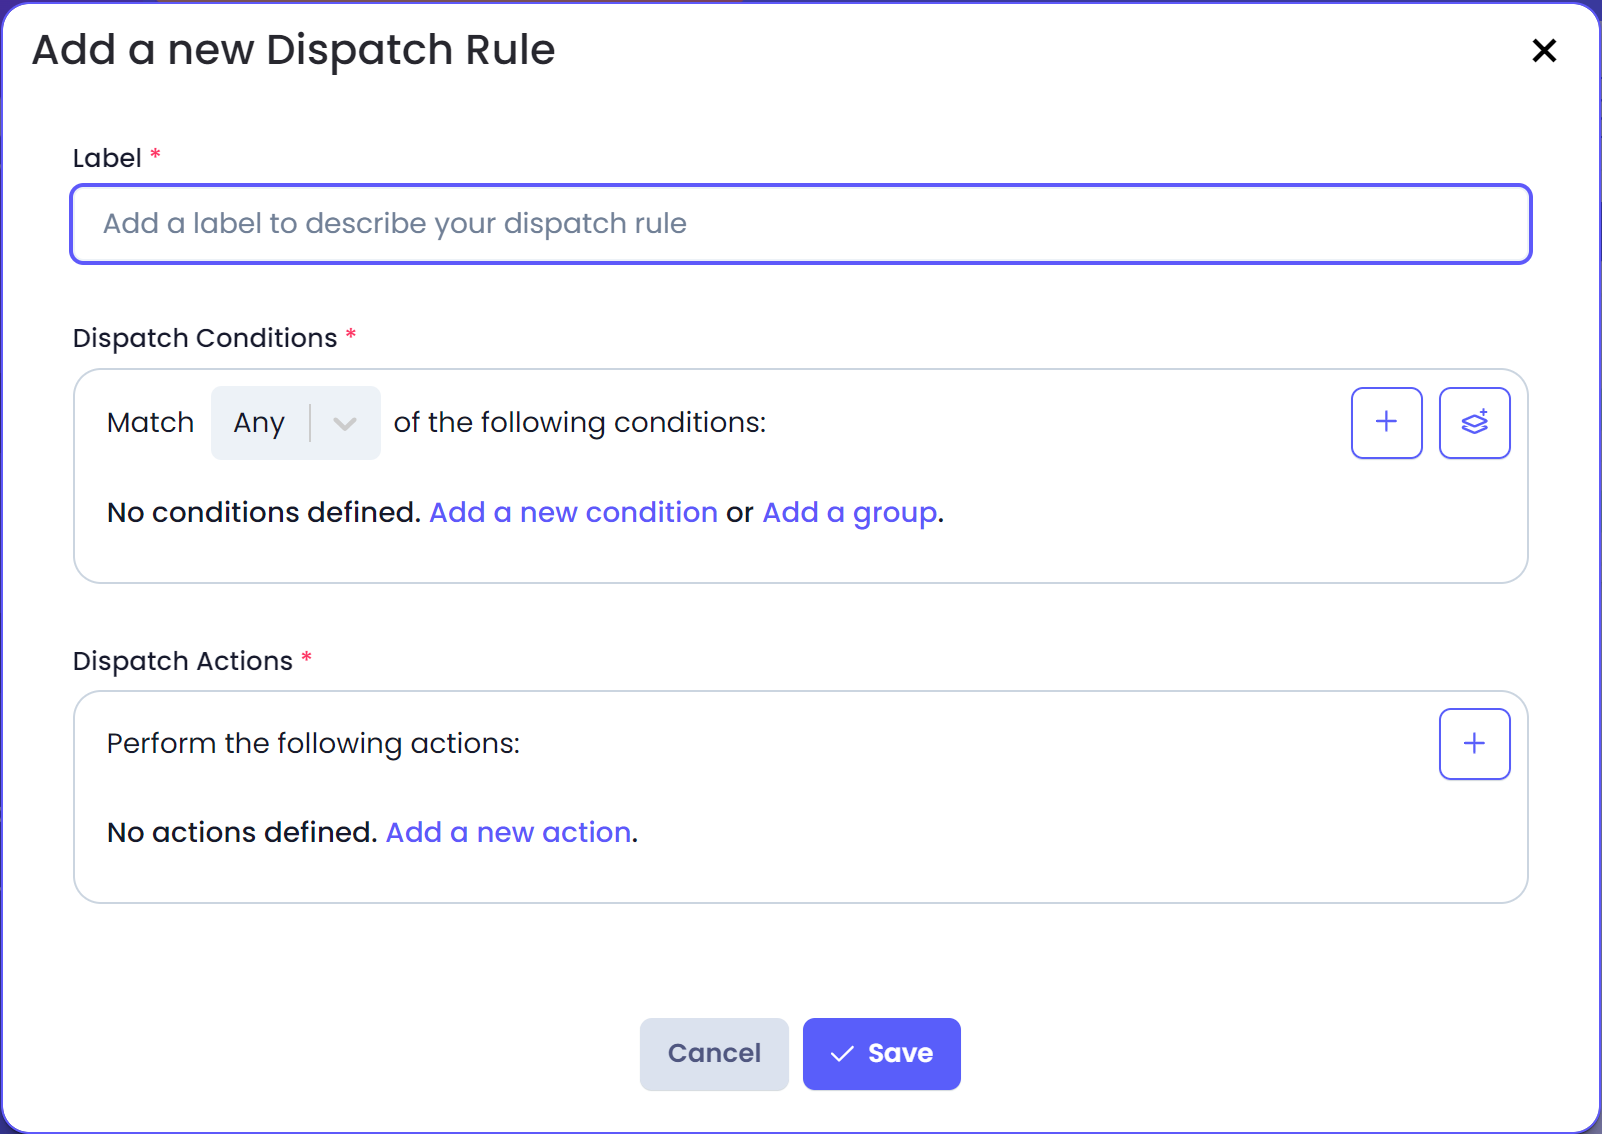
Label (*): add a label to describe your Dispatch rule
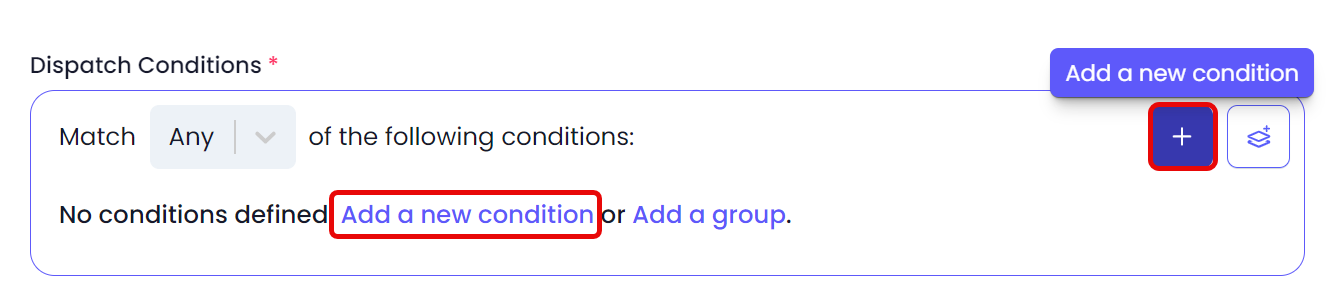
Dispatch Conditions (*): Match Any or All the following conditions:
- Any: any one of the conditions defined
- All: all the conditions defined
- Add a new condition or +
 or
or - Add a group
A group of Dispatch Conditions is a set of conditions that you want Pia Triage to match at the same time.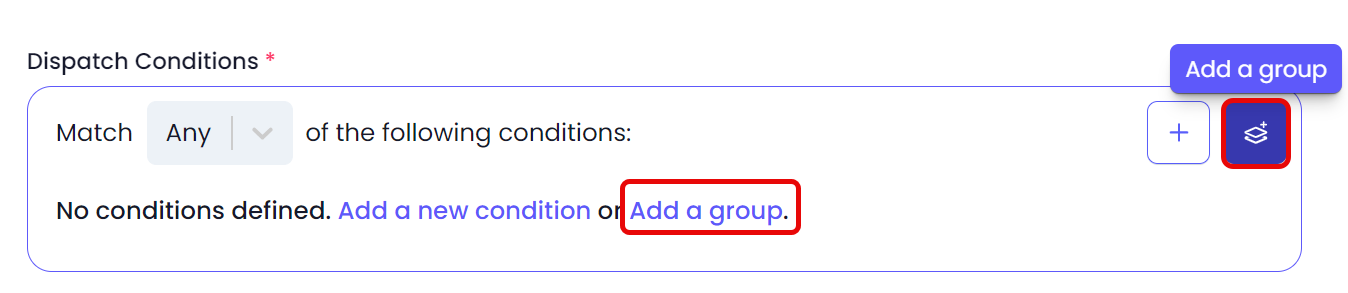
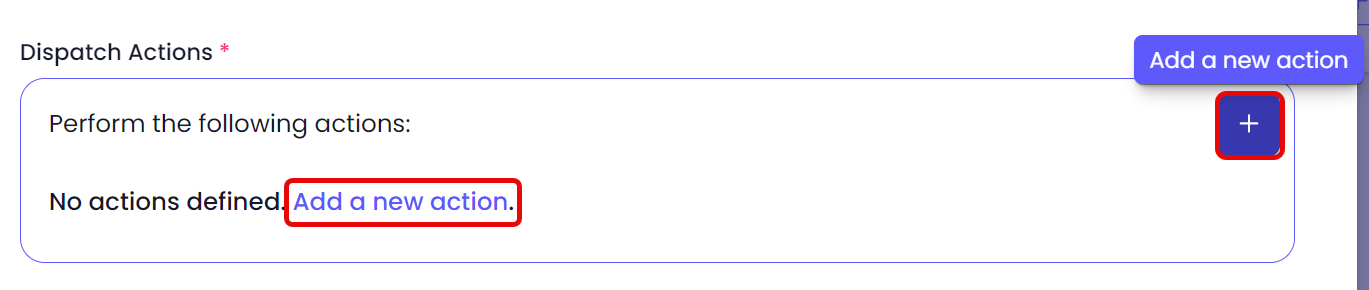
Dispatch Actions (*):
An action is an automated trigger for how you want Pia to manage your incoming tickets based on the conditions you specify above, this will "Route to" or "Set ticket".Add a new action or +
Select an action from the dropdown menu and complete the additional dropdowns that follow.
tipFor example Route to assignee will prompt you to select a name from the next dropdown menu. This will automatically assign tickets that match the abovementioned conditions to the nominated user.
Cancel or Save
Reordering Dispatch Rules
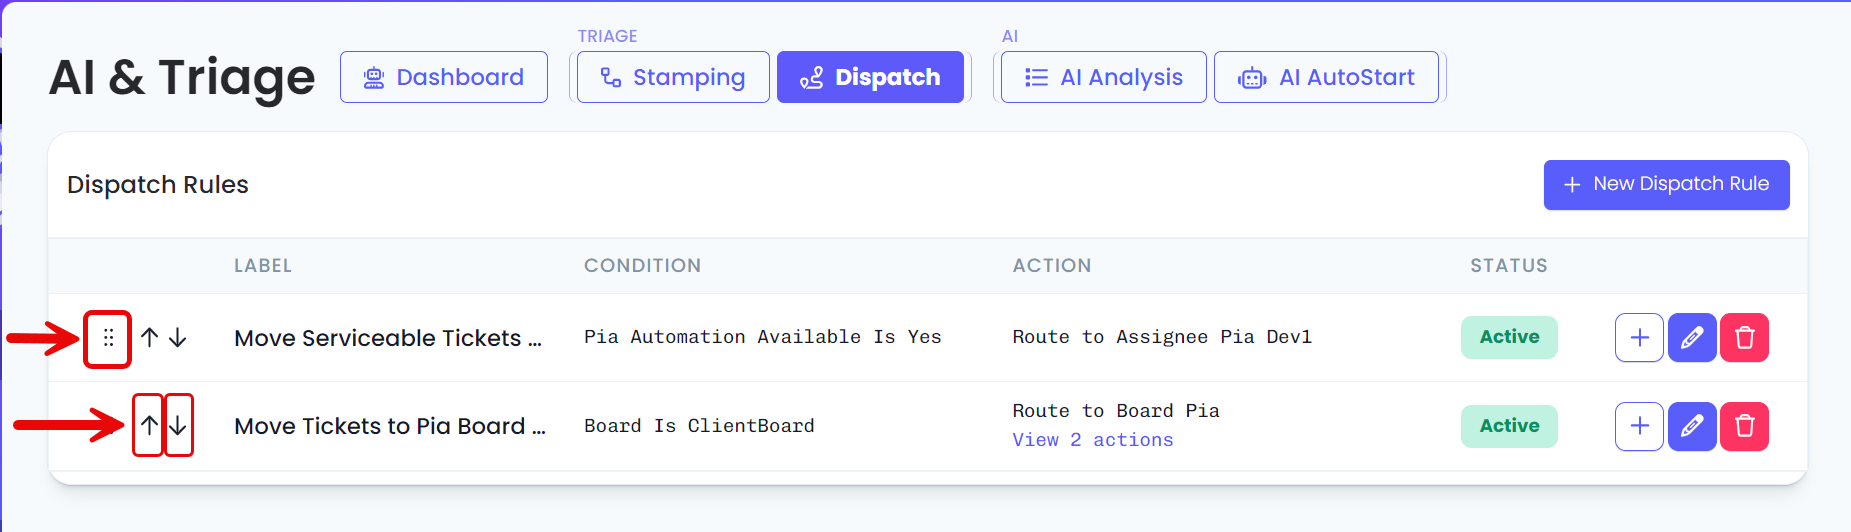
The order of Dispatch Rules determines the sequence that they’ll be processed (from top to bottom).
- Drag and drop the grip dots on the far left to move the rule's position up or down in the table. Alternatively, you can click the up or down arrows to move the rules one line at a time.
Editing Dispatch Rules
- Click the pencil icon on the right-hand side of the rule you wish to edit.

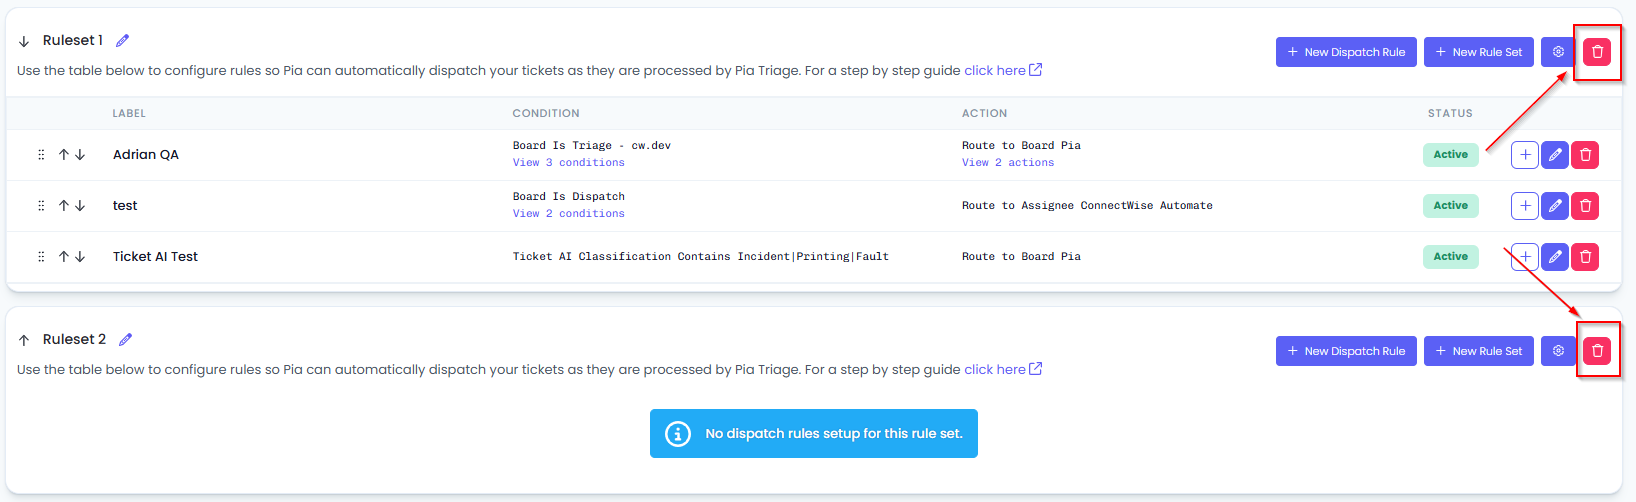
Deleting Dispatch Rules
Dispatch Rules can be deleted using the red trash can icon on the right side of the rule.
- To delete a rule, click the Trash can icon next to the existing AI rule.

- The "Are you sure" prompt appears, Cancel to go back or Confirm to delete the rule.

Advanced Settings
Click on the gear(settings) icon beside the + New Rule Set button to view the advanced options.
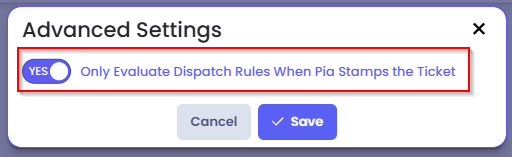
The Advanced Settings pop-up currently shows the following option:
- Only Evaluate Dispatch Rules When Pia Stamps the Ticket: When this is enabled, Pia will ONLY start processing dispatch rules or rule sets on a ticket on stamped tickets. If a ticket is still on the process of being stamped or if Pia cannot stamp the ticket for any reason, the ticket will not be dispatched.
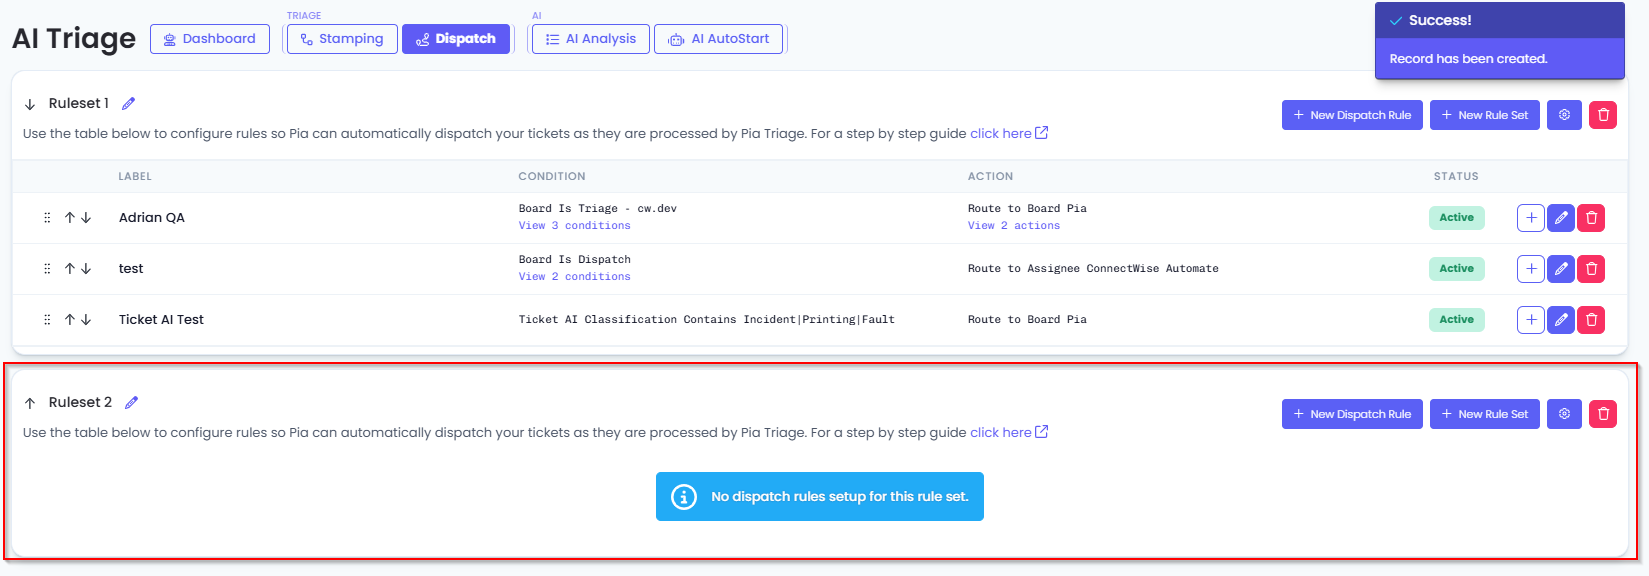
Dispatch Sets
With Dispatch Rule Sets, you can group multiple dispatch rules together giving you more flexibility and control when configuring your Dispatch workflow. When processing Dispatch Rule Sets, Pia will process each Rule Set separately; resulting in more actions which Triage may perform on your ticket.
- To create a new dispatch set, click on the + New Rule Set button beside the + New Dispatch Rule button.
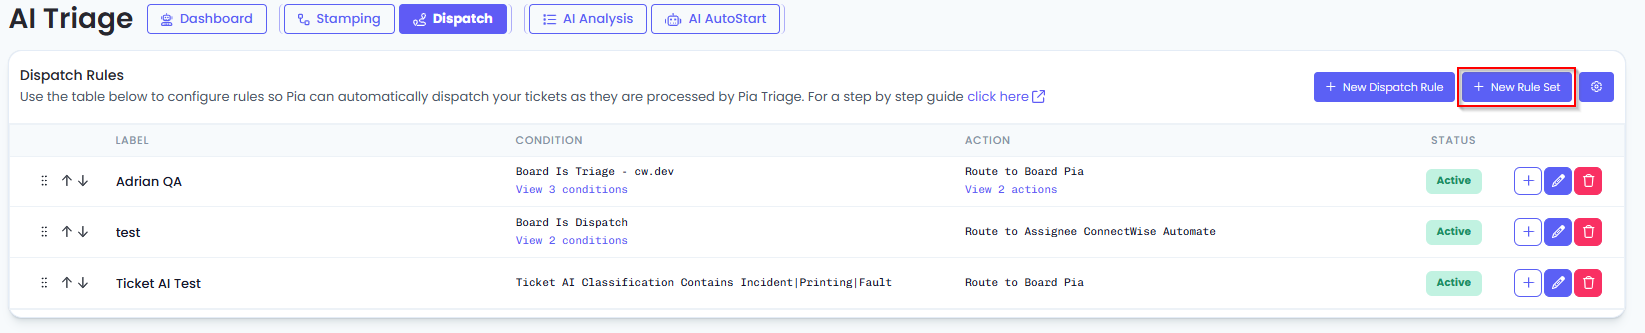
- A new rule set will be added just below your current dispatch rule set. This new rule set will have the same options as the original dispatch rule set.
When multiple dispatch rules are created, Pia provides you with the following additional options:
- Delete a Rule set: Click on the delete icon available at the top to delete a rule set
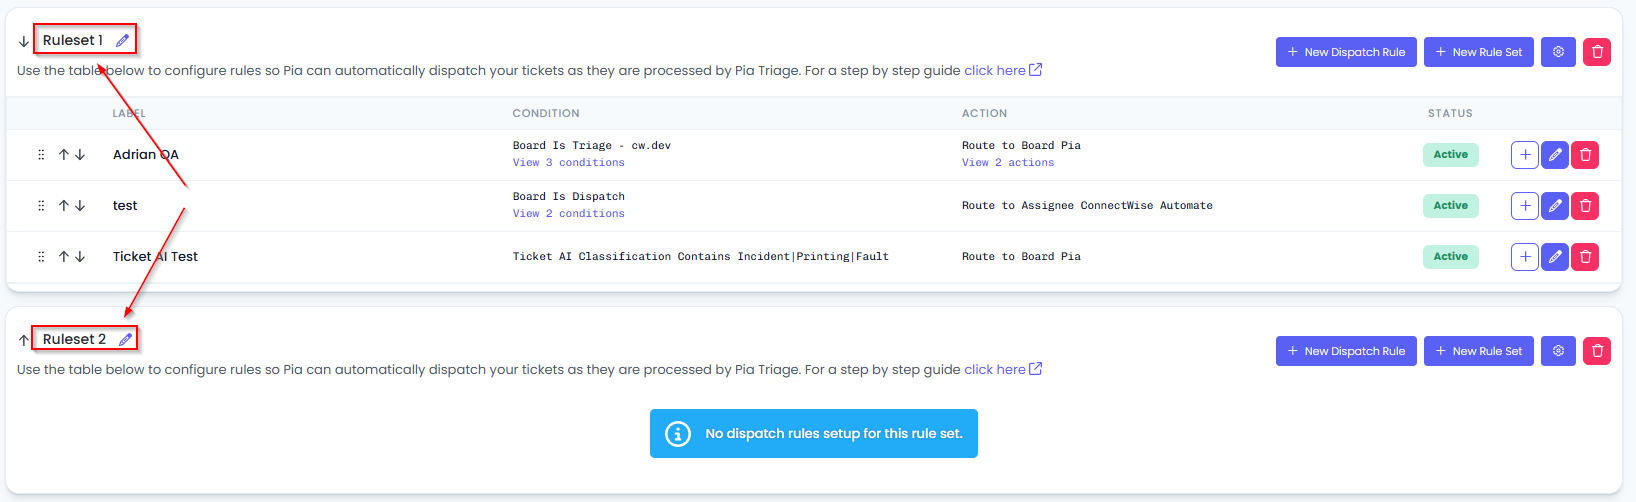
- Edit Name: You can edit the name of each rule set by clicking on the edit(pen) icon beside the name of the rule set
- Re-order Rule sets: Use the arrow available before the name of each rule set to re-order the dispatch rule sets.
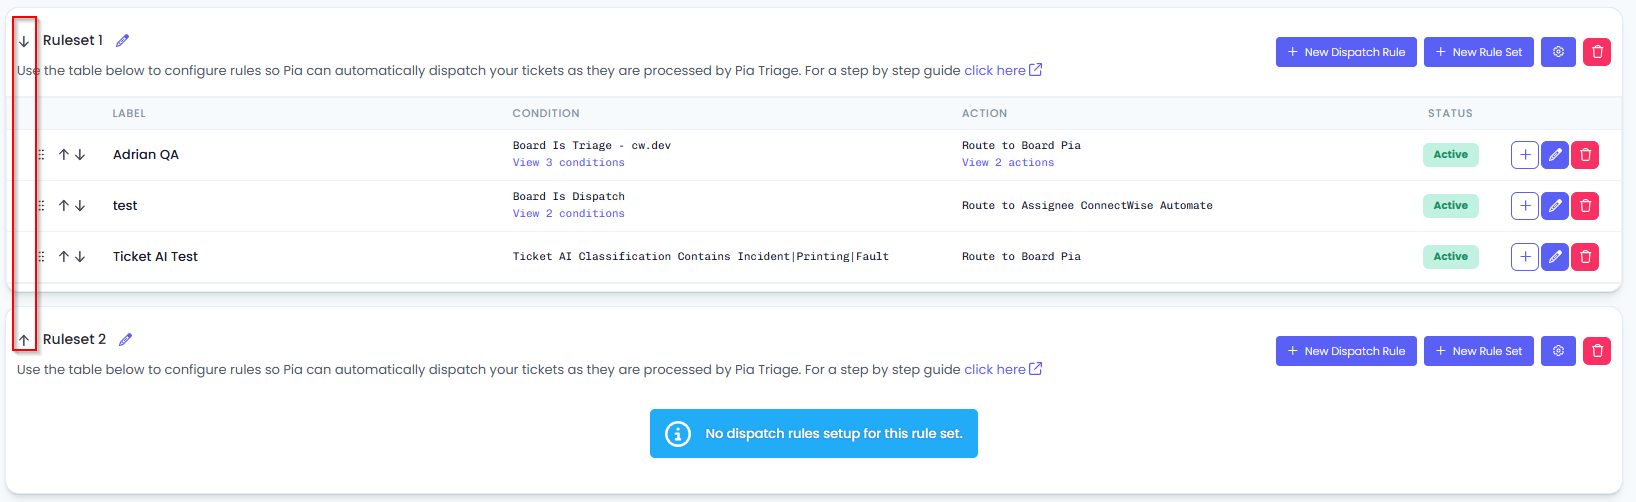
The order of Dispatch Rule Sets determines the sequence that they’ll be processed (from top to bottom). If a dispatch rule set includes the action 'Stop Processing Further Rules,' Pia will stop processing further dispatch rules for that ticket and will disregard any subsequent dispatch rule sets configured below the current one.
Scenarios
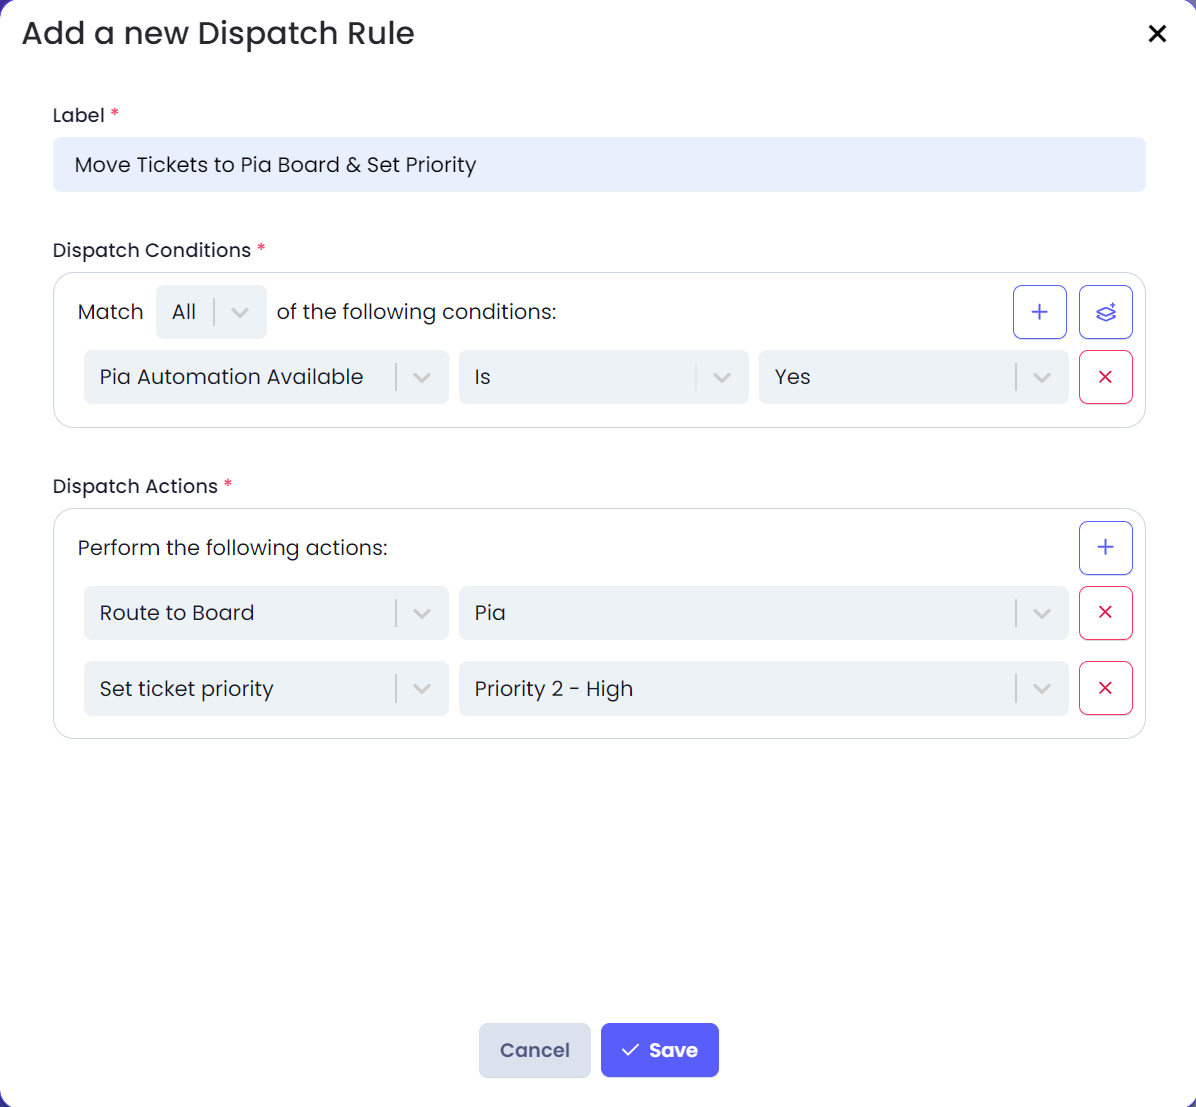
Scenario 1: Set Board & Priority
This Dispatch Rule detects all incoming tickets that are serviceable by Pia and moves them to the Service Board called Pia and sets the ticket priority to Priority 2 - High.
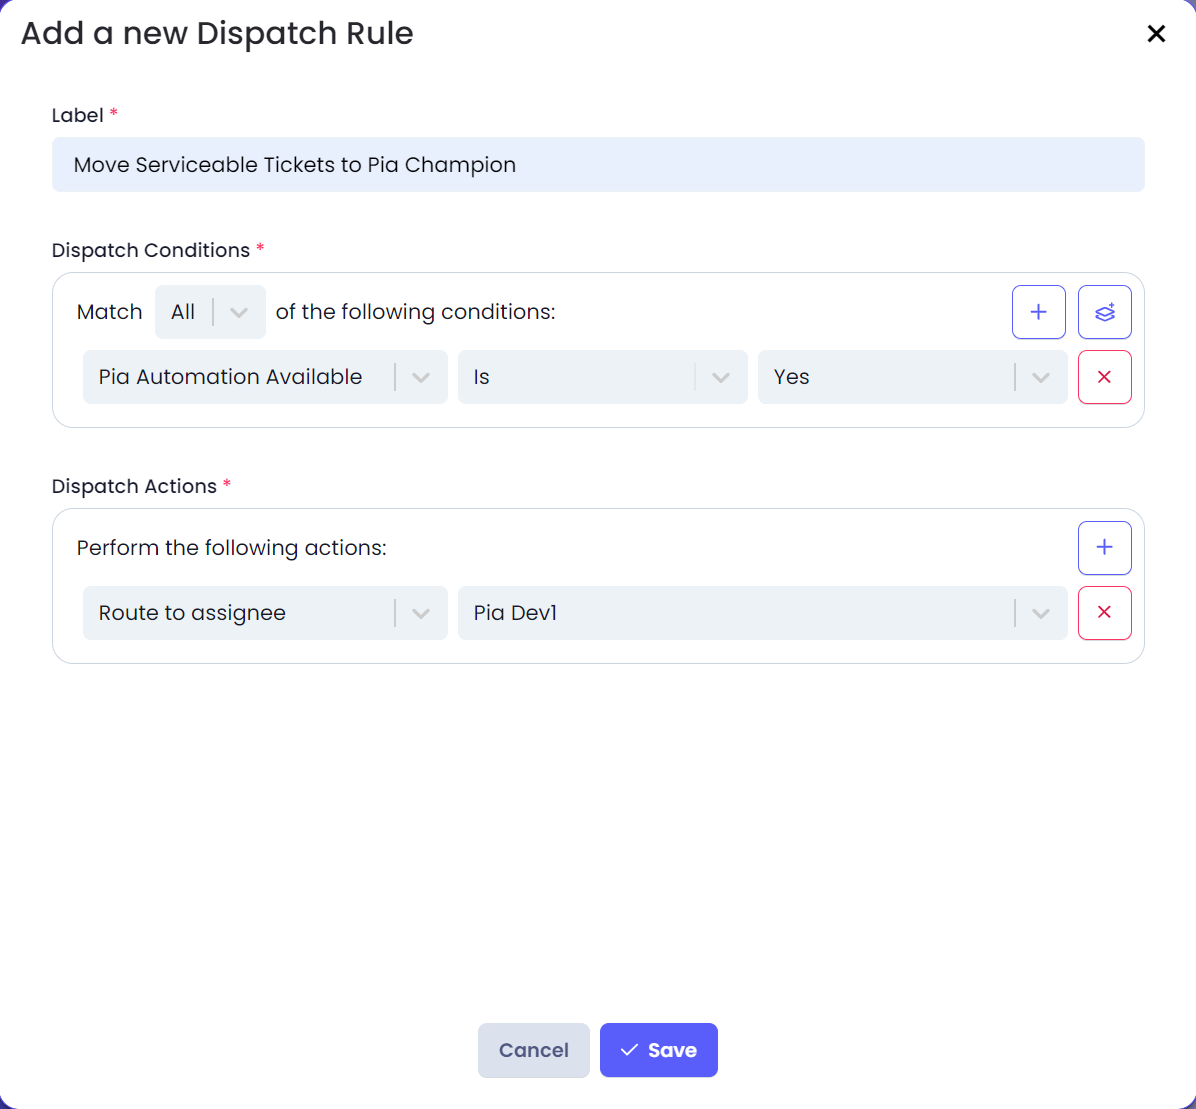
Scenario 2: Set Assignee
This Dispatch Rule detects all incoming tickets that are serviceable by Pia and routes them to a Pia Champion Pia Dev1.
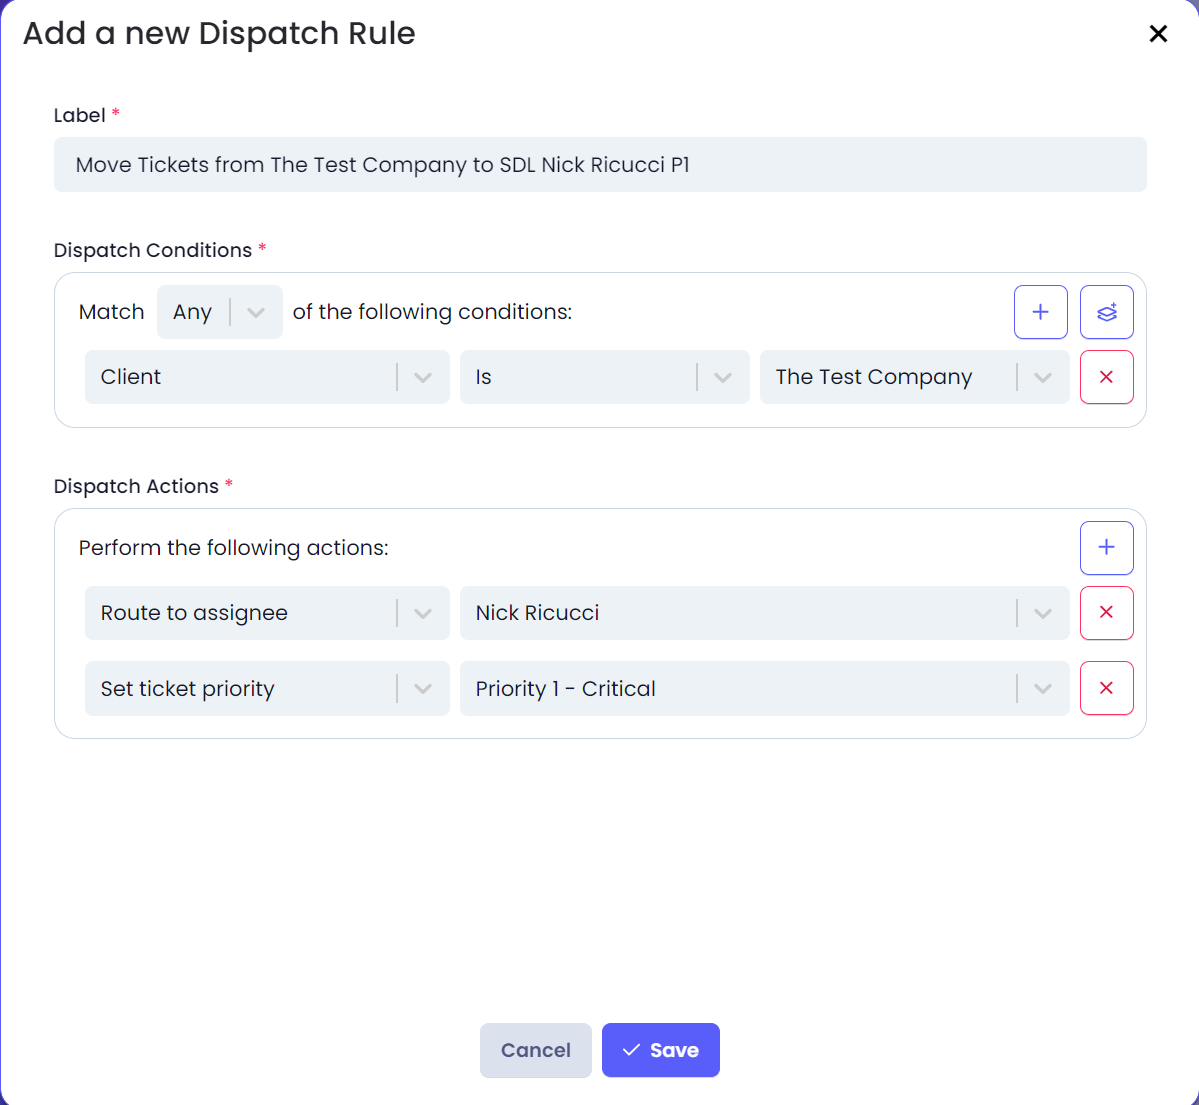
Scenario 3: Set Assignee and Priority
This Dispatch Rule detects all incoming tickets that are from The Test Company and assigns them to a Pia Champion Nick Ricucci and sets the ticket priority to Priority 1 - Critical.
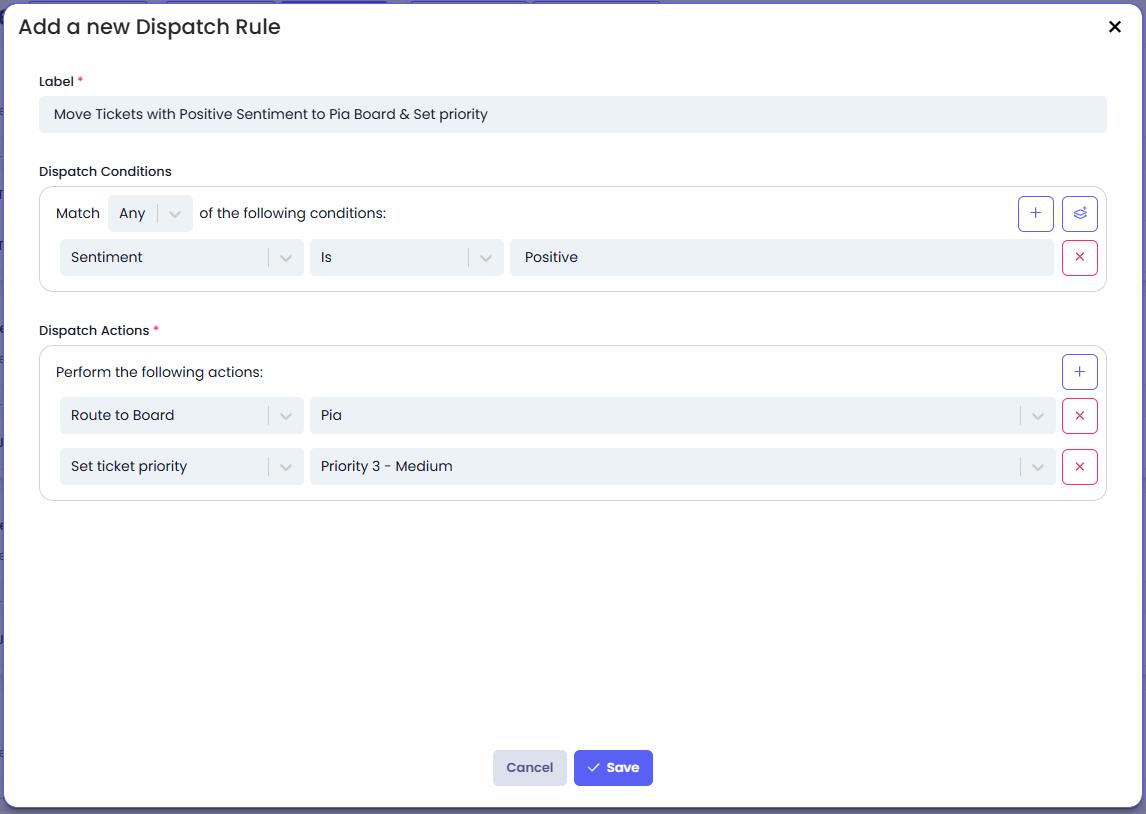
Scenario 4: Sentiment Analysis
This Dispatch Rule detects all incoming tickets that are positive in sentiment and moves them to the Service Board called Pia and sets the ticket priority to Priority 3 - Medium.