Managing with Inputs and Outputs
In the last part of this tutorial we are going to bring together every thing we learnt so far. The pia automation platform gets it power from how you can create many simple, single responsibility activities and bring them together to produce repeatable, flexible automations
What you'll learn
- Populating forms using The fallback content to display on prerendering
- Using input and output variables to drive your powershell activities
- Using The fallback content to display on prerenderingto manipulate data
- Generating complex The fallback content to display on prerenderingon the fly from activity output
Step 1 : A simple form definition
Let's get started with a simple form definition. We're going to build this up in stages so you get really familiar with how they work.
- Create a new automation package definition called "Tutorial: Part 4"
🎗️ Refresher on how to create an automation package definition
- Open the "Package Editor" from the left-hand menu
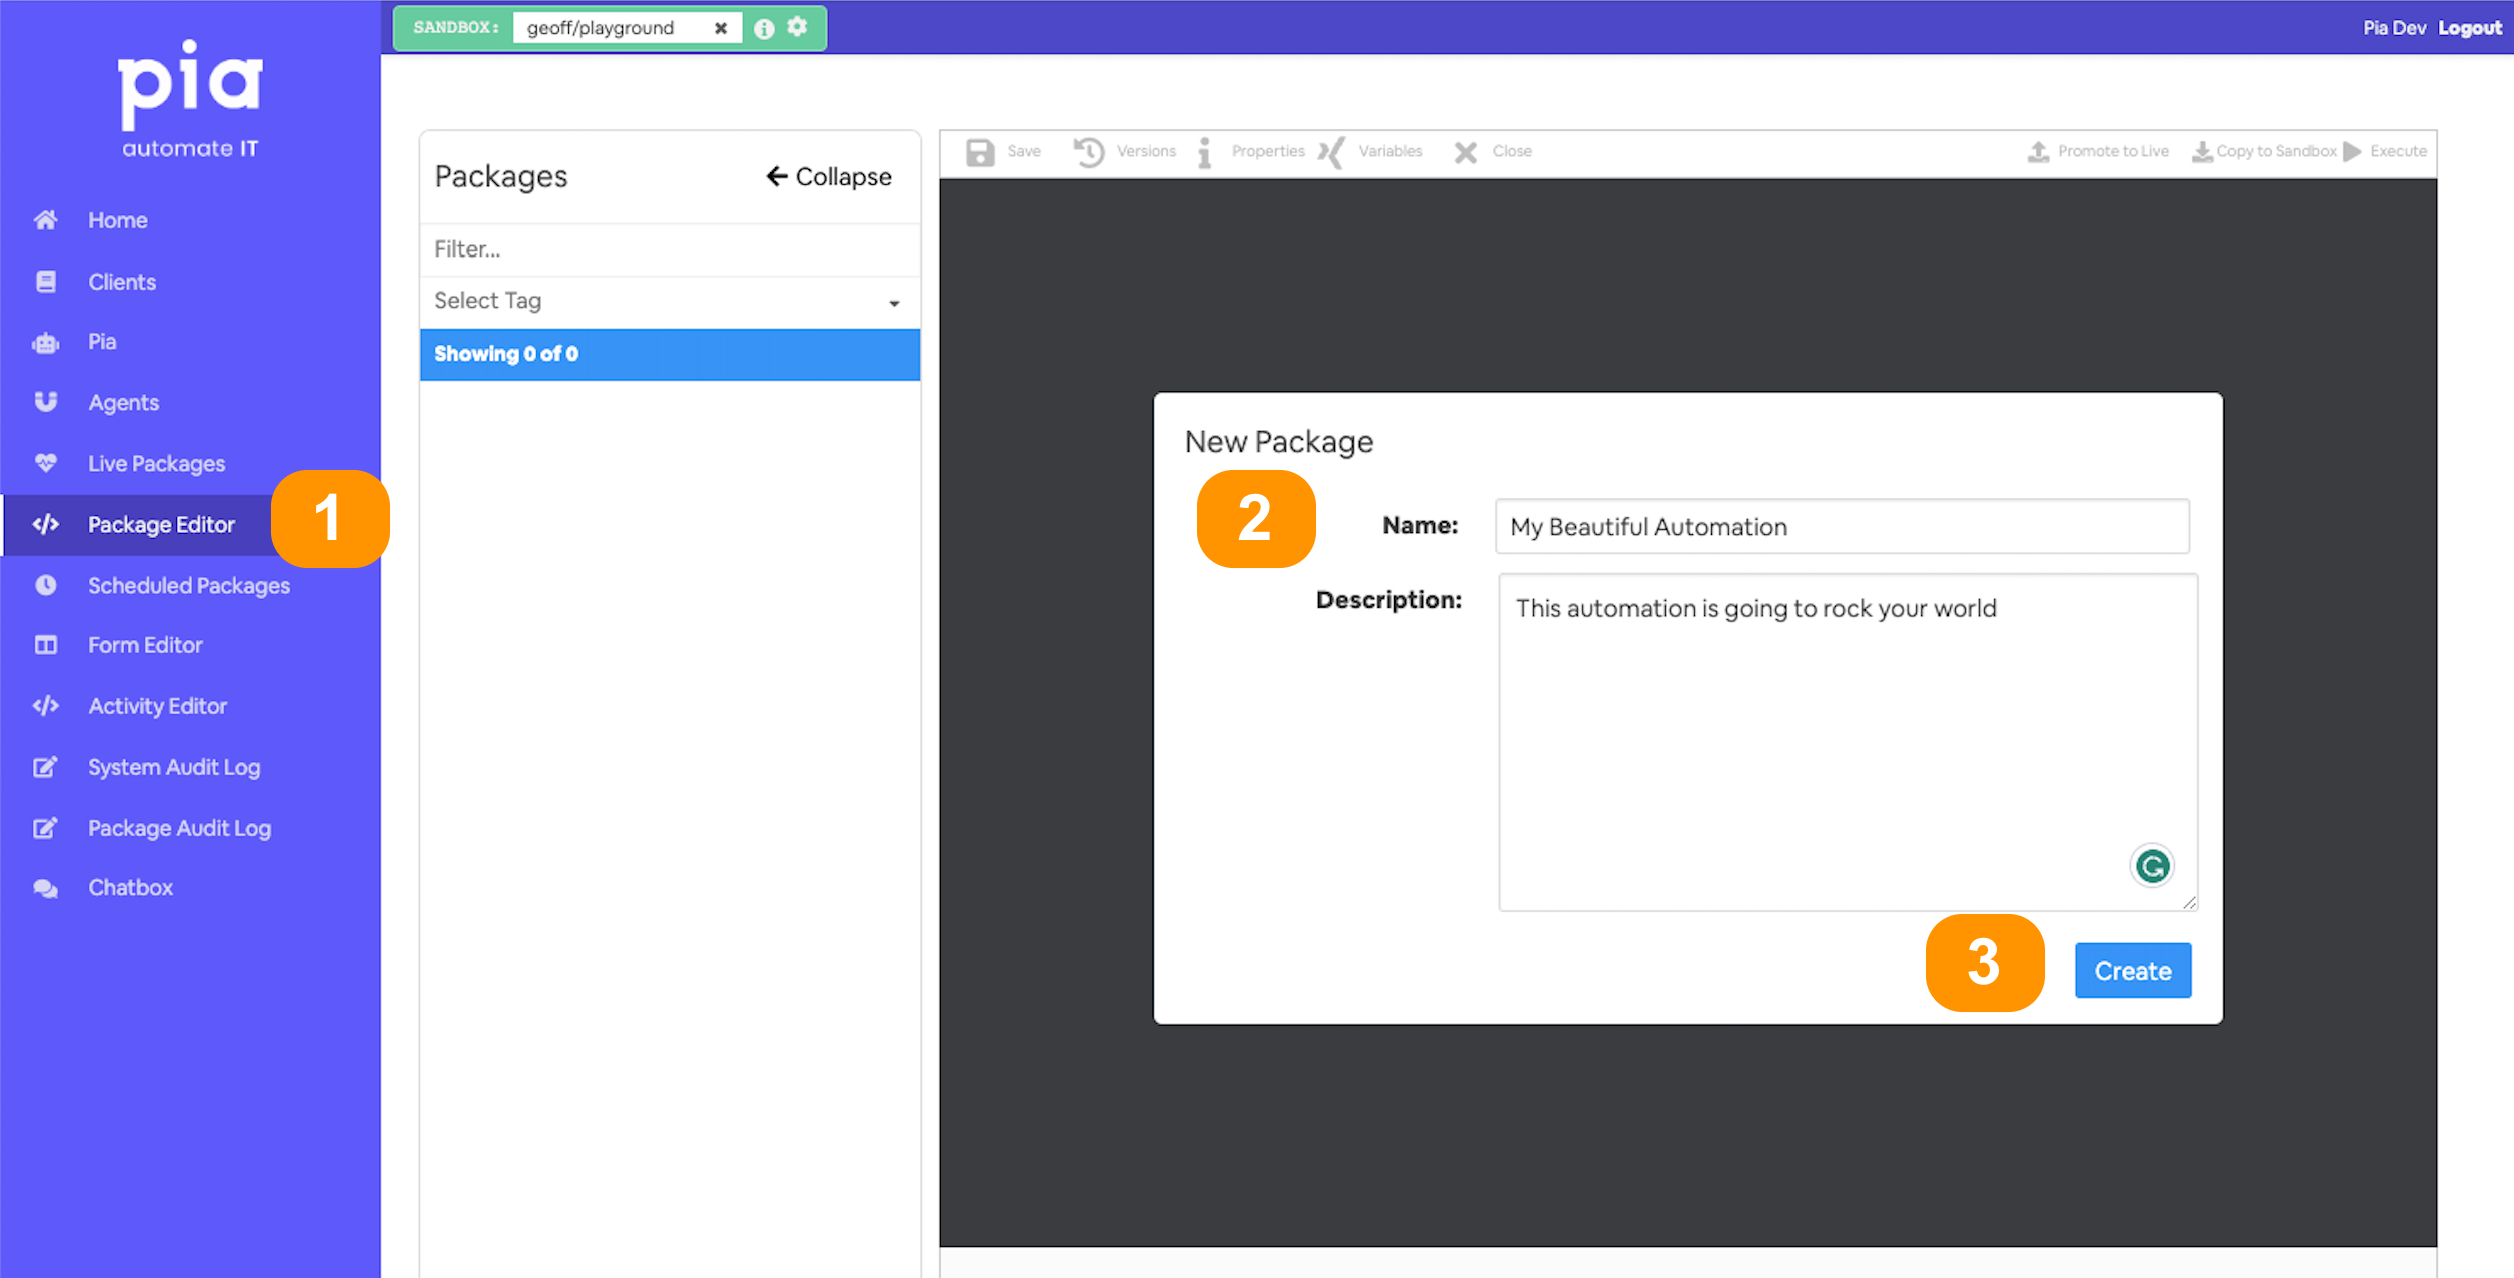
- Give your automation a memorable name;
- and a description (optional)
- You'll land in the automation definition editor
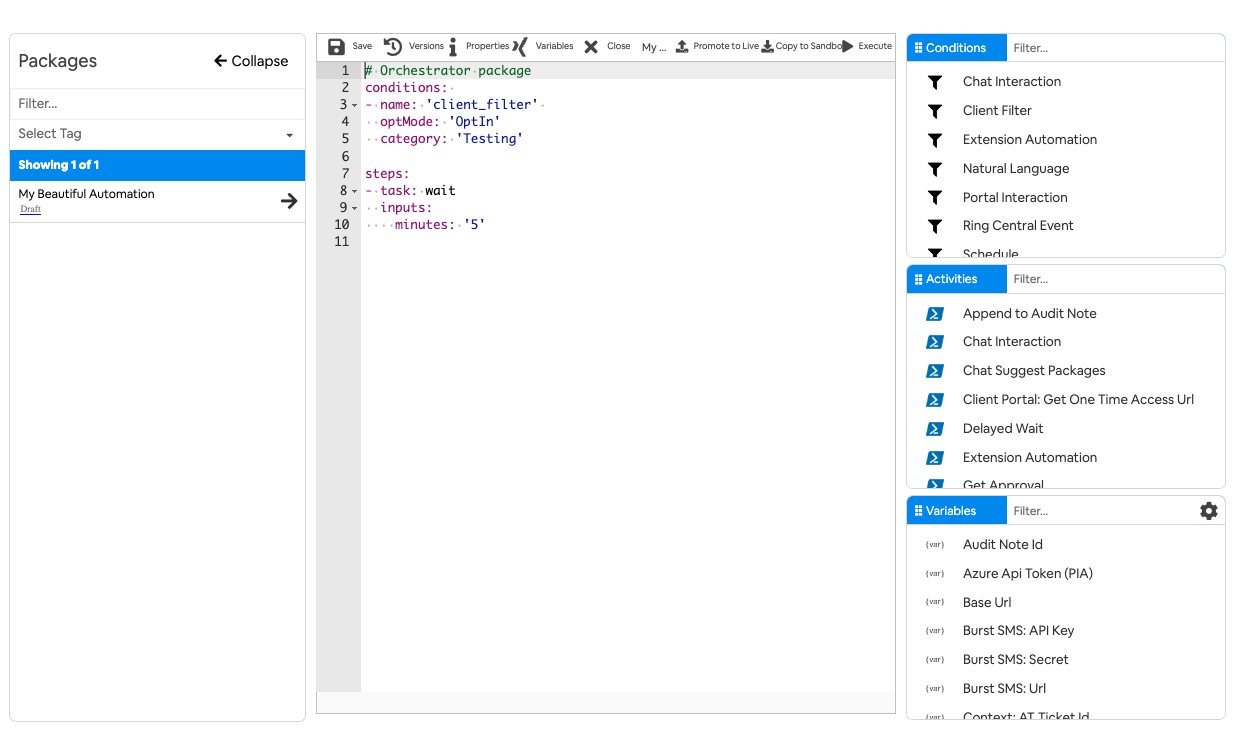
- Add the below conditions and steps.
- A chat condition so we can run it from the ChatBox to test
- optMode of OptOut so that it can be ran against any client in the Sandbox
- And a chat interaction to open the form we created in part
- Here is the complete definition
## Conditions are the first thing we define in our automation definition
conditions:
# 📝 Wherever you use a chat condition, you MUST have a client_filter condition.
- name: 'client_filter'
  optMode: 'OptOut'
  category: 'Testing'
# 💬 This is where we've defined a chat condition
- name: 'chat'
  option_button: 'Part 4: Inputs/Outputs'
  option_text: 'Part 4: Plugging activities together (Inputs/Outputs)'
  option_category: 'Tutorial'

## Steps are the things that run when the conditions are met
steps:
# 📝 trigger the Network Access Request form in the chat
- task: chat_interaction
  alias: network_access_request_form
  inputs:
    text: ' '
    form_name: 'network_access_request_form'
    form_display_mode: 'Popup'
- Before we go any further, run it in the chatbox to ensure it is working as expected
- Add a
form_defproperty to the chat interaction inputs section of the YAML. So, right at the bottom...- We're going to pass in the
Requestor's Nameto beJenny Benny - This is the value to do so:
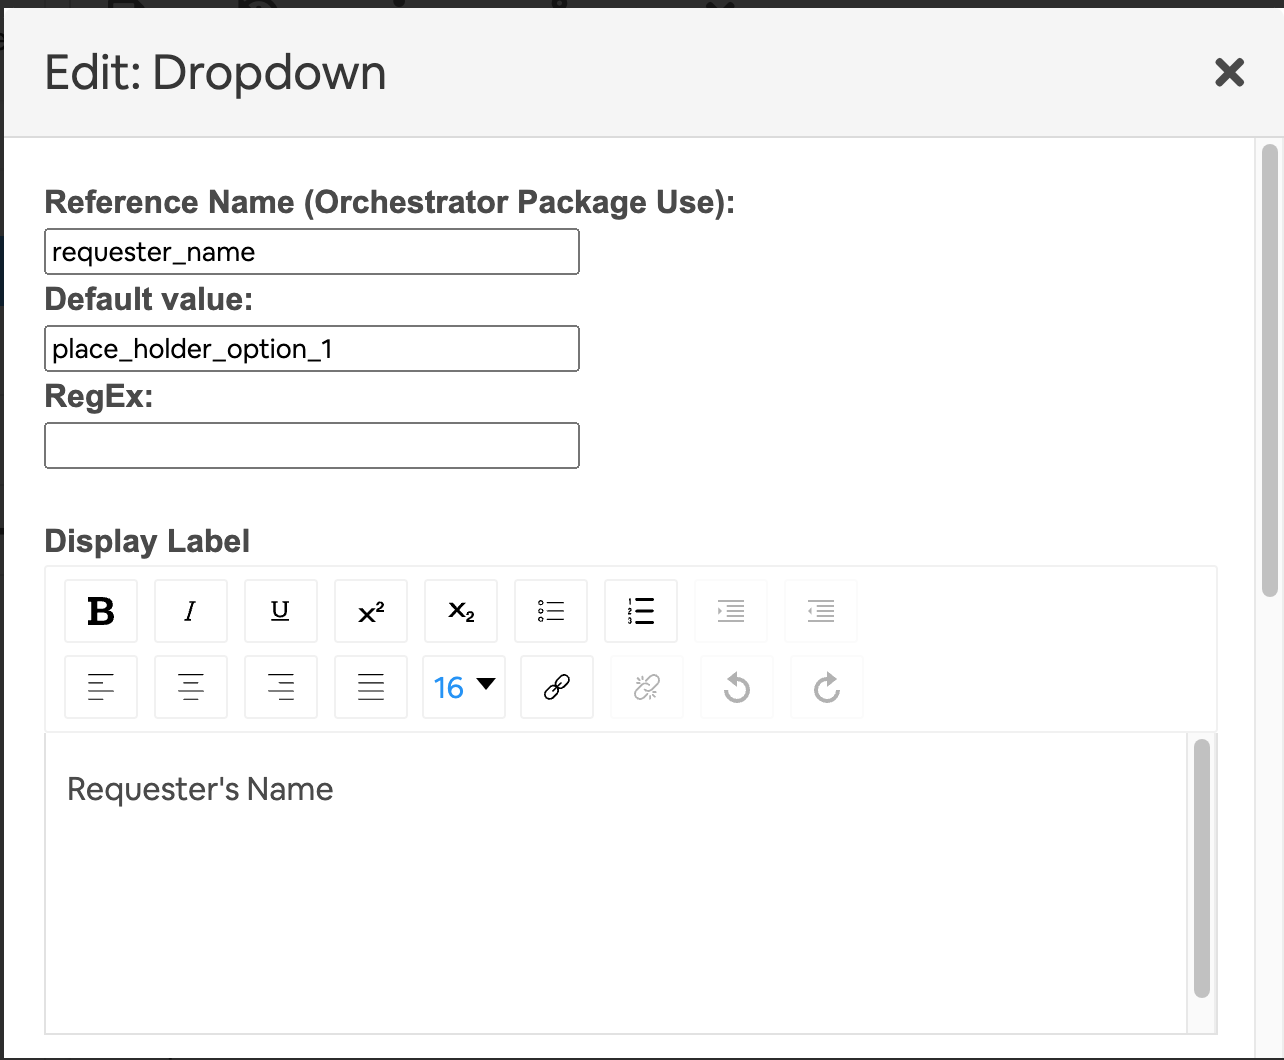
'{"requester_name": "Jenny Benny"}'
- We're going to pass in the
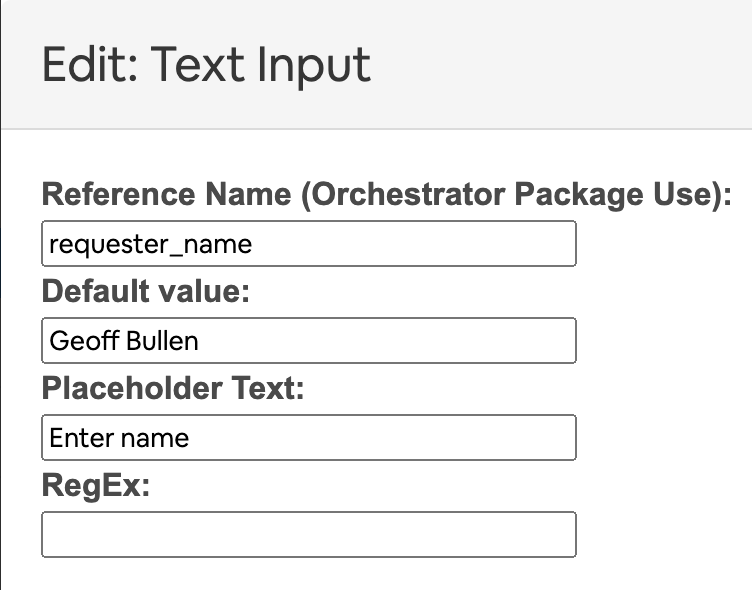
requester_name
the reference name of the field that we want to override
Jenny Benny
the value that we are going to set it to
This gets more complex with other field types, 📚 read all about it!
please note: anything you set in the form_def will overwrite what is set in the form editor.
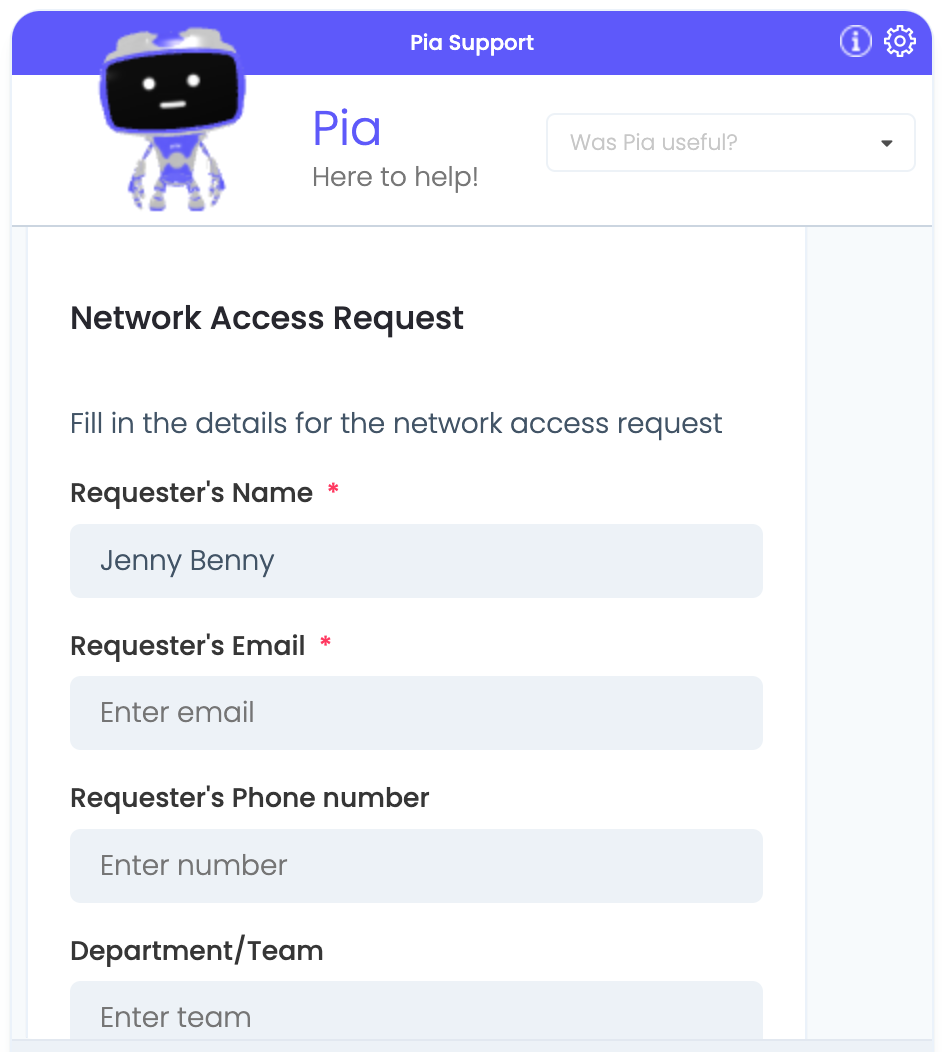
- Run your automation from the chat again and notice the difference. It should look a little like this:
Step 2 : A more complex form definition
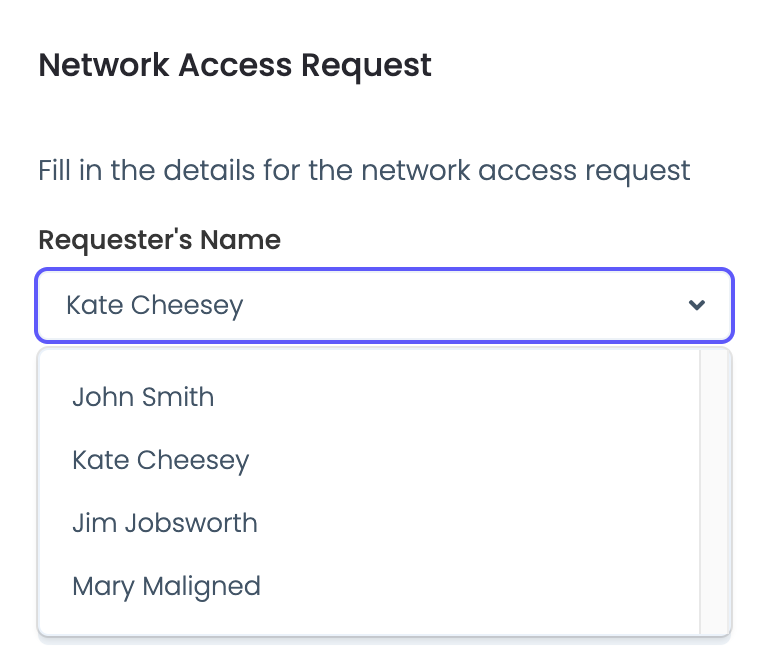
OK 🚀! Now let's take it a step further and convert it to a dropdown and provide the list of users in the
- Delete the text input field and replace it with a drop down...remembering to keep the same reference name!
- Update the form_def input property in your The fallback content to display on prerendering. We are going to give it a list of text, value and selected properties.
- task: chat_interaction
  inputs:
    text: ' '
    form_name: 'network_access_request_form'
    form_display_mode: 'Embed'
    form_def: |
      {
        "requester_name": [
          { "text": "John Smith", "value": "jsmith", "selected": false },
          { "text": "Kate Cheesey", "value": "kcheesey", "selected": true },
          { "text": "Jim Jobsworth", "value": "jjobsworth", "selected": false },
          { "text": "Mary Maligned", "value": "mmaligned", "selected": false }
        ]
      }
- notice the highlighted line, that item should be selected when the form is presented
- Run it again to confirm and you should get something similar to the below:
Step 3: Passing data as an output variable from an activity
In part 3 of this tutorial we were just printing lists of users and groups. In this part we are going to use those values to give us a dynamic form.
- Start by opening the
Get User Listactivity you created in the previous session - Select
variablesfrom the top menu and add 2 output variables:- UserList
- GroupList
- Now comment out all the code in ExecuteActivity where we were printing to the console
- And replace with the below lines to call the functions and populate the output variables
$userList = GetUserList
$activityOutput.out.UserList = $userList
$groupList = GetGroupList
$activityOutput.out.GroupList = $groupList
Step 4: Parsing data received from an activity
We're taking this pretty slow, but not long to go now
Let's get back into the automation package editor
Call the
Get User Listactivity first. We need to do this up top as we are going to use the output in later stepsAnd bring in the
Inline Powershellactivity. We will use that to play with the output
- Give your
Get User ListtheexecutionEnvironmentandexecutionEnvironmentKeythat was working for you in the previous session.
Now we are going to bring in a new activity type, the
- Put your cursor below the Get User List (
get_user) activity and select Inline Powershell from the activity selection box.
- Now we are just going to set these 2 inputs on the inline powershell
userList: =get_users.UserList: this maps the UserList output property from step 2, to a variable available to our inline powershell calleduserList(it could be anything you fancy).script: 'Write-Host "userList length is $($userList.Length)"': All this is going to do is print out the length of the userList variable. 🤔 what do you think it will be??
- this is what you should end up with in the
steps:part of your yaml
## Steps are the things that run when the conditions are met
steps:
# 💻 run get users
- task: get_users
  executionEnvironment: 'System'
  executionEnvironmentKey: '[YOUR_AGENT_KEY]'

# 🔮Inline powershell is great for parsing and mapping output
- task: inline_powershell
  inputs:
    userList: =get_users.UserList
    script: 'Write-Host "userList length is $($userList.Length)"'
- so, go ahead and run that. You know the drill 👮♀️.
- Check the output log for something similar to:
[INFO] userList length is 5480 - That is strange, I was expecting about 20 users and it says I have nearly 6,000 🙈. Oh, that makes sense - this is a string not an object.
Non-primitive output variables are converted to JSON objects when they are passed from activity to the automation.
- Ah! You just need to update your script to call the ConvertFromJson cmdlet and Bob's your uncle.
 Write-Host "userList length is $($userList.Length)"
 $userList = $userList | ConvertFrom-Json
Write-Host "userList length is $($userList.Length)" now! - And now your output should look like this:
[INFO]  Executing PowerShell on PIA environment.
[INFO]  userList length is 5480
[INFO]  userList length is 20 now!
Remember to use the | character when you want to add multi-line text to your yaml. Such as:
script: |
      Write-Host this is line one of my fancy script
      Write-Host this is line two of my fancy script
Step 5: Map into the form_def
OK, so now we are going to bring the 2 parts together. We know how to create a powershell activity, get users from active directory and return it to our automation definition. We also know how to setup pur forms with the
- So, let's expand our The fallback content to display on prerenderingto include a line that converts our array of users into the
text/valueformat required by the dropdown field definition. There are 3 parts.
You can remove the logging statements so your script should just have this line to convert from a JSON string into a powershell object.
$userList = $userList | ConvertFrom-JsonAdd in a statement that will map that array to a new array with a property
textthat holds the value ofuserList.DisplayNameand a propertyvaluethat has the value ofuserList.SamAccountName. Here is one possible implementation:$requesterNameFieldDefinition = $userList | Select-Object `
@{Name='text'; Expression={$_.DisplayName}}, `
@{Name='value'; Expression={$_.SamAccountName}}And return it as an object in the required format
return @{
    FormDef = @{ requester_name = $requesterNameFieldDefinition }
}
👀 complete script
# ① Convert the JSON string in $userList into a PowerShell object
# This is necessary to perform object manipulations in the next steps.
$userList = $userList | ConvertFrom-Json

# ② Reformat each user in $userList into a new object
# The 'text' property corresponds to the DisplayName of the user,
# and the 'value' property corresponds to the SamAccountName of the user.
$requesterNameFieldDefinition = $userList | Select-Object `
    @{Name='text'; Expression={$_.DisplayName}},
    @{Name='value'; Expression={$_.SamAccountName}}

# ③ Return a map with the key  'FormDef'
# 'FormDef' contains another map where the key 'requester_name'
#  matches the field identifier in your form
return @{
    FormDef = @{ requester_name = $requesterNameFieldDefinition }
}
- Give your The fallback content to display on prerenderingan alias that we will use to refer to it by in ourThe fallback content to display on prerendering.
alias: get_users_form_def
Aliases allow you to refer to the return values from inline powershell from anywhere in your automation definition.
- Replace the hardcoded
form_defin yourThe fallback content to display on prerenderingwith a reference to the FormDef return value from your script. So, it should now look similar to:text: 'Complete Network Access request Form'
form_name: 'network_access_request_form'
form_display_mode: 'Popup'
form_def: =get_users_form_def.FormDef - 🤞 Lets give it a whirl. Run your automation from the chat interface and you should get your beautiful form populated from your AD user list.
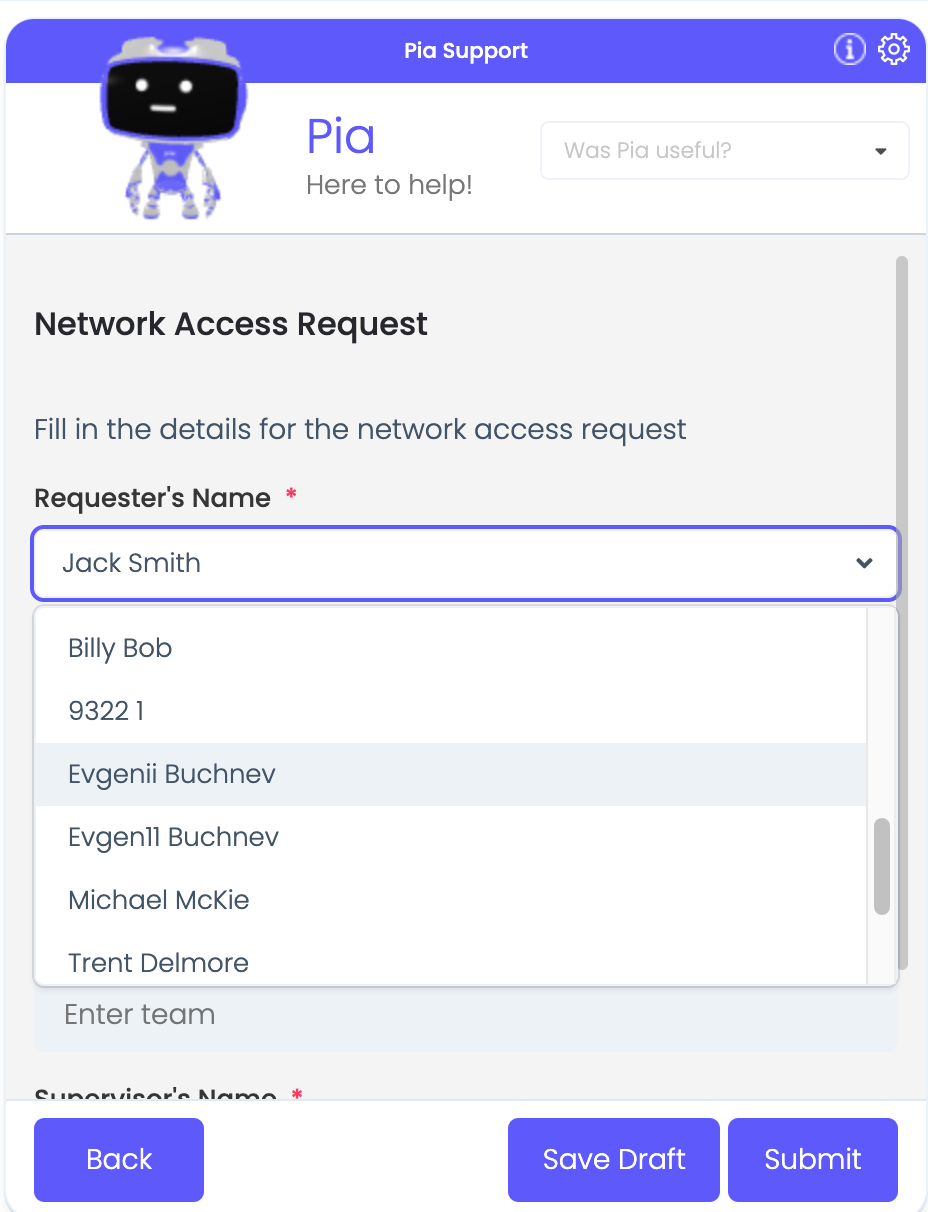
👀 complete automation definition YAML
## Conditions are the first thing we define in our automation definition
conditions:
# 📝 Wherever you use a chat condition, you MUST have a client_filter condition.
- name: 'client_filter'
optMode: 'OptOut'
category: 'Testing'
# 💬 This is where we've defined a chat condition
- name: 'chat'
option_button: 'Part 4: Inputs/Outputs'
option_text: 'Part 4: Plugging activities together (Inputs/Outputs)'
option_category: 'Tutorial'
## Steps are the things that run when the conditions are met
steps:
# 💻 run your Get User List powershell activity to query AD
- task: get_users
executionEnvironment: 'System'
executionEnvironmentKey: '[YOUR AGENT KEY]'
# 🔮use inline powershell to parse and manipulate the results into
# the format needed by your form
- task: inline_powershell
alias: get_users_form_def
inputs:
userList: =get_users.UserList
script: |
# ① Convert the JSON string in $userList into a PowerShell object
# This is necessary to perform object manipulations in the next steps.
$userList = $userList | ConvertFrom-Json
# ② Reformat each user in $userList into a new object
# The 'text' property corresponds to the DisplayName of the user,
# and the 'value' property corresponds to the SamAccountName of the user.
$requesterNameFieldDefinition = $userList | Select-Object `
@{Name='text'; Expression={$_.DisplayName}},
@{Name='value'; Expression={$_.SamAccountName}}
# ③ Return a map with the key 'FormDef'
# 'FormDef' contains another map where the key 'requester_name'
# matches the field identifier in your form
return @{
FormDef = @{ requester_name = $requesterNameFieldDefinition }
}
# 📄 Display the network request form in the chat interface, populated from your AD users
- task: chat_interaction
alias: network_access_request_form
inputs:
text: 'Complete Network Access request Form'
form_name: 'network_access_request_form'
form_display_mode: 'Popup'
form_def: =get_users_form_def.FormDef
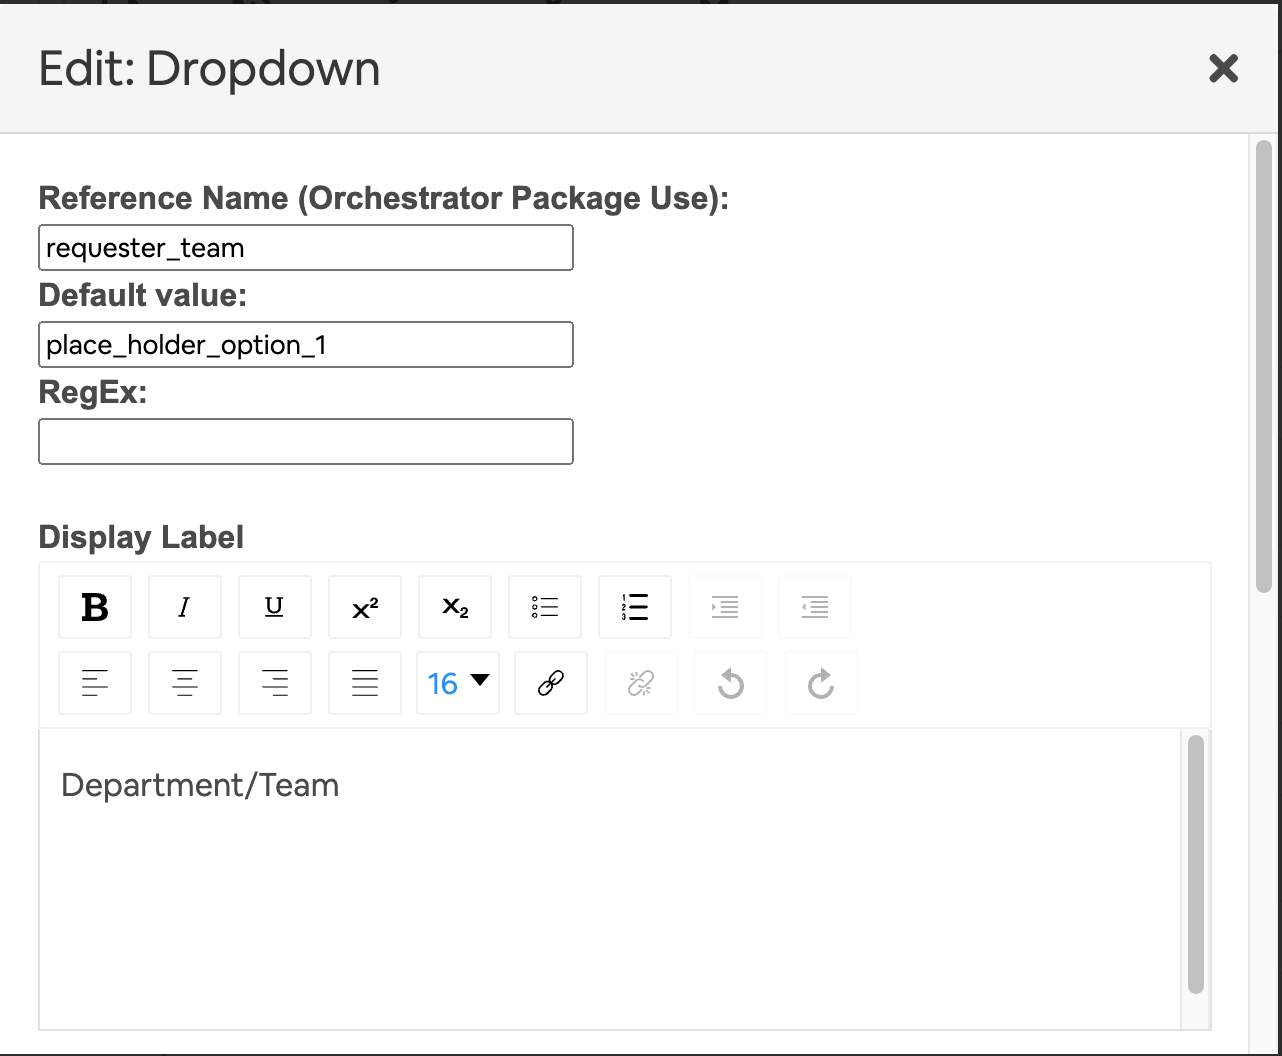
Step 6: Use the group list to populate the Team dropdown in your form
We're getting to the end of this tutorial 😢. So, put what you've learnt into practice and do the following:
Replace the
Requester's Teamfield in the form with a dropdownUpdate your
The fallback content to display on prerenderingto include this in your form definitionRun it and enjoy 🎈. It's pretty easy when you know what you're doing eh? Here's what you should see:
💻 Get User List Activity
Function VerifyActivity()
{
    # # Put code here to verify the command will work given the variables
    return $true;
}

<#
   The GetGroupList function retrieves all Active Directory groups, counts the number of members
   in each group, and returns a sorted list of groups with their member counts.
#>
Function GetGroupList(){
    # Get all groups
    $groups = Get-ADGroup -Filter *
    $groupList = @()
    foreach ($group in $groups) {
        # Get the members of the group and add their count to the object
        $members = Get-ADGroupMember -Identity $group -Recursive
        $groupList += New-Object PSObject -Property @{
            Name = $group.Name
            DistinguishedName = $group.DistinguishedName
            MemberCount = $members.Count
        }
    }

    # Sort and filter to only display groups with more than 9 members
    $groupList = $groupList | Where-Object { $_.MemberCount -gt 9 } | Sort-Object MemberCount -Descending

    return $groupList
}

<#
   The GetUserList function retrieves Active Directory users that have logged in
   in the last 30 days and have their names set
#>
Function GetUserList() {
    # Construct our filter
    $today = Get-Date
    $thirtyDaysAgo = $today.AddDays(-30).ToString('yyyy/MM/dd')
    $filter = "LastLogonDate -ge '$thirtyDaysAgo' -and GivenName -ne '*' -and Surname -ne '*'"

    # Get users from AD with required properties
    $users = Get-ADUser -Filter $filter -Properties SamAccountName, DisplayName, EmailAddress, `
    Title, Manager, LastLogonDate, GivenName, SurName

    # Construct the array
    $userList = $users | ForEach-Object {
        New-Object PSObject -Property @{
            SamAccountName = $_.SamAccountName
            DisplayName = $_.DisplayName
            EmailAddress = $_.EmailAddress
            Title = $_.Title
            Manager = $_.Manager
            LastLogonDate = $_.LastLogonDate
            GivenName = $_.GivenName
            LastName = $_.SurName
        }
    }
    return $userList
}


Function ExecuteActivity(){
    # Do stuff here
    $userList = GetUserList
    $activityOutput.out.UserList = $userList
    $groupList = GetGroupList
    $activityOutput.out.GroupList = $groupList

    # Set execution status
    $activityOutput.success = $true;
    return $activityOutput;
}
💻 Automation Package Definition
 ## Conditions are the first thing we define in our automation definition
conditions:
# 📝 Wherever you use a chat condition, you MUST have a client_filter condition.
- name: 'client_filter'
  optMode: 'OptOut'
  category: 'Testing'
# 💬 This is where we've defined a chat condition
- name: 'chat'
  option_button: 'Part 4: Inputs/Outputs'
  option_text: 'Part 4: Plugging activities together (Inputs/Outputs)'
  option_category: 'Tutorial'

## Steps are the things that run when the conditions are met
steps:
# 💻 run your Get User List powershell activity to query AD
- task: get_users
  executionEnvironment: 'System'
  executionEnvironmentKey: '[YOUR AGENT KEY]'

# 🔮use inline powershell to parse and manipulate the results into
# the format needed by your form
- task: inline_powershell
  alias: get_users_form_def
  inputs:
    userList: =get_users.UserList
    groupList: =get_users.GroupList
    script: |

        # Convert the JSON string  into a PowerShell object
        $userList = $userList | ConvertFrom-Json
        $groupList = $groupList | ConvertFrom-Json

        # Reformat each user in $userList into a field def friendly object
        $requesterNameFieldDefinition = $userList | Select-Object `
            @{Name='text'; Expression={$_.DisplayName}},
            @{Name='value'; Expression={$_.SamAccountName}}

        # Reformat each user in $userList into a field def friendly object
        $requesterTeamFieldDefinition = $groupList | Select-Object `
            @{Name='text'; Expression={$_.Name}},
            @{Name='value'; Expression={$_.DistinguishedName}}

        # ③ Return a map with the key  'FormDef'
        # 'FormDef' contains another map where the key 'requester_name'
        #  matches the field identifier in your form
        return @{
            FormDef = @{
                requester_name = $requesterNameFieldDefinition
                requester_team = $requesterTeamFieldDefinition
            }
        }

# 📄 Display the network request form in the chat interface, populated from your AD users
- task: chat_interaction
  alias: network_access_request_form
  inputs:
    text: 'Complete Network Access request Form'
    form_name: 'network_access_request_form'
    form_display_mode: 'Popup'
    form_def: =get_users_form_def.FormDef
📝 Form Field Definition
🧨 Congratulations 🧨, you have now completed the introduction to automation development tutorial! 🍻 or ☕️?