Interacting with the chatbot
In this tutorial we explore the concept of how to create a package. We cover how to create a new package, add conditions for package execution, add chat interactions to your package, and set up your package for use in the chatbot.
Like to watch 👀? Dive into our video series for a comprehensive overview before delving into the tutorials.
What you'll learn
- Create your The fallback content to display on prerendering
- Create an The fallback content to display on prerendering
- Add The fallback content to display on prerenderingto determine execution rules
- Add The fallback content to display on prerendering
- Set your package up to be used in the chatbot
To be able to start with the package development in Pia, you will need to have the role of 'Engineer' in Pia portal and the following permissions:
- Sandbox Permissions
- Edit/Draft Permissions for: Package Editor, Form Editor and Activity Editor
- View Permissions for: Chatbot
🦸♀️ Of course 'SuperAdmin' will have automatic access to all features in Pia portal.
If you do not have the above permissions, ask your admin to provide you with the required access.
Step 1: Create a Sandbox
A sandbox in Pia allows you to create custom automation in isolation from live mode. In fact, you can only create them when you are in a sandbox!
With a sandbox, you only have the activities and forms required for the development of a single package.
Read more
- Using the Package Editor, you can only view and save packages for the sandbox you have selected
- Using the Form Editor, you can only view and save packages for the sandbox you have selected
- Using the Activity Editor, you can only view and save packages for the sandbox you have selected
- Using the Client Dashboard the client tags, package configuration and global configuration options are all specific to that sandbox
- Using the Live Packages view, you can only see packages which you are running inside that sandbox
- Using the Pia Chatbot, while in sandbox mode, you can only see packages which are available inside that sandbox.
Differences Between Sandbox and Live Mode
There are also some minor differences in functionality between sandbox mode and live mode:
- In sandbox mode, you cannot use scheduled packages - if you attempt to schedule a package with a cron expression, it simply will not execute. Scheduled packages will only work when in live mode. If you want to test a package that you will later schedule, use the "Test Execute" function or add conditions for Pia Chatbot so you can use it in Pia for testing
- Certain other conditions will be restricted in sandbox mode. To understand more about specific restrictions, navigate to the article for the relevant condition
- Sandbox mode does not have versions functionality. Live mode is the only place where you can view and restore the previous version of a package, activity or form.
- Certain restrictions to the automations you can execute apply in sandbox mode. These restrictions are built into the system to ensure that you can safely create automations without executing commands on client agents. Refer to the Whitelist Feature.
How to use a Sandbox
Once you have created a sandbox, you can create new packages, forms and activities directly or copy them from live mode and other sandboxes.
Often, the process for developing changes to an existing package (i.e. one you have previously published) involves:
- Navigate to the package you wish to modify in live mode
- Select "Copy to Sandbox" in the toolbar at the top of the editor
- Select the sandbox you wish to copy to and click Go
- You will be prompted with a list of associated forms and activities which will be copied into the sandbox. If you already have forms and activities of the same name in the sandbox, Pia will do a comparison and give you an option of overriding changes if required
- You will be redirected to the sandbox where the package has been copied. You can make changes here
Once you are finished development of a package in sandbox mode, you can use the "Promote to Live" feature to publish and "Activate" the package.
- In the top bar of the portal, select view all sandboxes
- '+ New Sandbox' to create your sandbox
- Give it a simple, easy to remember name
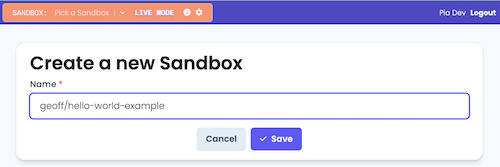
prefixing your sandboxes with your name can make them easy to find
Step 2: Create a New Package
Create a new Package called Pia aiDesk Tutorial
- Open the "Package Editor" from the left-hand menu
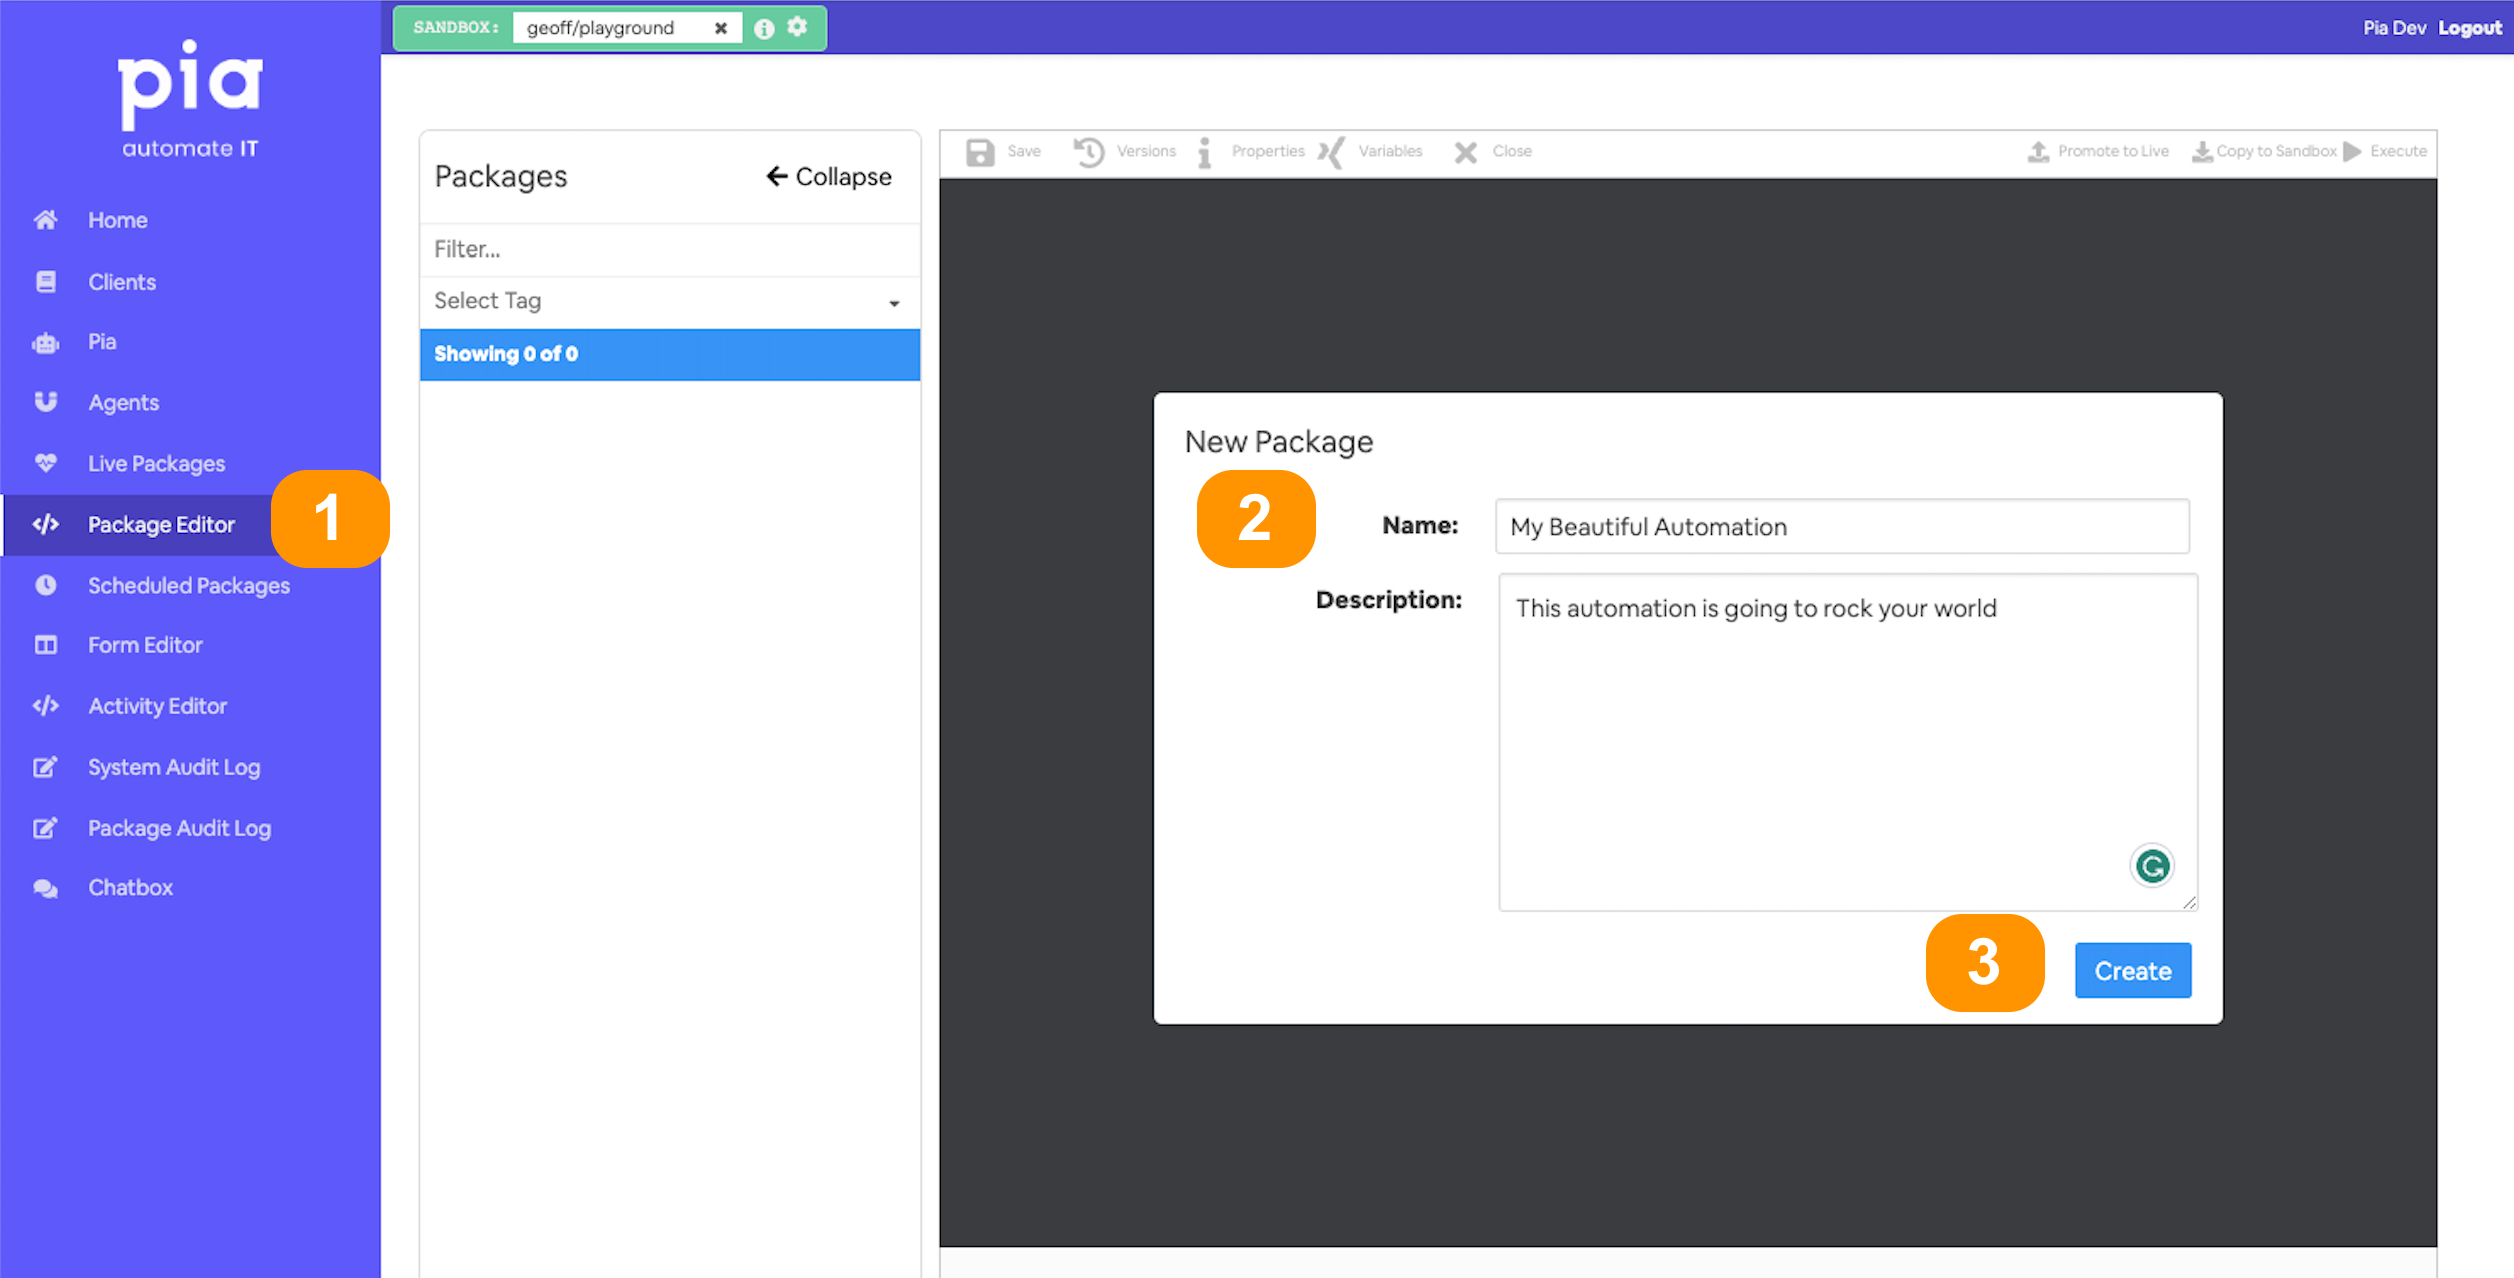
- Give your automation a memorable name;
- and a description (optional)
- You'll land in the automation definition editor
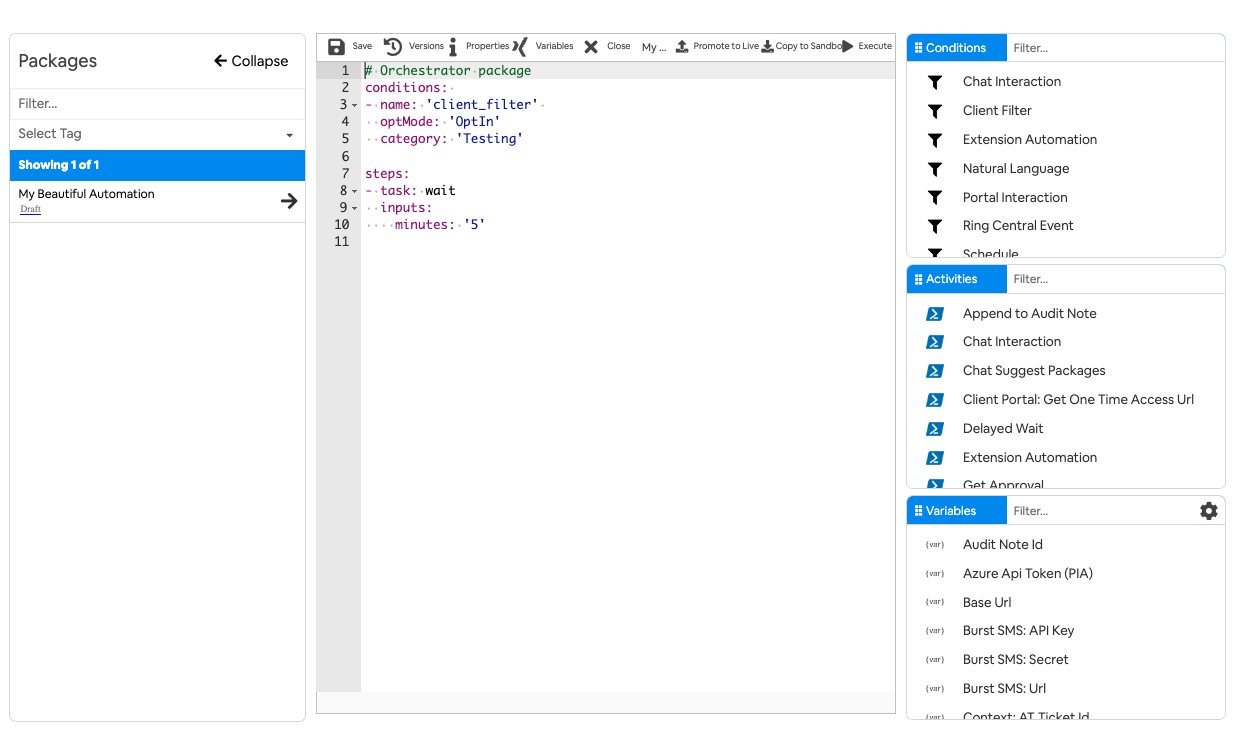
Step 3: Add A Chat Condition for Package execution
Add a
From within the automation package editor
- Put your cursor into the conditions section of the yaml file
- Select the condition you want from the conditions section of the editor
- The available fields can be filled in using the form. Or, you can enter them into the yaml later
- Click 'Add' to populate your definition with this condition
Set the below properties
- option_text: 'I want to run my First Chat Interaction'
- option_button: 'First Chat Interaction'
- option_category: 'Tutorial'
Your condition should look like the highlighted section below
conditions:
# 🔎 This is where we can set the options to Filter by clients
# 📝 Wherever you use a chat condition, you MUST have a client_filter condition.
- name: 'client_filter'
  optMode: 'OptOut'
  category: 'Testing'

# 💬 This is where we've defined a chat condition
- name: 'chat'
  option_text: 'I want to run my First Chat Interaction'
  option_button: 'First Chat Interaction'
  option_category: 'Tutorial'
📚 Want to go deep into Chat Conditions?
Overview
The primary use of a Chat Interaction condition is to make your package accessible via the Pia Chatbot. With this condition added to your package, your automation can be initiated by a user of the Pia Chatbot.
The Chat Interaction condition can be selected in the conditions menu of the package editor:

Here is an example for what the condition looks like in a basic package:
conditions:
- name: 'client_filter'
  optMode: 'OptOut'
  tags: 'Cloud Hybrid'
  category: 'Profile'

- name: 'chat'
  option_button: 'Test'
  option_text: 'Test'
  option_category: 'Testing'

steps:
- task: chat_interaction
  inputs:
    text: ' {=client_filter.form.option1}'
Condition Behavior
Packages which Behavior a Chat Interaction Condition will display an option in the Pia Chatbot window which allow the user to initiate/start the automation. Most of the input properties on the "Chat Interaction Condition" allow you to control how your package is displayed to your users in the chatbot. Refer to the usage of these properties below.
The Chat Interaction condition must be combined with a Client Filter Condition to have any effect. If a Client Filter Condition is not included in the package alongside a Chat Interaction condition, the package will not display in Pia Chatbot.
The Pia Chatbot is just one way of running packages inside the Pia platform. Certain built-in activities are only available for use when building a package for the Pia Chatbot (i.e. a package which has a Chat Interaction Condition):
- Chat Interaction Activity
- Chat Suggest Packages Activity
- Schedule For Later Activity
- Get Approval Activity
Input Properties
Use properties to modify the behavior of the condition.
Property Name: option_button
Property Required: Yes
Property Description: Title of the package (aka. automation action), this is displayed in the Pia Chatbot when a user is selecting a package for execution.

Property Name: option_text
Property Required: Yes
Property Description: Short description displayed under the title in pia chatbot window.
Property Name: option_category
Property Required: No, defaults to empty
Property Description: Category used to group packages in the pia chatbot
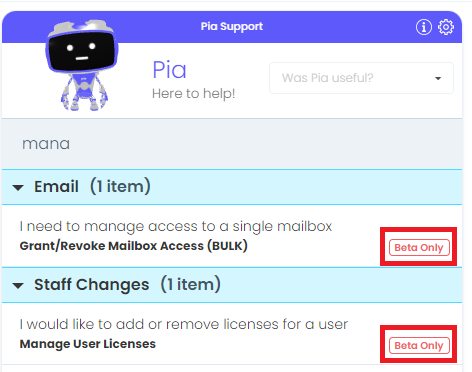
Property Name: beta_mode
Property Options: enabled, disabled
Property Required: No, defaults to disabled
Property Description: If enabled, this will inform the user in pia that the package is in beta. Note: This can be overriden in the client package configuration screen.
Property Name: timeout_warning_minutes
Property Required: No, defaults to platform inactivity warning time period
Property Description: Determine the time when the first warning message will be displayed after a period of inactivity / waiting on the chatbot user to respond.
Property Name: timeout_final_minutes
Property Required: No, defaults to platform inactivity timeout period
Property Description: Determine the time when the package will finally timeout after a period of inactivity / waiting on the chatbot user to respond.
Output Properties
There are two properties which the Chat Interaction condition makes available.
Property Name: client_id
Property Description: This will return the client id for the ticket context which Pia Chatbot is running.
Most of the time this will return the same value as the $ctx_client_id variable, however this property has a special purpose in that it will only have a value if the package was initiated via chatbot. If the package was not initiated via the Pia Chatbot (e.g. perhaps you have a ticketing system condition on this package), then this property would have a null value.
Unless you are using the property for this purpose, you should use the $Ctx_Client_Id variable in most cases.
Property Name: initiated_by
Property Description: This will help you determine if a Client, Engineer or Pia caused this package to execute.
- Engineer: This will be the value in most cases at the current time. This will be returned where the user of the Chatbot is a Service Desk Engineer.
- Pia: If pia starts the automation automatically via its AI condition, the value will be returned as "Pia".
- Client: Not Yet Implemented. This is a placeholder value for when Pia's functionality is available to clients in the future.
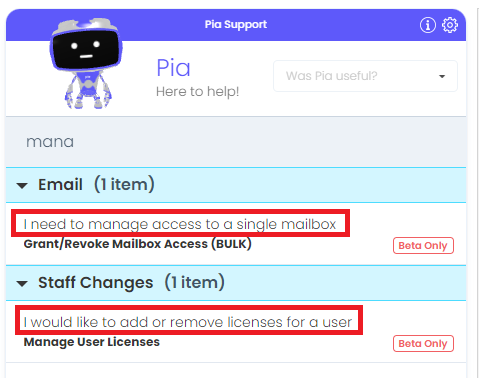
Example of Usage
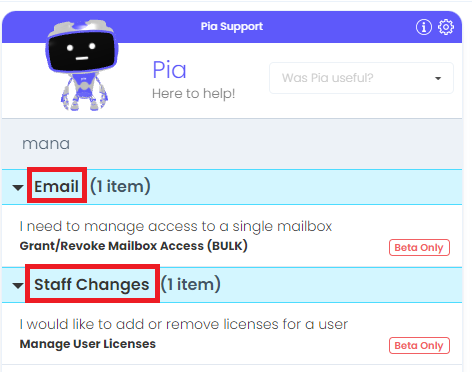
The example below demonstrates how the properties can be configured for a package which manages user licenses. In the example below, the package will display a warning after 30 minutes of inactivity and timeout after a further 60 minutes (or 90 minutes since the start of inactivity).
# Orchestrator package
conditions:
- name: 'chat'
  option_button: 'Manage User Licenses'
  option_text: 'I would like to add or remove licenses for a user'
  option_category: 'Staff Changes'
  beta_mode: 'enabled'
  timeout_warning_minutes: '30'
  timeout_final_minutes: '90'

# Wherever you use a chat condition, you MUST have a client_filter condition.
# A chat condition will not work without a client_filter condition
# Refer to client_filter documentation for more information
- name: 'client_filter'
  optMode: 'OptOut'
  lockTo: '50'

steps:
# Not displayed
Step 4: Add Chat Interactions to Your Package
From within the automation package editor
- Put your cursor into the activities section of the yaml file
- Select the activity you want from the activities section of the editor
- The available fields can be filled in using the form. Or, you can enter them into the yaml later
- Click 'Add' to populate your definition with this activity
- Delete the form options from the package editor.
- Add a generic "Hello, world" chat interaction to your package.
- Click on "Save".
Your activity should look like the highlighted section below
## Conditions are the first thing we define in our automation definition

conditions:
# 🔎 This is where we can set the options to Filter by clients
# 📝 Wherever you use a chat condition, you MUST have a client_filter condition.
- name: 'client_filter'
  optMode: 'OptOut'
  category: 'Testing'

# 💬 This is where we've defined a chat condition
- name: 'chat'
  option_text: 'I want to run my First Chat Interaction'
  option_button: 'First Chat Interaction'
  option_category: 'Tutorial'

# 🏃Activities, or steps, are the actions we take when a condition has been met
steps:
- task: chat_interaction
  inputs:
    text: 'Hello there! Did you realize, you are now officially a Pia automation engineer?'
📚 Want to learn about the Chat Activity?
Overview
The Chat Interaction (chat_interaction) Activity is a powerful feature for use in your automation packages. With the Chat Interaction Activity, you can interface with the users of your automation and control the flow of execution of your package. Specifically, you can send text messages to your user and request input (using a form) via the Pia Chatbot.
Lets compare building an automation in Pia with how you would build a simple PowerShell script on your PC. In your PowerShell script, you may need to ask your user for information and also display information back to them. You may use Write-Host and Read-Host for this, or for a more advanced UI, you may even create a window popup or web page to request information from your user.
With the Pia chatbot, the Chat Interaction activity speeds up your development by reducing one of the concerns that you would otherwise need to spend time developing - the user interface.
The Chat Interaction activity can be located by searching for "Chat Interaction" in the list of activities in the package editor:

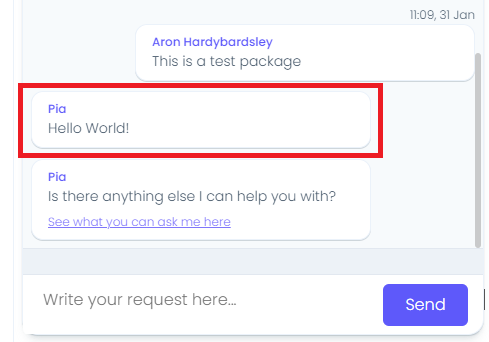
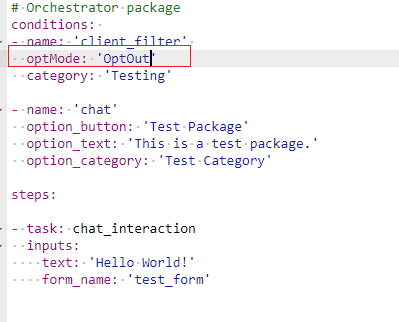
Here is a working sample of the activity in a basic package:
# Orchestrator package
conditions:
- name: 'client_filter'
  optMode: 'OptOut'
  category: 'Test Package'

- name: 'chat'
  option_button: 'Test'
  option_text: 'This is a test package'
  option_category: 'Test Category'

steps:
- task: chat_interaction
  inputs:
    text: 'Hello World!'
Activity Behaviour
The primary behaviour of the Chat Interaction activity is to send messages to the user via the Pia Chatbot. When your package is executed, Pia will output the message you specify and move on to the next activity in your package for execution.
One exception to this behaviour is where you send a message via Chat Interaction activity with a form attached. In this scenario, the package execution will wait until the user submits a response to the form before continuing on to the next activity in your package (Note: This doesn't apply for forms where you have turned off the setting for "Enable Go Button" - forms used in this scenario are typically read only and used to better present large amounts of information which do not fit into a text message).
The Chat Interaction Activity can only be used in package executions which have been initiated via the Pia Chatbot (i.e. this activity will not work in cases where the package was initiated via Schedule or Ticketing System Event).
Features of the Chat Interaction Activity
The Chat Interaction activity primarily used to send text to the chatbot, but there are also some additional features which make a couple of common scenarios easier:
- You can send forms to the chatbot to request information from the user
- You can send text with newlines and even HTML formatting in the text of the chat message
- If you want to send a user a date but want it to be converted to the local timezone of the user, you can format the date in ISO UTC format and it will be automatically converted when it is displayed in the chatbot
An example of each feature above is available at the bottom of this article.
Input Properties
Use properties to modify the behaviour of the activity.
Property Name: ticket_id
Default Value: $Ctx_CW_Ticket_Id
Property Required: Yes
Property Description: The ticket id of the ticket to send the chat message to. This defaults to the ticket id for the current chat session and does not need to be set unless you want to override this behaviour.
Property Name: text
Property Required: Yes
Property Description: The text message to send the user.
Here's an example using the text "Hello World!":
Property Name: form_name
Property Required: Yes
Property Description: The static name of a form for the user to fill out.

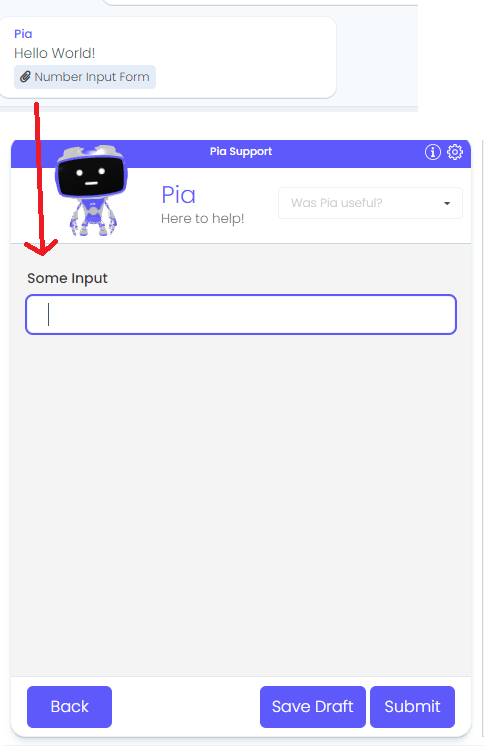
Property Name: form_display_mode
Property Options: 'Popout' or 'Embed'
Default Value: Popout
Property Required: Yes
Property Description: This determines how the form is displayed in the chat.
The screenshot below shows the "Popout" form experience. This is useful for larger forms:
The screenshot below shows the "Embed" form experience. This is useful for smaller forms:

Property Name: form_def
Property Required: No
Property Description: A JSON string which defines default values for the form which the user will fill out.
Refer to this article for more: Chat Interaction - Form Def Property
Property Name: audience
Property Options: 'Engineer' or 'Client'
Default Value: Engineer
Property Required: Yes
Property Description: Set target audience for this chat message. Multiple values can be added to this input property using a comma separated format (e.g. Engineer,Client). Note: The audience property/feature is not yet fully supported as Pia does not currently expose the chatbot to the end client. Please do not use this for now.
Output Properties
There is a single property which the Chat Interaction activity makes available:
Property Name: form
Property Description: This will return a JSON string containing the result of the filled form for which the user submitted. This will always have a value if your Chat Interaction Activity had a form_name set. Typically, you would access the fields directly in your form by using the syntax "=chat_interaction.form.FIELD_REFERENCE_NAME" - where FIELD_REFERENCE_NAME is the reference name of the field you set in your form as per the screenshot below:

Refer to the Pia Form Editor for more information on how you can create forms.
Examples
Form Example
Here is an example of a chat interaction activity which displays a form to the user, complete with form def and form output:
# Orchestrator package
conditions:
- name: 'client_filter'
  optMode: 'OptOut'
  category: 'Test Package'

- name: 'chat'
  option_button: 'Test'
  option_text: 'This is a test package'
  option_category: 'Test Category'

steps:
- task: chat_interaction
  inputs:
    form_def: '{ "num": 10 }' # Dynamically set the default value of the number input field to 10
    form_name: 'prompt_number_input'
    form_display_mode: 'Embed'
    text: "Hello World!"

- task: chat_interaction
  inputs:
     # Use the output of the form as submitted by the user
    text: "The value was: {=chat_interaction.form.num}"
In the above example, a form will be displayed with the "num" field displaying a default value of '10':

The screenshot below shows that the form has been submitted with the "num" field having the value of '20':

HTML Formatting Example
You can use HTML in the text property of the chat interaction:
conditions:
- name: 'client_filter'
  optMode: 'OptOut'
  category: 'Testing'

- name: 'chat'
  option_button: 'Hello World'
  option_text: 'Say Hello World!'
  option_category: 'Test'

steps:
- task: chat_interaction
  inputs:
    text: '<b>Calculator</b>: This is <span style="color: green;text-decoration: underline;">HTML</span>'
This will produce a message with formatted output as follows:

Date Formatting Example
When working with dates in a chat interaction, always output into ISO date format as UTC time. The chatbot will automatically convert this date into the local time format of the user's browser.
This has the added benefit of converting into the date format for the localised region of the browser (e.g. DD/MM/YYYY vs. MM/DD/YYYY).
Here is the example:
conditions:
- name: 'client_filter'
  optMode: 'OptOut'
  category: 'Testing'

- name: 'chat'
  option_button: 'iso8601_date_time'
  option_text: 'iso8601_date_time'
  option_category: 'Testing'

steps:
- task: inline_powershell
  inputs:
    script: |
            $res = (Get-Date).ToUniversalTime().ToString("o");

            # Note: Make sure you return a string containing text + a date, not just the date
            # At this point in time, if you return only the date, it will be automatically converted to the server time and give you an undesired output.
            # So you must return a "message which contains a date" instead.

            return @{ result = $("Date: " + $res) }

- task: chat_interaction
  inputs:
    text: ' {=inline_powershell.result}'
This will look like the following in the chat:

Step 5: Run your new automation
Go to the Pia chatbox screen and select and run your automation
To run in the chatbot, a valid ticket number from your ticketing system is required.
To run your package in Pia chatbot (in
👀 Check your condition
From within the Chatbox screen of the partner portal
- Enter a service desk ticket
- Select the automation to run
- Validate the output
🧨 Congratulations 🧨, you have now created an automation for the Pia chatbot!