5. Ticketing System Integration
Configuring your ticketing system in Pia is the next step. Start by selecting your ticketing system below and follow the provided instructions.
- AutoTask
- ConnectWise
- Halo PSA
Intro
AutoTask is a ticketing system. This page guides you through the process of setting up an integration via the AutoTask API.
Note: Pia allows just one active ticketing system integration at a time.
Prerequisites
You will need the following details before setting up your AutoTask integrations. (More details about these items can be found where you enter them in the sections below.)
- AutoTask API Keys
- Username (Key)
- Password (Secret)
- Tracking Token
- AutoTask WebServices URL
- Time that Pia will sync with AutoTask on a daily basis
- Name of the board Pia reads tickets from
- Name of the board Pia escalates tickets to
Set Up Process
Here is a quick intro to setting up a new integration. Details for the fields specific to each service are on the pages linked below.
Summary of the set up process
- Set-up and Test integration
- Perform Initial Sync with Ticketing System
- Install Webhooks in Ticketing System
Set-up integration
Log in to your Pia portal.
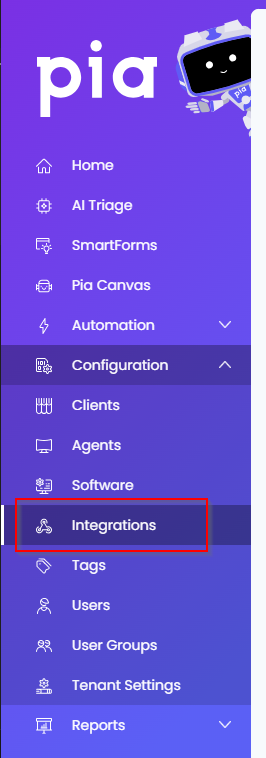
In the left menu, click on integrations
The integrations page opens.
Search for Autotask using the search bar at the top.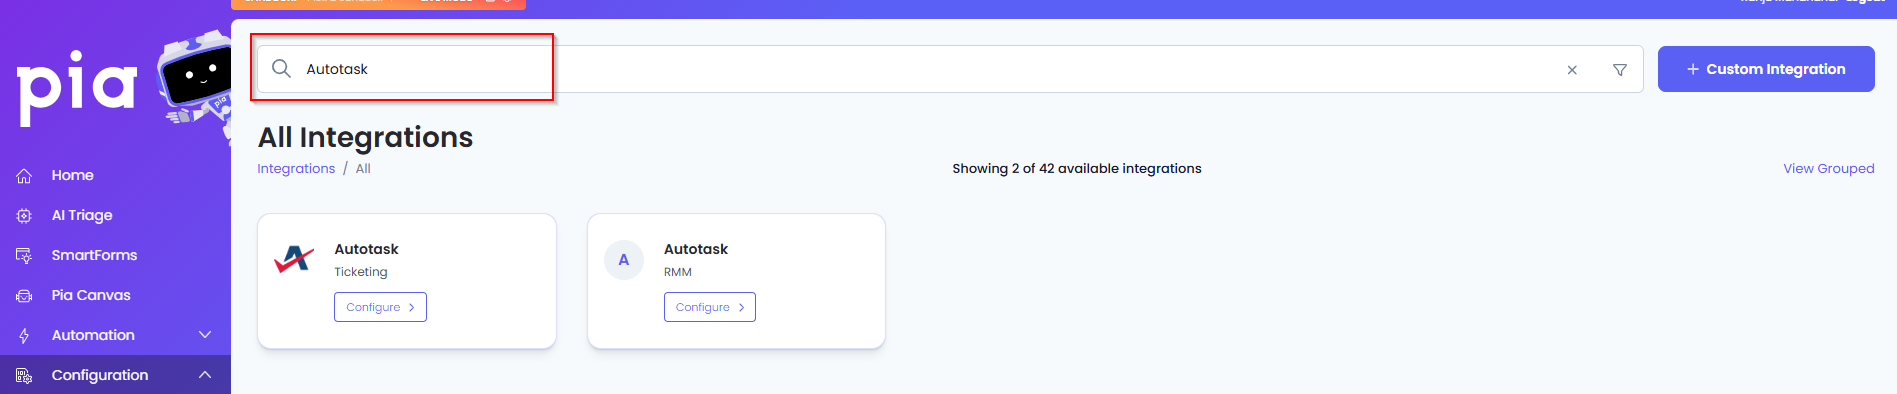
Or, click on the "View All" button available in the All Integration section.

This will open up a screen that displays all the available integrations where you can navigate to Autotask.
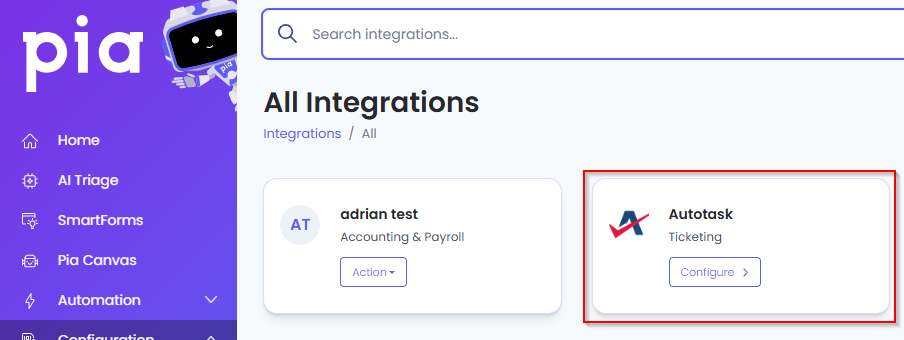
Click on the "Configure" button available in the widget for Autotask. This will take you to the configuration page for Autotask.

In this page, you can add a friendly name for the configuration in the "Configuration Name" field.
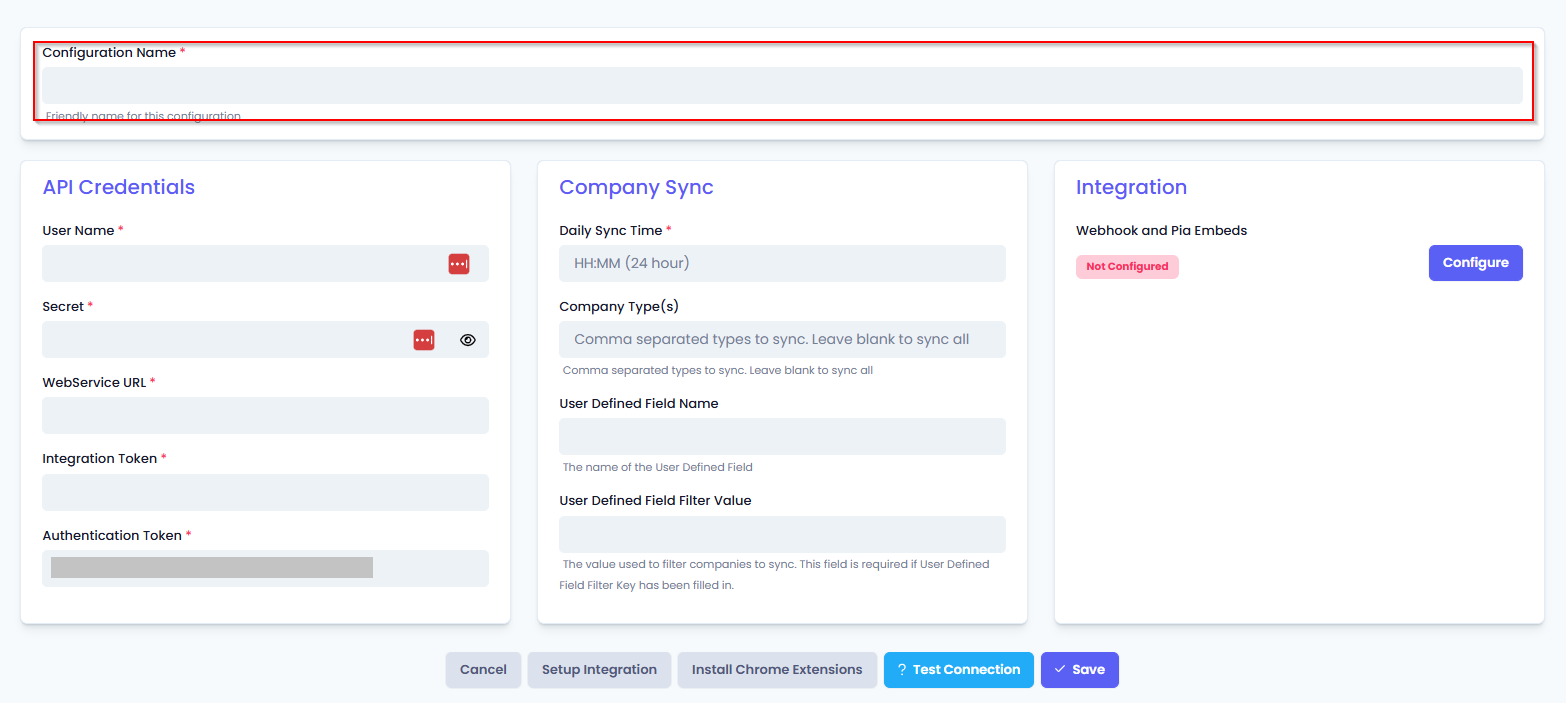
You will also see four sections with multiple fields that need to be configured for Autotask.
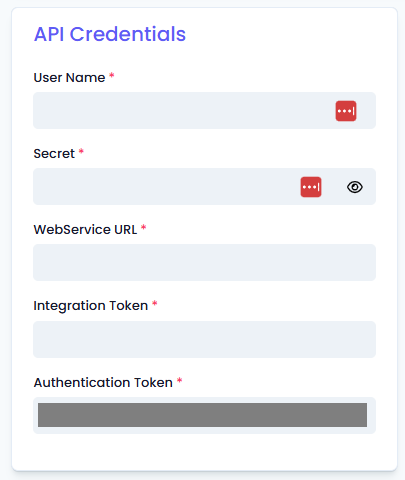
In the API Credentials tab fill in the following fields:
- Username: Enter the 'Username (Key)' value that was generated when creating your Pia API account in AutoTask.
- Secret: Enter the 'Password (Secret)' value that was generated when creating your Pia API account in AutoTask
- WebService URL: Enter the URL for your AutoTask's WebService, followed by the API version number
- The URL used is dependent on your geographic location. Check the Autotask PSA API zones and WSDL versions page if you are unsure
- Add the API version number on the end in the form
/v1.0/
- Integration Token: Enter the Tracking Identifier value that was generated when creating your Pia API account in AutoTask
- Authentication Token: The token will be automatically generated when the page loads.
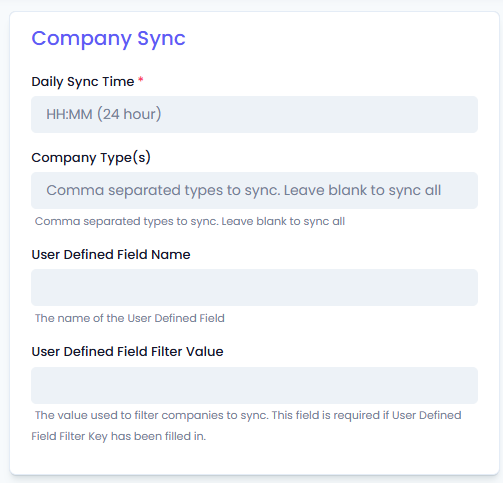
In the Company Sync tab, and fill in the following fields:
- Daily Sync Time: Enter the time that companies will be synced each day
- The time is entered in 24-hour format (e.g. 04:30 for 4:30 am)
- The time is entered using the UTC time zone (e.g. 00:45 for 10:45 +1000)
- Company Type(s) (optional): This field is used to filter the AutoTask Account Types that are synced into Pia
- Enter a comma "," seperated list of tags to filter by
- Leave blank to sync all companies
- User-Defined Field Name (optional): This field is the name of the User-Defined Field you have created in AutoTask
- You can further filter down the list of clients synchronized into Pia on top of the account type based on a user defined field set on the account (see steps at the bottom of this page on how to create the User-Defined Field)
- User-Defined Field Filter Value (optional): This is the value which you have entered into the User-Defined Field for clients that you would like to sync into Pia.
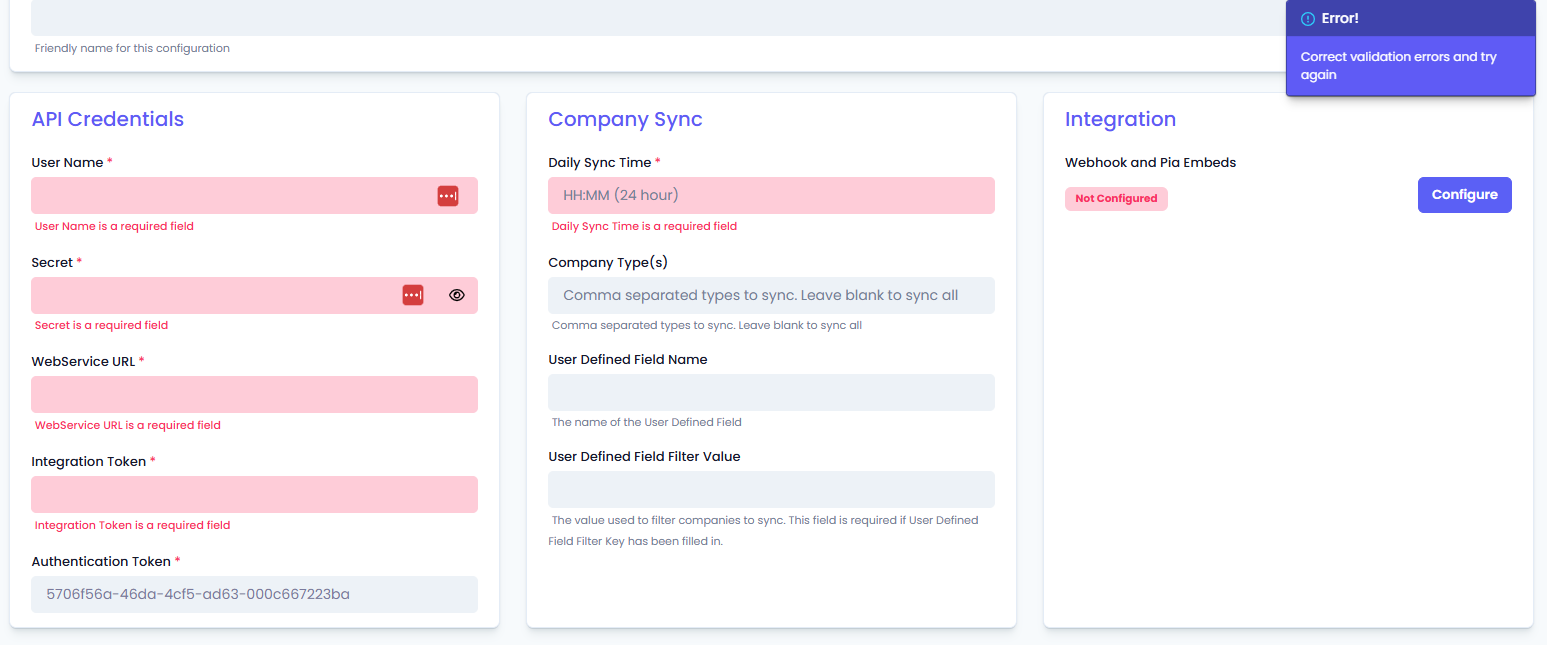
- Click Save to commit the settings from the 3 tabs. (If any mandatory fields have been left blank you will receive an error message, and the missed field will have a red box around them.)
Install Webhooks in Ticketing System
Once you have set up your integration and synced the companies, you will need to install Pia webhooks in your ticketing system so the ticketing system can send notifications to Pia.
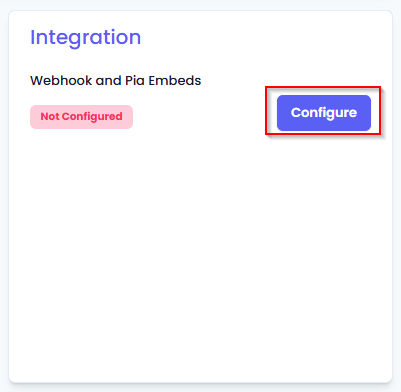
- In the Integration section, click on the Configure button.
Pia will automatically test the connection with the given credentials before configuration. If the connection fails, an error will be displayed.
You should receive a message stating the webhook install was successful. If you receive a failure message, double-check the configuration details and try again.
Once your connection is successful, you can move on to performing the initial sync with the ticketing system.
Perform Initial Sync with Ticketing System
After you have finished setting up the integration for your ticketing system you will need to perform an initial sync to make sure Pia knows about the companies defined in your ticketing system.
Return to the Autotask integration screen if you have exited from the screen
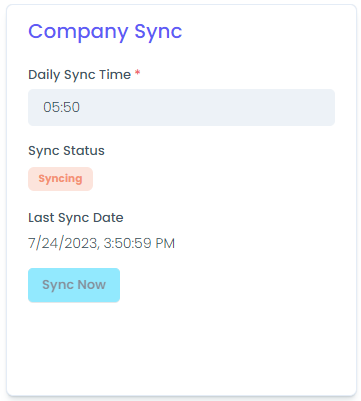
In the Company Sync section, you will be able to see a "Sync Now" button
Click on the button to start the sync.
When you click on the "Sync Now" button, it will be disabled and you will also see the Sync status change to "Syncing"
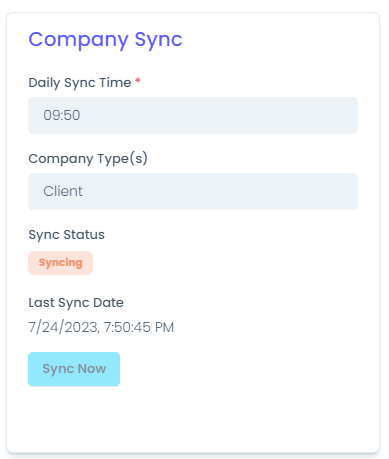
- Wait for the sync to complete and check the Clients list has been populated.
- You have finished setting up your AutoTask integration.
Create User-Defined Fields in AutoTask
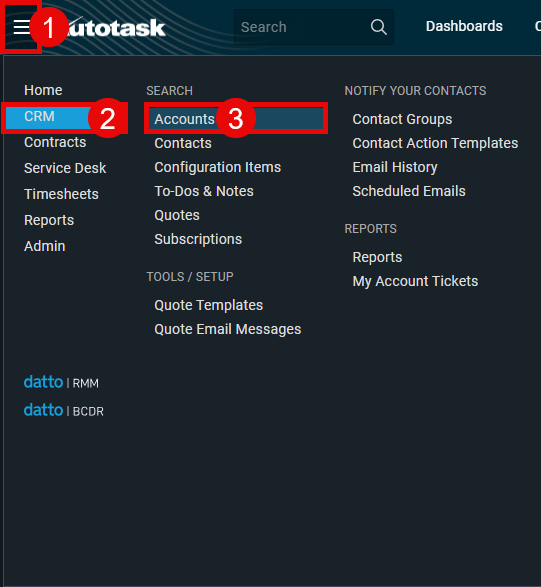
Hover your mouse over the hamburger icon (☰)
Hover your mouse over 'Admin'
Click 'Features & Settings'
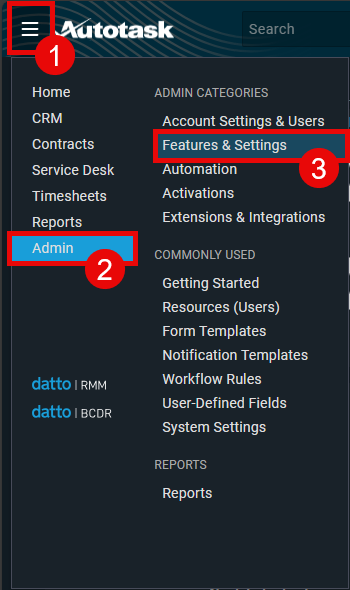
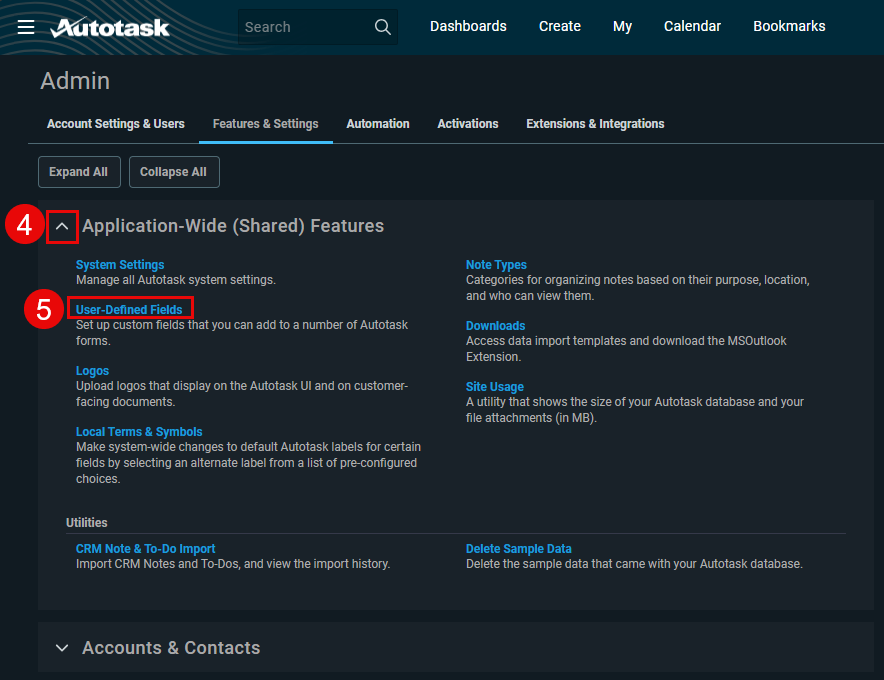
Expand 'Application-Wide (Shared Features)'
Select 'User-Defined Fields'
Select 'Accounts' tab.
Note: The name of the 'Accounts' tab can vary depending on your localisation setting in AutoTask, it may also be called one of the following:
- Account
- Client
- Company
- Business Unit
- Site
- Customer
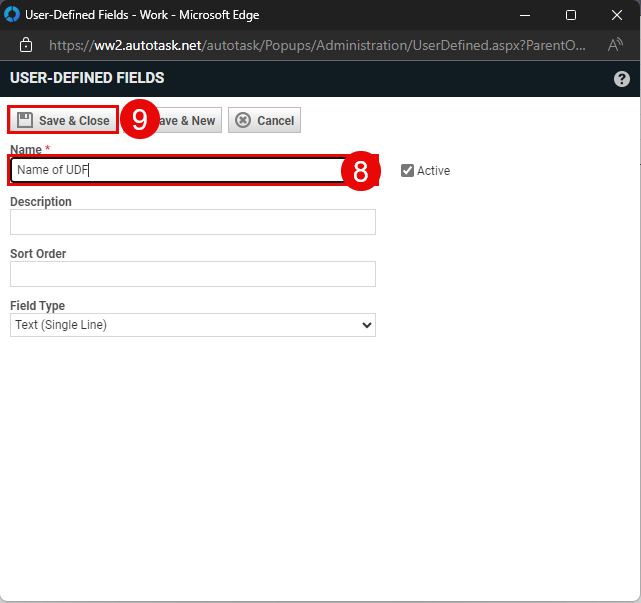
- OrganizationClick '+ New' button
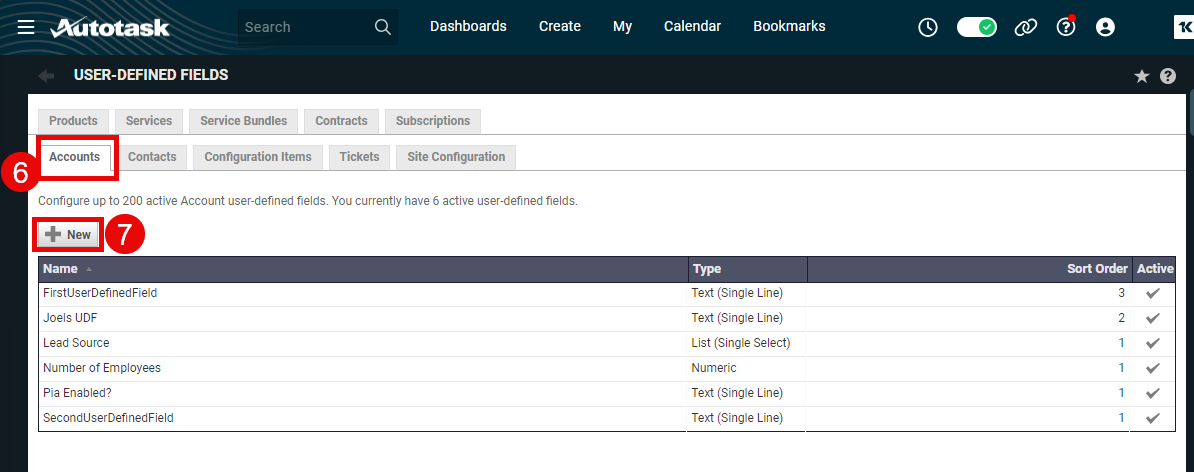
Create a name for the User-Defined Fields
Click 'Save & Close'
Hover mouse over the hamburger icon (☰)
Click 'Admin'
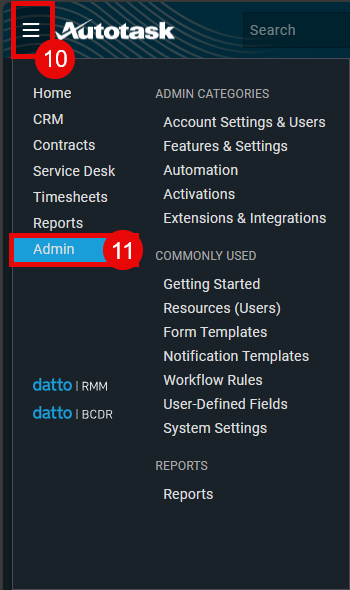
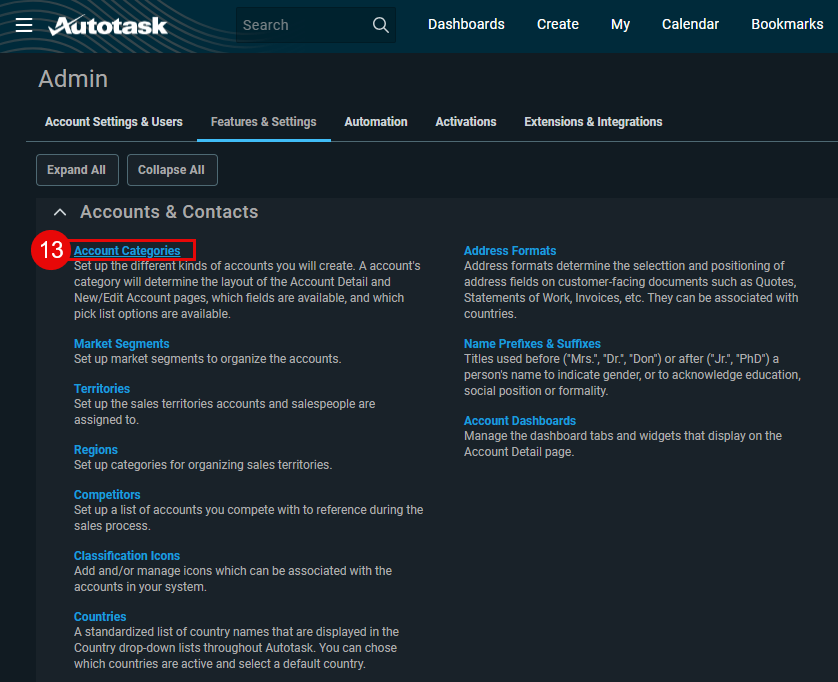
Expand 'Accounts & Contacts'
Note: as mentioned in Step 6, the name of this section may vary depending on your localization setting in AutoTask.

Select 'Account Categories'
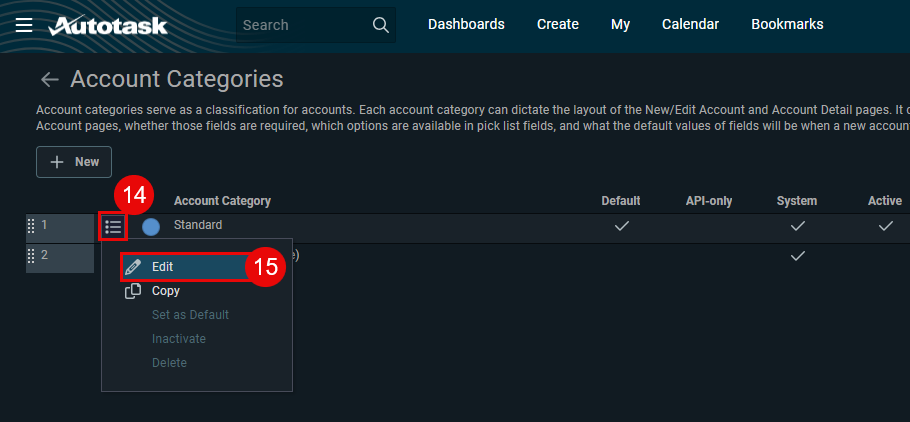
Hover mouse over the settings icon button of the preferred Account Category
Click 'Edit'
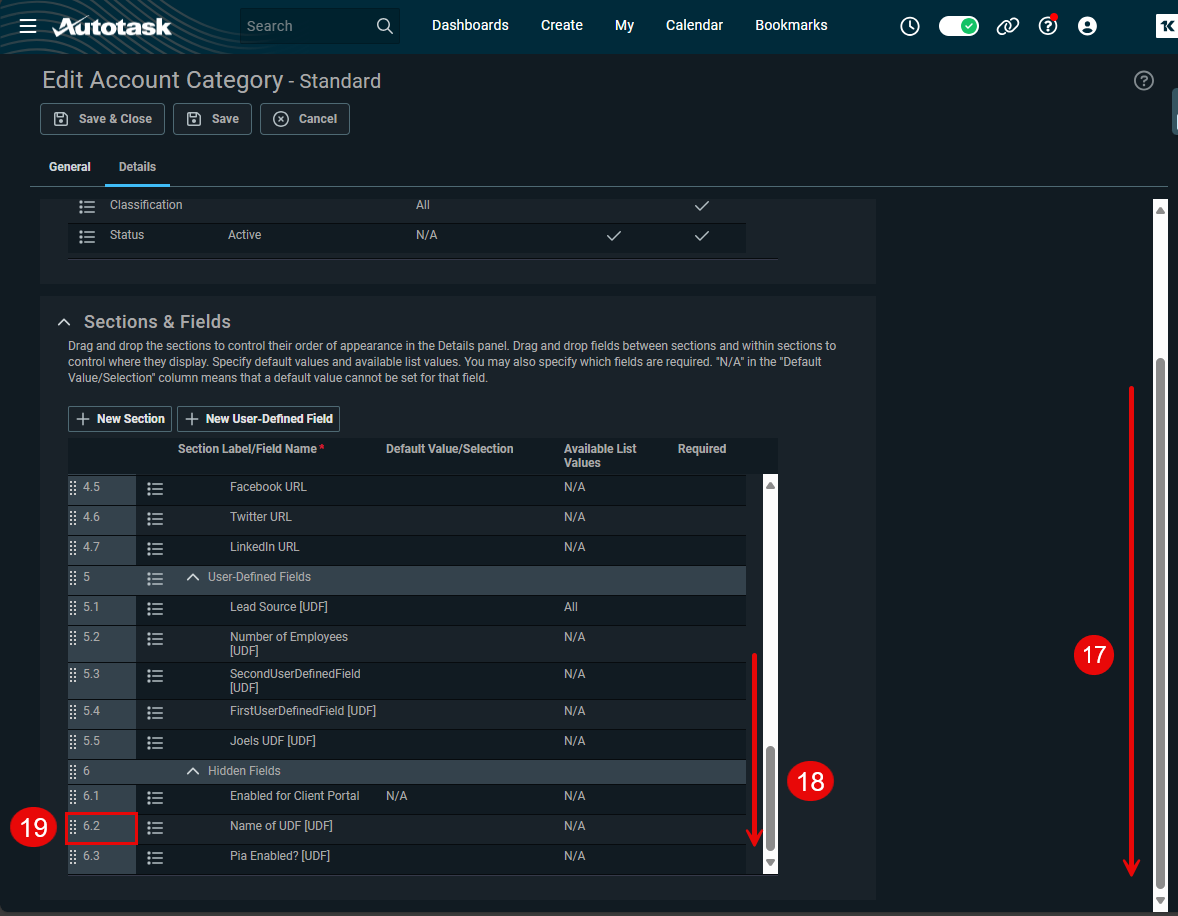
Click the 'Details' tab

Scroll to the bottom of the page
Scroll to the bottom of the embedded window
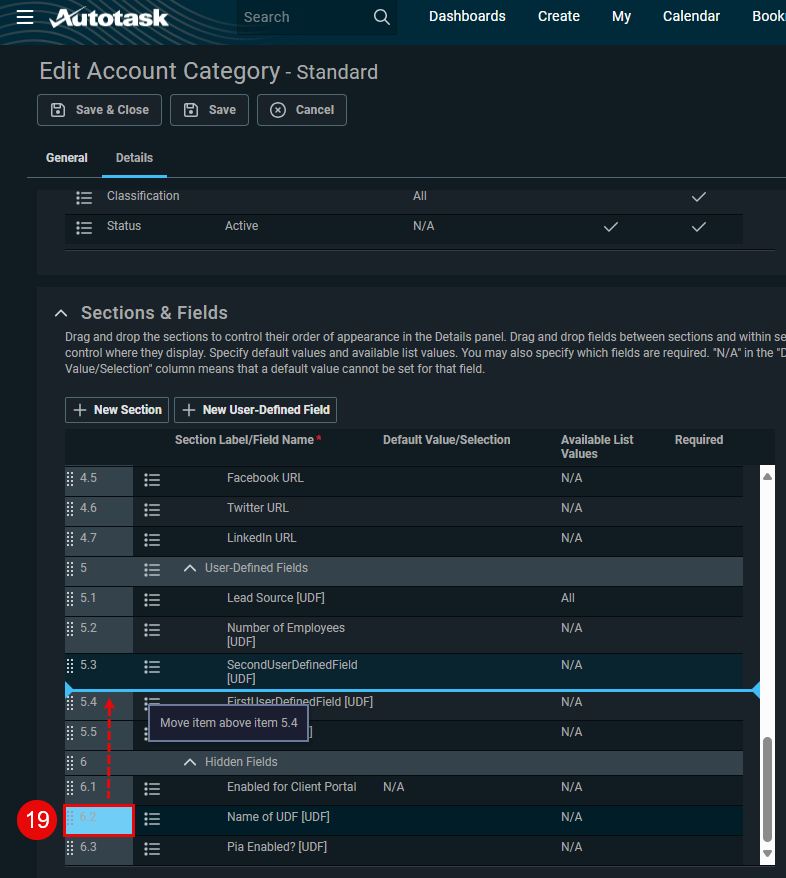
The UDF you've just created will show in the Hidden Fields section. Drag & Drop the UDF out of Hidden Fields to the User-Defined Fields section.
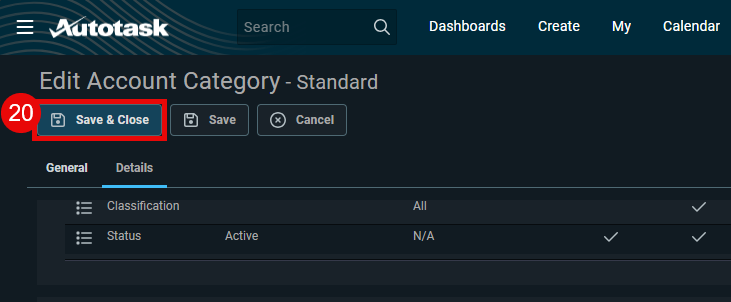
Click 'Save & Close'
Setting a User-Defined Field on a Client
- Hover your mouse over the hamburger icon (☰)
- Hover your mouse over 'CRM'
- Click 'Accounts'
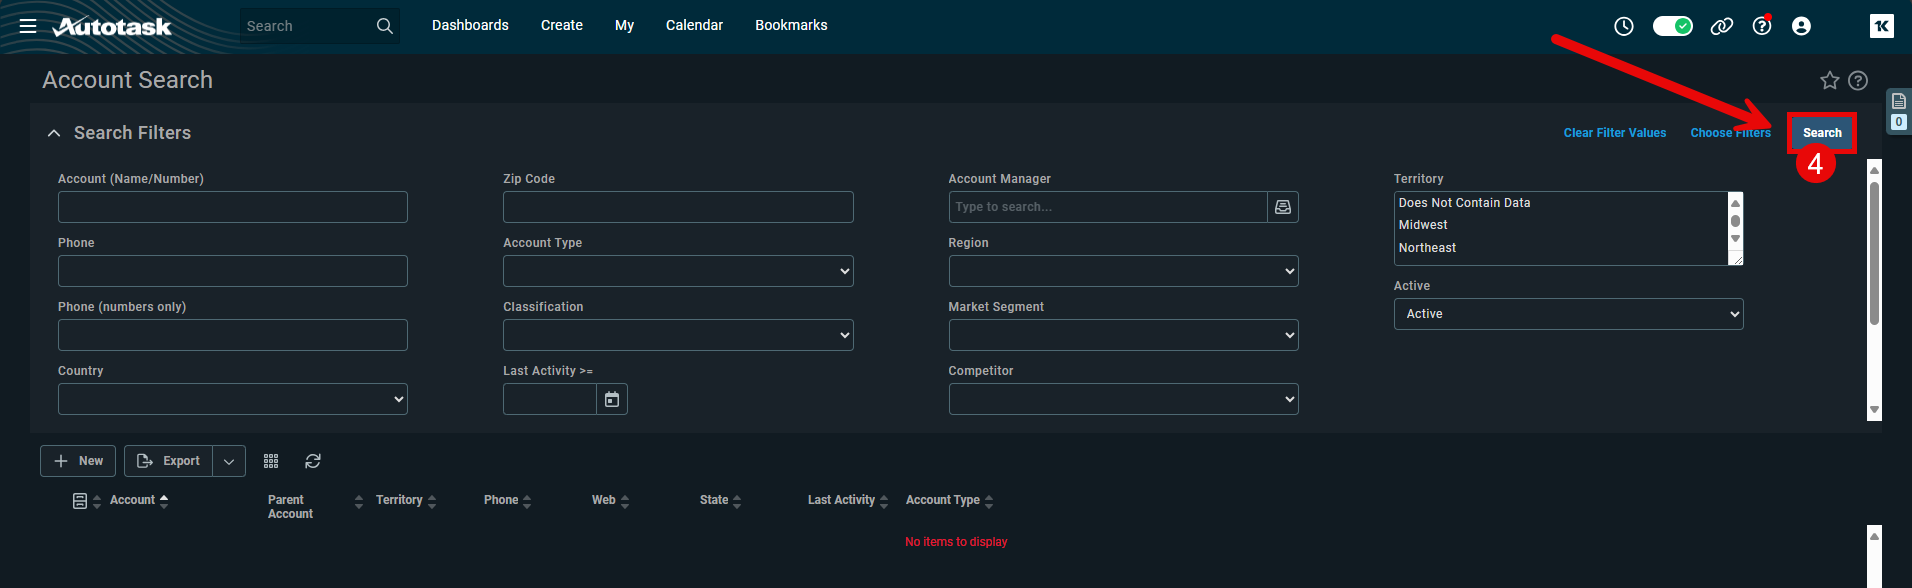
- Click the 'Search' button in the top right hand corner of the page.
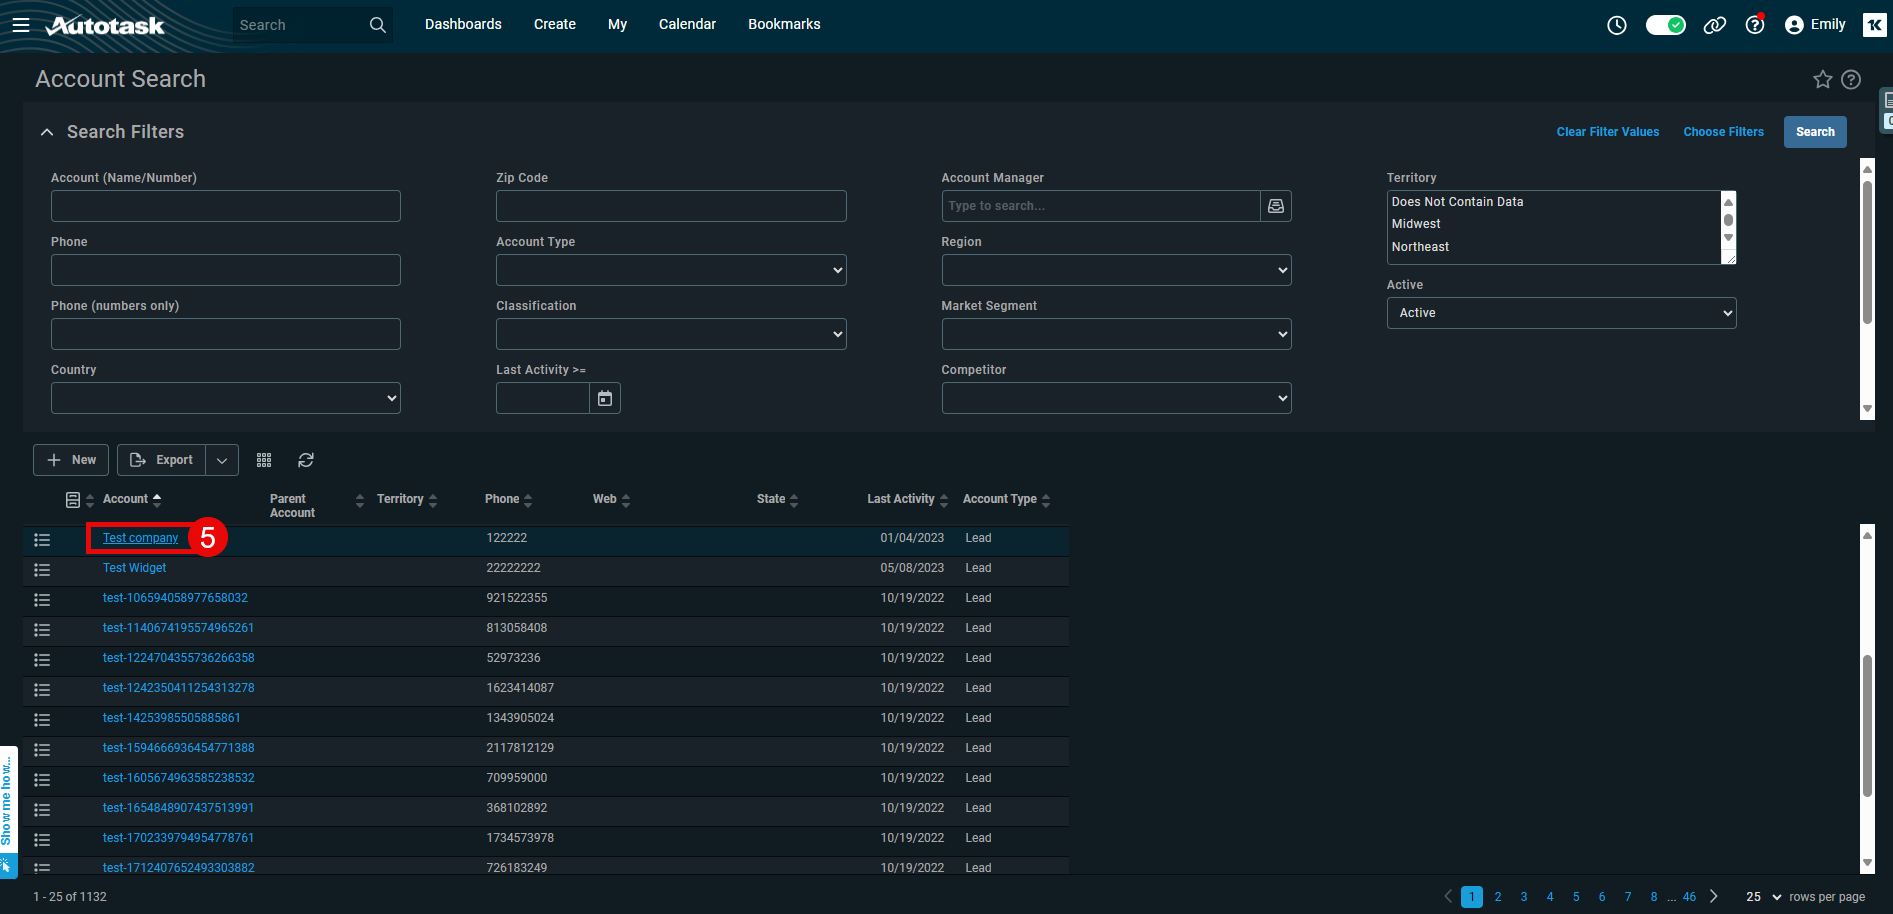
- From the Account Search List, select the client that you want to add the UDF to.
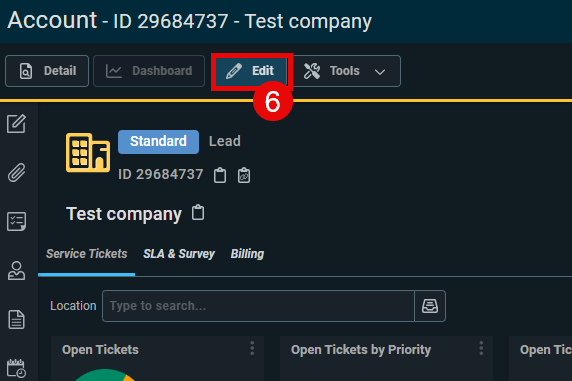
- Click the 'Edit' button
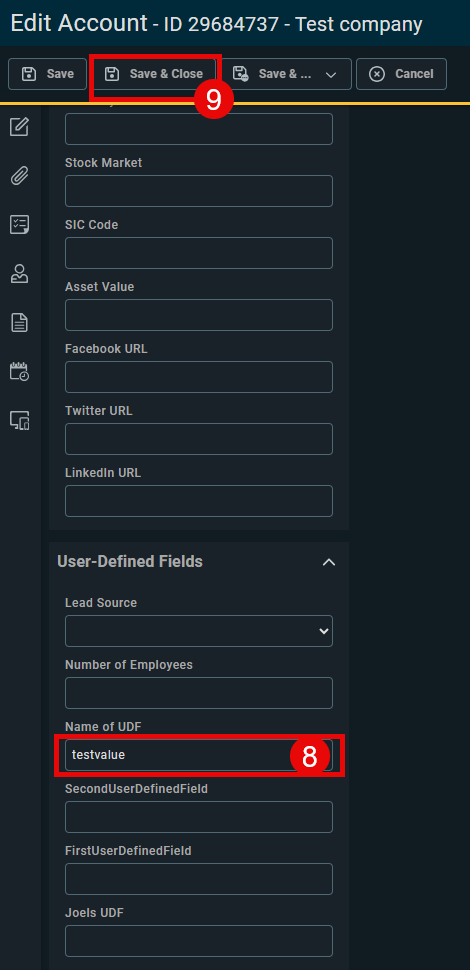
- In the Edit Account Window, scroll to the bottom of the page until you see the User-Defined Fields section.
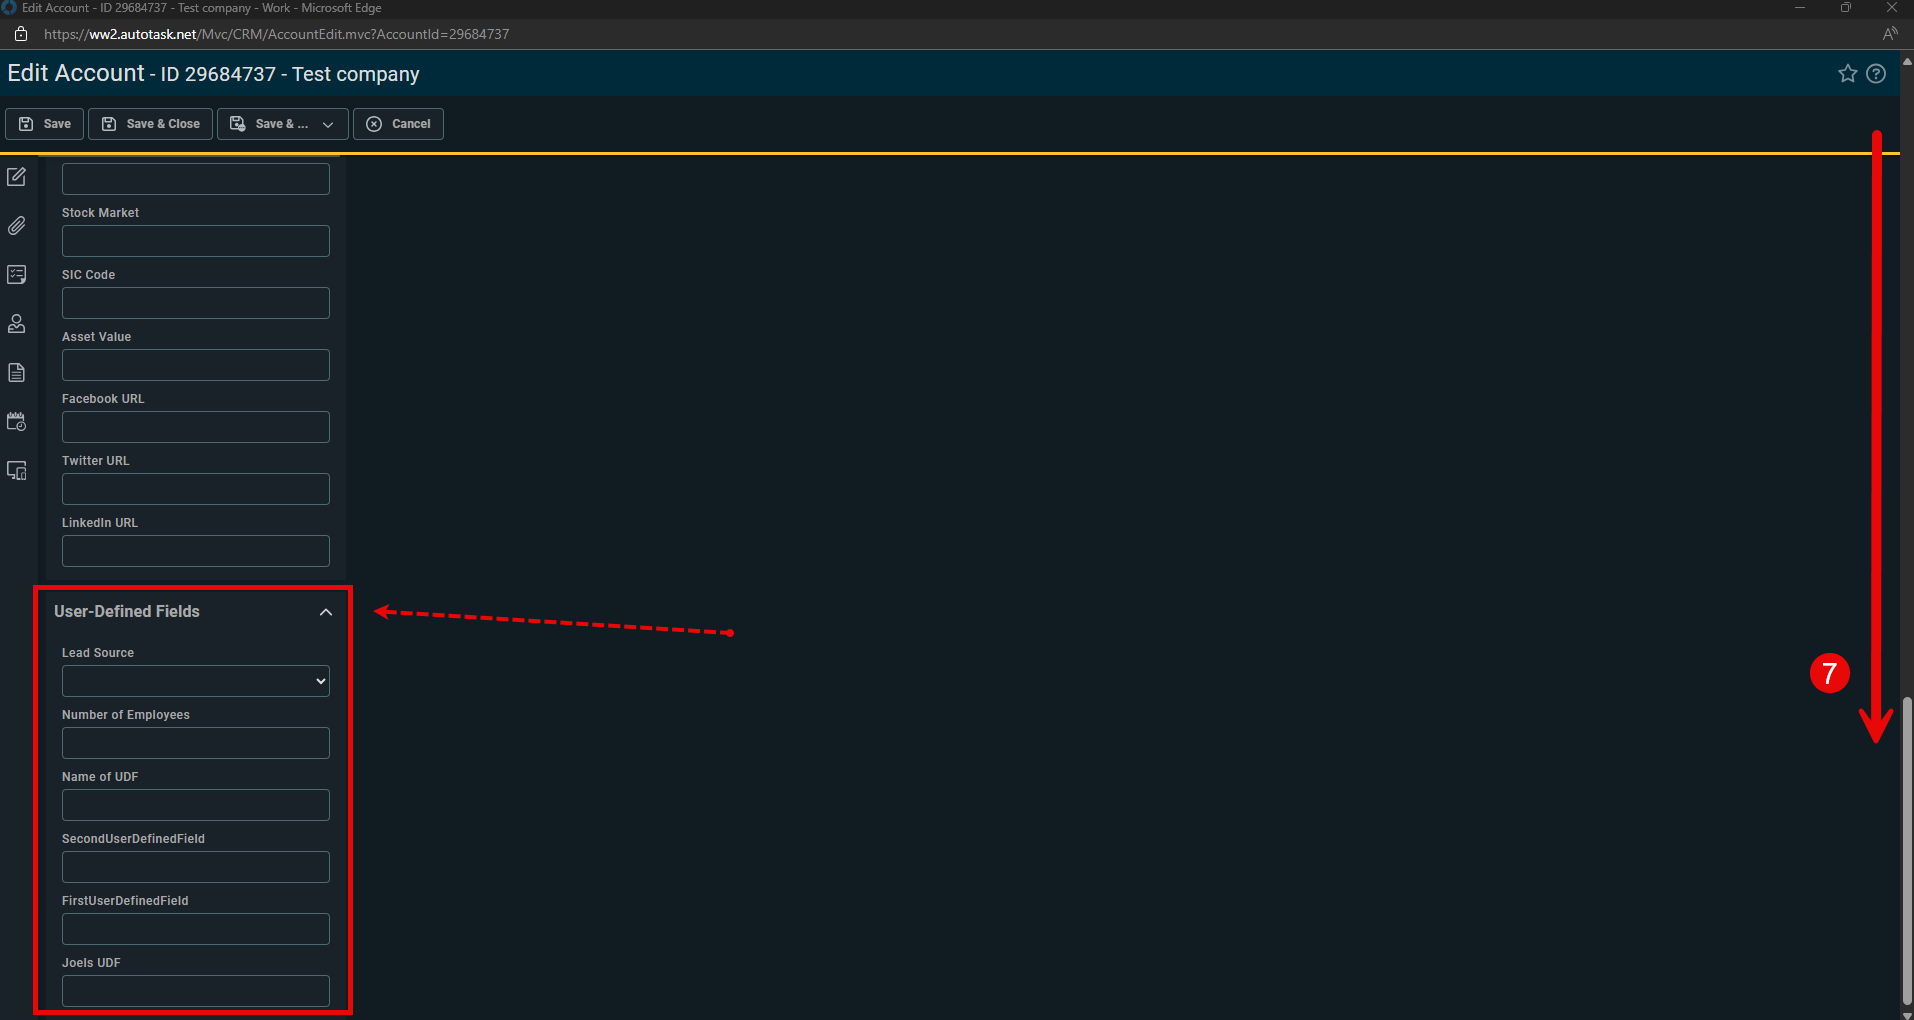
- Enter a Value into the UDF you created.
- Click 'Save & Close' will close the Edit Account window, and take you back to the Account Search Window, close this window as well.

Repeat Steps 4-9 for all clients that you want to sync into the pia portal.
Open the pia portal, enter the UDF values into the fields as shown in Step 7 of 'Set-up integration'.
Also See
Once you have configured the AutoTask integration you might want to look at:
- AutoTask Browser Extension Instructions for installing the browser extension in Google Chrome or Microsoft Edge.
Intro
ConnectWise Manage is a ticketing system. This page guides you through the process of setting up an integration via the ConnectWise API.
Note: Pia allows just one active ticketing system integration at a time.
Prerequisites
You will need the following details before setting up your ConnectWise Manage integrations.
- ConnectWise API Keys
Set Up Process
Here is a quick intro to setting up a new integration. Details for the fields specific to each service are on the pages linked below.
Summary of the set up process
- Set-up and Test integration
- Perform Initial Sync with Ticketing System
- Install Webhooks in Ticketing System
Set-up and Test integration
Log in to your Pia portal.
In the left menu click on integrations
The integrations page opens. Search for ConnectWise using the search bar at the top.
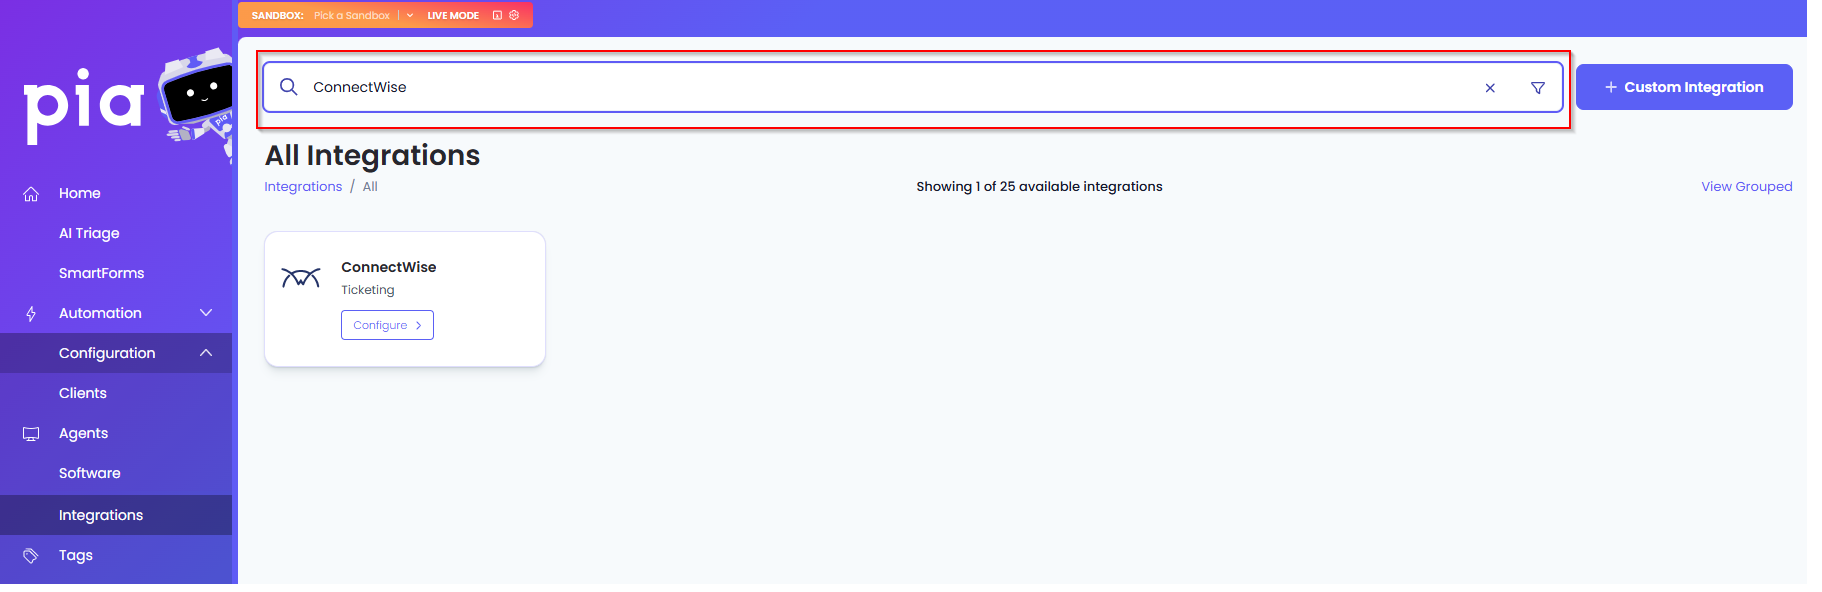
Or, click on the "View All" button available in the All Integration section.
This will open up a screen that displays all the available integrations where you can navigate to ConnectWise.
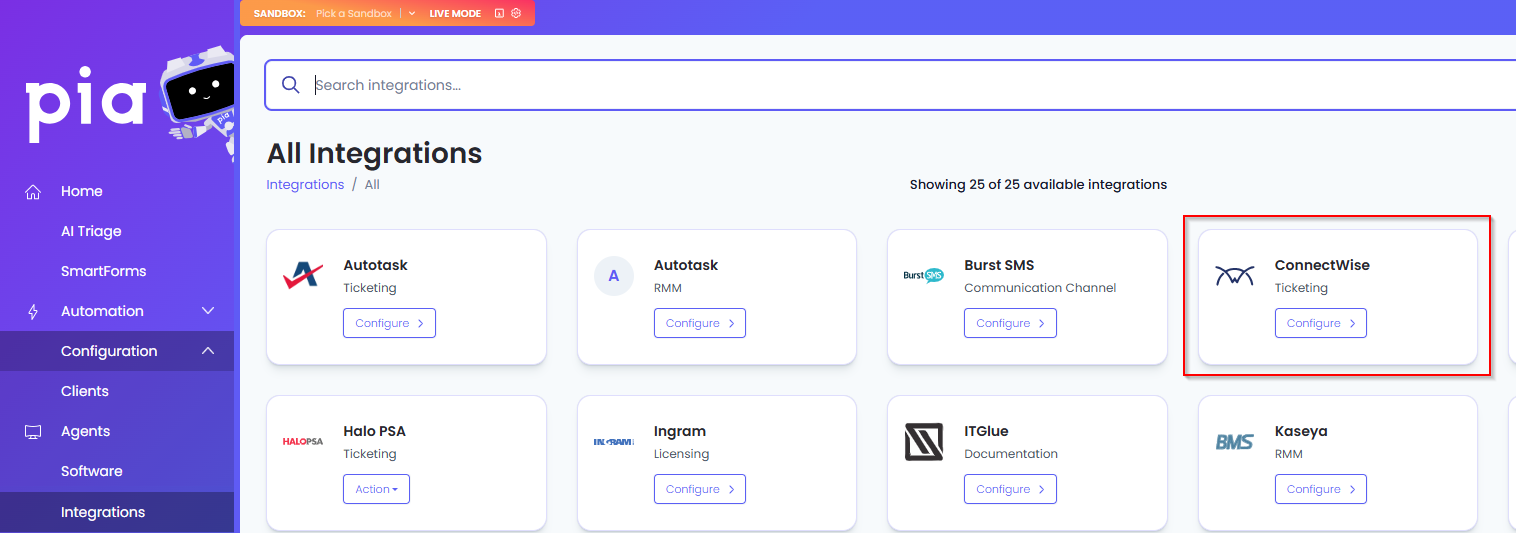
Click on the "Configure" button available in the widget for ConnectWise. This will take you to the configuration page for ConnectWise.

In this page, you can add a friendly name for the configuration in the "Configuration Name" field.

You will also see four sections with multiple fields that need to be configured for ConnectWise.
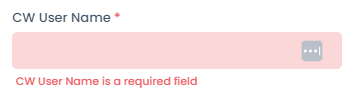
In the API Credentials section, fill in the following fields:
- CW User Name - Enter your ConnectWise Manage Company ID, followed by a "+" symbol, and then your API Public Key. (e.g.
ABCD+L4rLfBU7fDhy8bUT) - CW Password - Enter the API Secret Key
- CW Hostname - Enter the Hostname for your ConnectWise Manage instance, for example:
aus.myconnectwise.net - CW Authentication Token - The token will be automatically generated when the page loads.
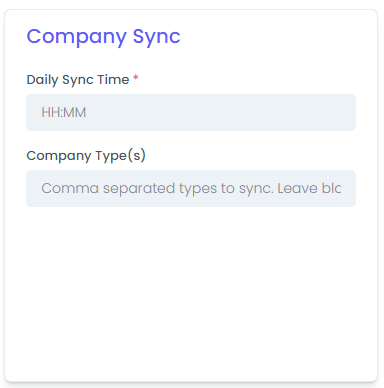
In the Company Sync tab, fill in the following fields:
- Daily Sync Time: Enter the time that companies will be synced each day
- The time is entered in 24-hour format (e.g. 04:30 for 4:30 am)
- The time is entered using the UTC time zone (e.g. 00:45 for 10:45 +1000)
- Company Type(s) (optional): This field is used to filter the companies that are synced from ConnectWise into Pia
- This is the Types set on the Client in CW Manage.
- Enter a comma "," seperated list of tags to filter by
- Leave blank to sync all companies
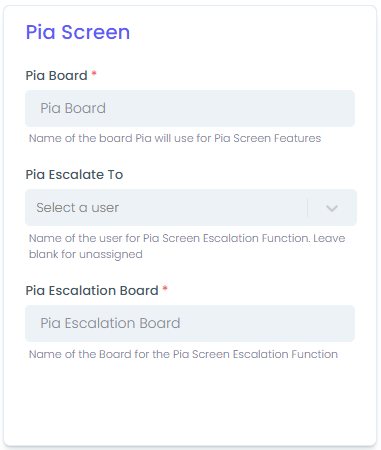
In the the Pia Screen tab, fill in the following fields:
Pia Board: Enter the name of the board that Pia reads tickets from.
- For most partners that will be 'Pia'.
Pia Escalate To: This is where you select the default escalation contact for tickets
- Until you have performed a sync, there will be no selectable contact in this field
- Leave this field blank to have no default escalation
Pia Escalate Board: Enter the name of the board that escalated ticket will be moved to
- For most partners that will be 'Pia'.
- CW User Name - Enter your ConnectWise Manage Company ID, followed by a "+" symbol, and then your API Public Key. (e.g.
Click Save to save your changes (If any mandatory fields have been left blank you will receive an error message, and the missed field will have a red box around them.)
Install Webhooks in Ticketing System
Once you have set up your integration and synced the companies, you will need to install Pia webhooks in your ticketing system so the ticketing system can send notifications to Pia.
- In the Integration section, click on the Configure button.
Pia will automatically test the connection with the given credentials before configuration. If the connection fails, an error will be displayed.
You should receive a message stating the webhook install was successful. If you receive a failure message, double-check the configuration details and try again.
Once your connection is successful, you can move on to performing the initial sync with the ticketing system.
Perform Initial Sync with Ticketing System
After you have finished setting up the integration for your ticketing system you will need to perform an initial sync to make sure Pia knows about the companies defined in your ticketing system.
Return to the ConnectWise integration screen if you have exited from the screen
In the Company Sync section, you will be able to see a "Sync Now" button
Click on the button to start the sync.
![]()
When you click on the "Sync Now" button, it will be disabled and you will also see the Sync status change to "Syncing"
- Wait for the sync to complete and check the Clients list has been populated.
- You have finished setting up your ConnectWise Manage integration.
Intro
Halo PSA is a ticketing system. This page guides you through the process of setting up an integration via the Halo PSA API.
Note: Pia allows just one active ticketing system integration at a time.
Prerequisites
You will need the following details before setting up your Halo PSA integrations.
- Halo PSA API Credentials
Set Up Process
Here is a quick intro to setting up a new integration. Details for the fields specific to each service are on the pages linked below.
Summary of the set up process
- Set-up and Test integration
- Perform Initial Sync with Ticketing System
- Install Webhooks in Ticketing System
Set-up and Test integration
Log in to your Pia portal.
In the left menu click on integrations
The integrations page opens.
Search for Halo PSA using the search bar at the top.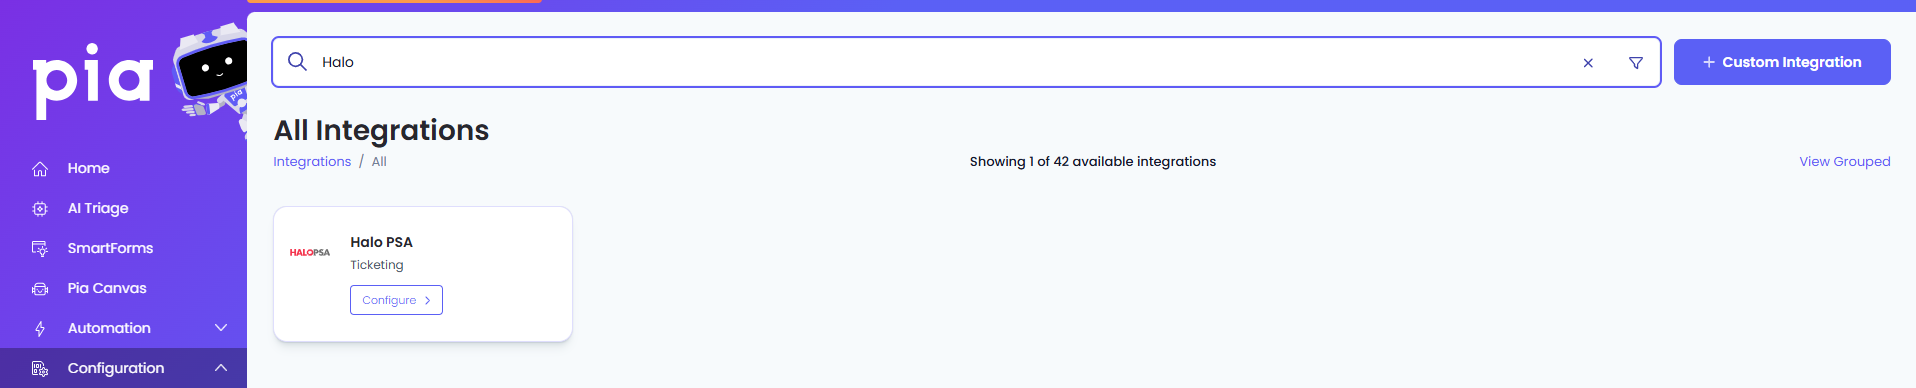
Or, click on the "View All" button available in the All Integration section.
This will open up a screen that displays all the available integrations where you can navigate to Halo PSA.
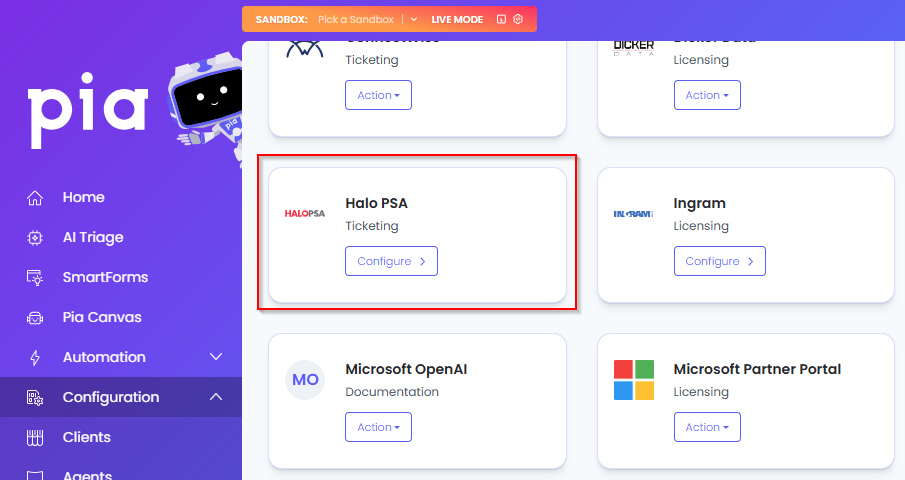
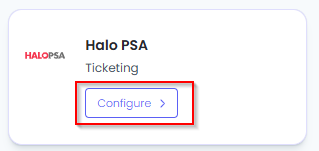
- Click on the "Configure" button available in the widget for Halo PSA. This will take you to the configuration page for Halo PSA.
In this page, you can add a friendly name for the configuration in the "Configuration Name" field.
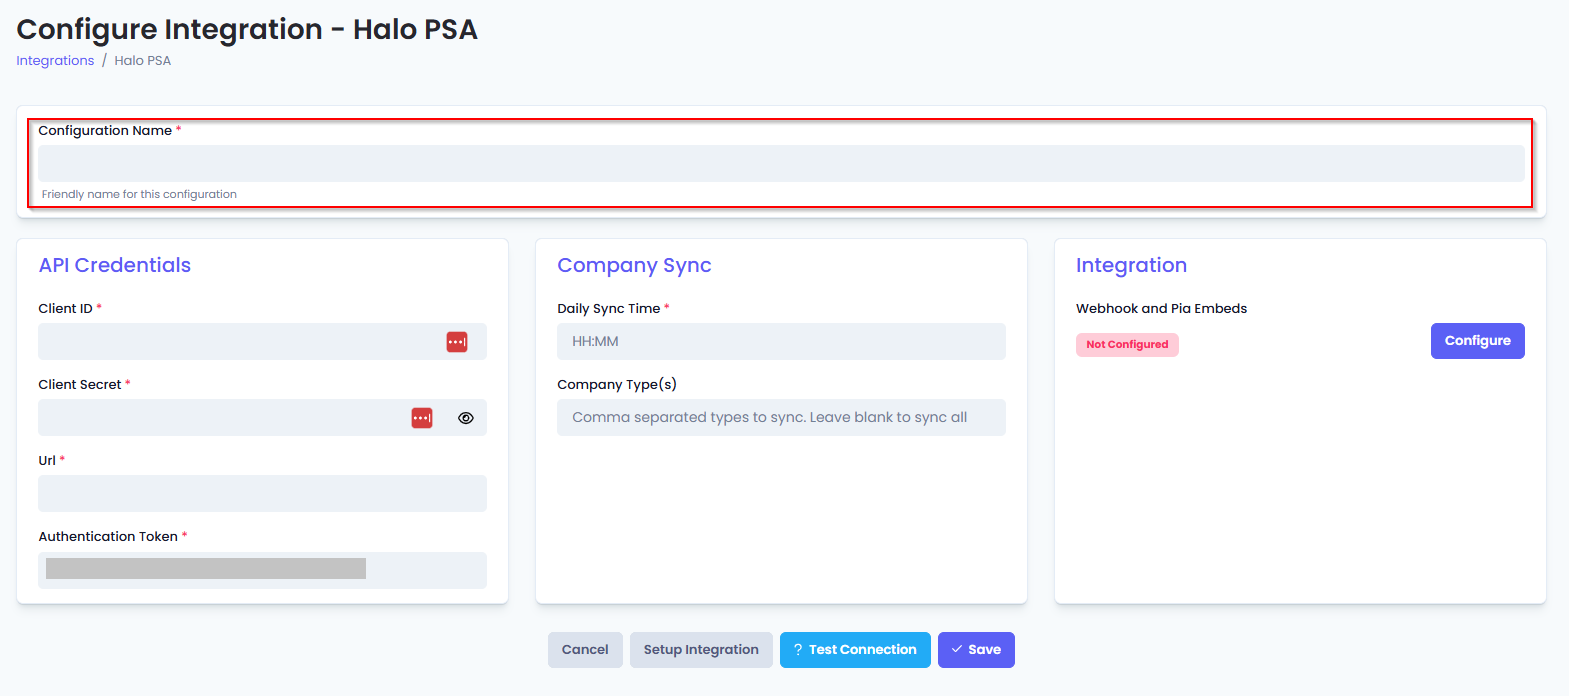
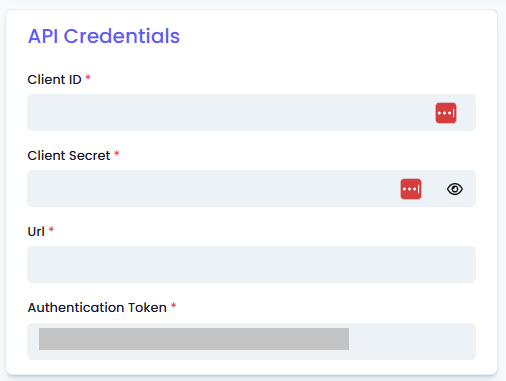
- You will also see four sections with multiple fields that need to be configured for Halo. In the API Credentials section, fill out the following fields:
- Client ID: Enter the Client Id for your Halo API credentials.
- Client Secret: Enter the secret for your Halo API credentials.
- Url: Enter the URL for your Halo PSA instance (e.g. https://yourcompany.halopsa.com)
- Authentication Token: The Auth token will be automatically generated. You can skip this field.
In the Company Sync section, fill in the following fields:
- Daily Sync Time: Enter the time that companies will be synced each day
- The time is entered in 24-hour format (e.g. 04:30 for 4:30 am)
- The time is entered using the UTC time zone (e.g. 00:45 for 10:45 +1000)

- Once done, click on the Save button to save your changes.
Perform Initial Sync with Ticketing System
After you have finished setting up the integration for your ticketing system, you will need to perform an initial sync to make sure Pia knows about the companies defined in your ticketing system.
Return to the Halo PSA integration screen if you have exited from the screen
In the Company Sync section, you will be able to see a "Sync Now" button
Click on the button to start the sync.
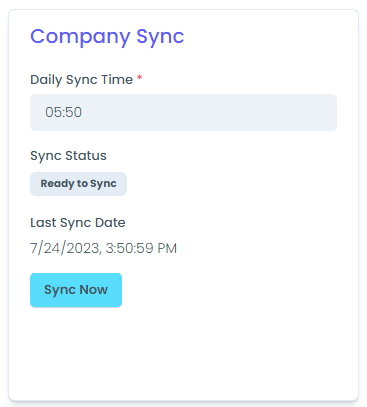
When you click on the "Sync Now" button, it will be disabled and you will also see the Sync status change to "Syncing"
- Wait for the sync to complete and check the Clients list has been populated.
- Once the Sync is complete, you can now move on to Install Webhooks in your Ticketing System.
Install Webhooks in Ticketing System
Once you have saved your configuration, you will now be able to view that the Callback URLs have been generated with a valid token when you click on the Setup Integration button.
Now, you will need to install Pia webhooks in your ticketing system so the ticketing system can send notifications to Pia.
On the Integration Tab, click on the Configure button to setup configuration.
Pia will test the connection with the given credentials before configuration. If the connection fails, an error will be displayed.
You should receive a message stating the webhook install was successful. If you receive a failure message, double-check the configuration details and try again.You have finished setting up your Halo PSA integration.
Setting up Pia Chatbot in Ticketing System
Clicking the "Configure" button in the Integration Tab will automatically activate Pia Chatbot within Halo. A new custom tab for Pia Chatbot will appear in your ticket window.
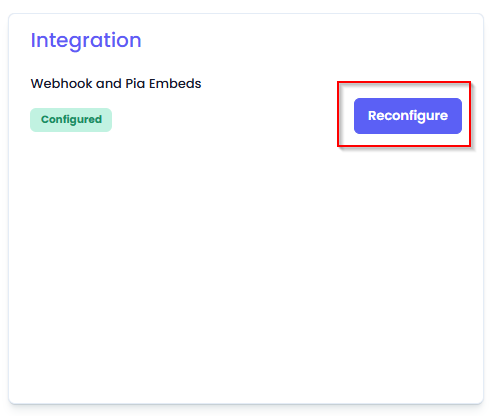
Additionally, the custom pod for Pia Chatbot will be linked to your existing ticket types. However, if you add a new ticket type after the initial setup, you'll need to click on the "Re-configure" button again to associate the custom pod with the new ticket type.
If you already have Halo integration configured in your Pia tenant, go to the Integration tab and click "Reconfigure". This will enable Pia Chatbot in Halo for you.

Halo PSA Embed Troubleshooting
The Halo PSA Chatbot embed is automatically installed as a tab in Halo PSA during the configuration process. This does not require you to make any changes to the ticketing system. However, if you get stuck or simply want to remove the Chatbot, you can check the following scenarios:
Scenario 1: Chatbot not working
There has been few cases where 'admin' permission was required for some Partners to embed the chatbot after performing the initial sync and webhook/embed configuration. Once the chatbot was embedded, the integration worked without any issues when the permission was removed and the integration was reconfigured.
To learn about API permissions for Halo, click here.
Scenario 2: Removing the Chatbot
To remove the custom tab, follow the steps below:
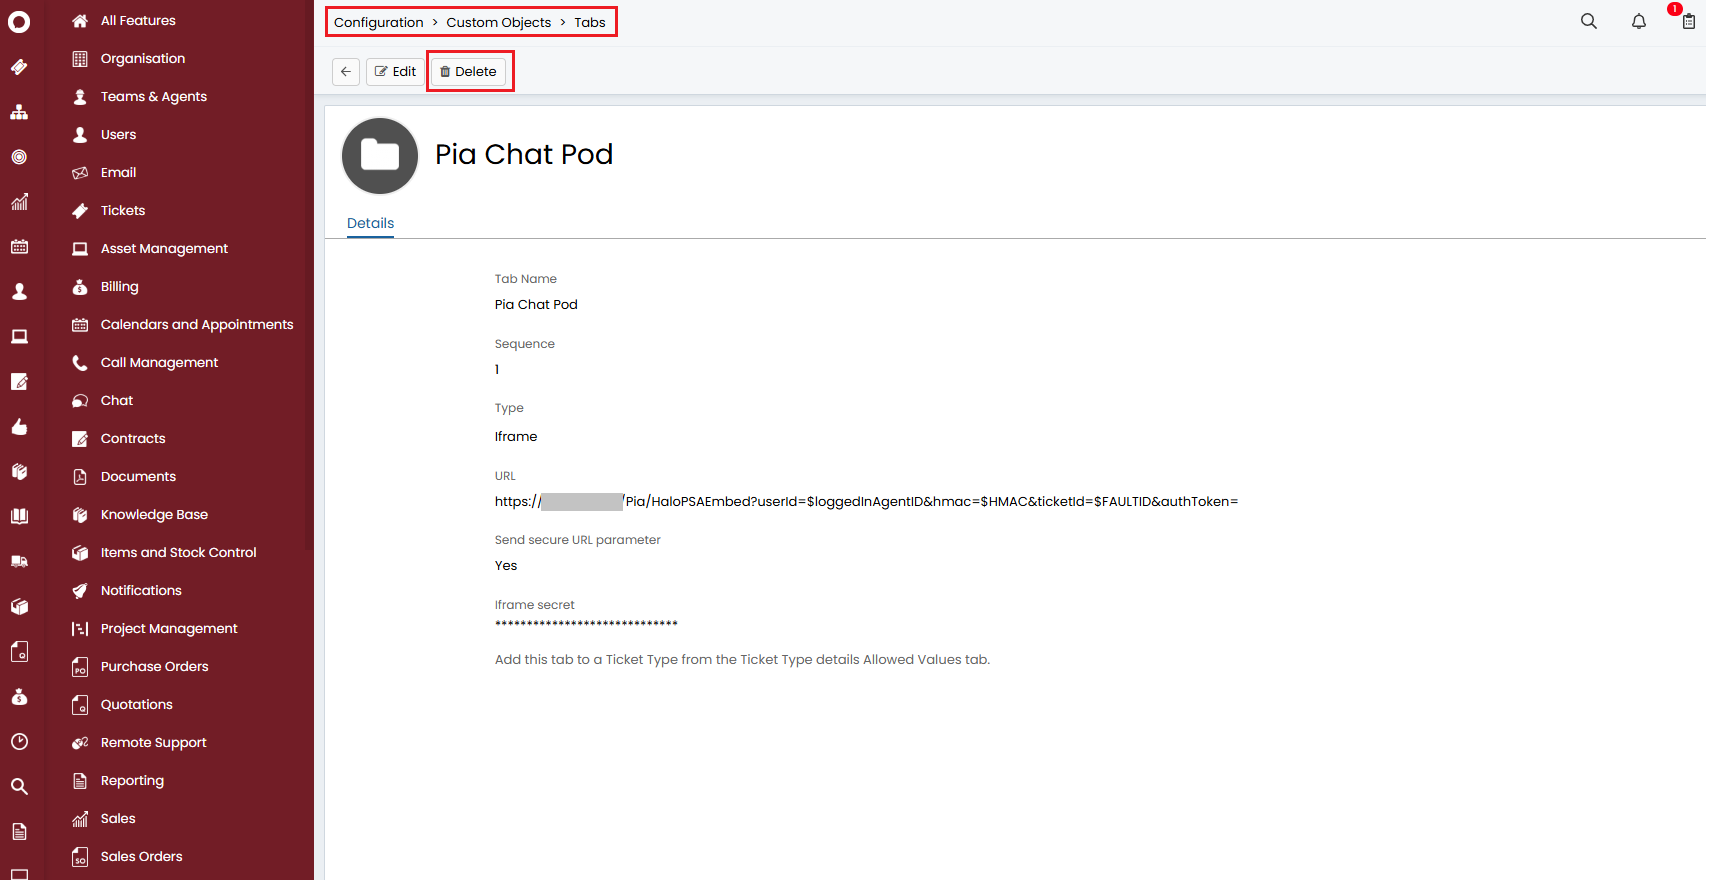
Step 1: Click on the Configuration icon at the bottom of the side menu. This will open up the Configuration screen.
Step 2: Navigate to the custom objects option in the Configuration screen. This will open up Custom Objects screen.
Step 3: Click on the Custom Tabs.
Step 4: Click on Pia Chat Pod from the list.
Step 5: Click on the 'Delete' button at the top and confirm your actions.